Crochet offers endless creative possibilities, including the ability to mimic the look of knitting with just a hook and yarn. One popular project that makes great use of this is the easy crochet headband using the false knitting stitch. This headband is cozy, stylish, and perfect for beginners or seasoned crocheters looking for a quick and rewarding project.
In this article, you’ll learn what the false knitting stitch is, how to make a beautiful and stretchy crochet headband using it, and some variations and finishing tips to personalize your piece.
🌟 Why You’ll Love This Project
- Beginner-friendly: Simple stitches with a big payoff.
- Knit-look texture: Get the beauty of knit without needing needles.
- Quick to make: Takes about 1–2 hours to complete.
- Great gift idea: Perfect for holidays, birthdays, or craft fairs.
🧶 What Is the False Knitting Stitch?
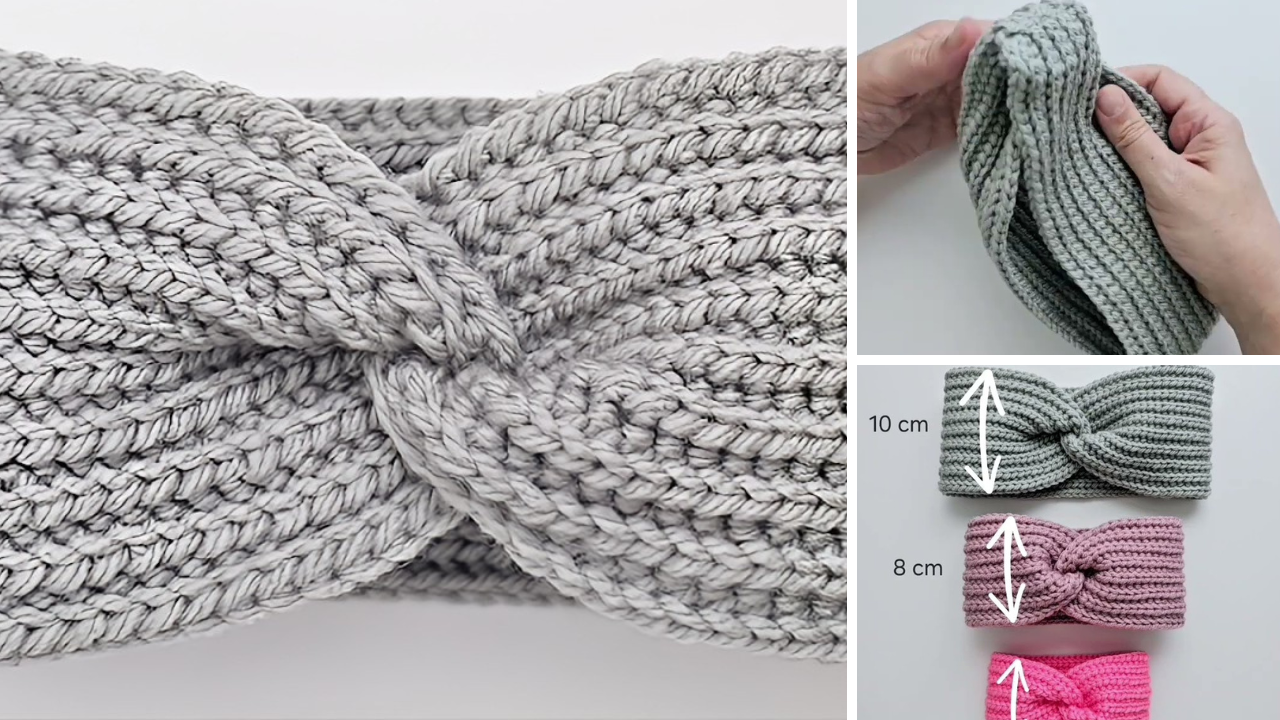
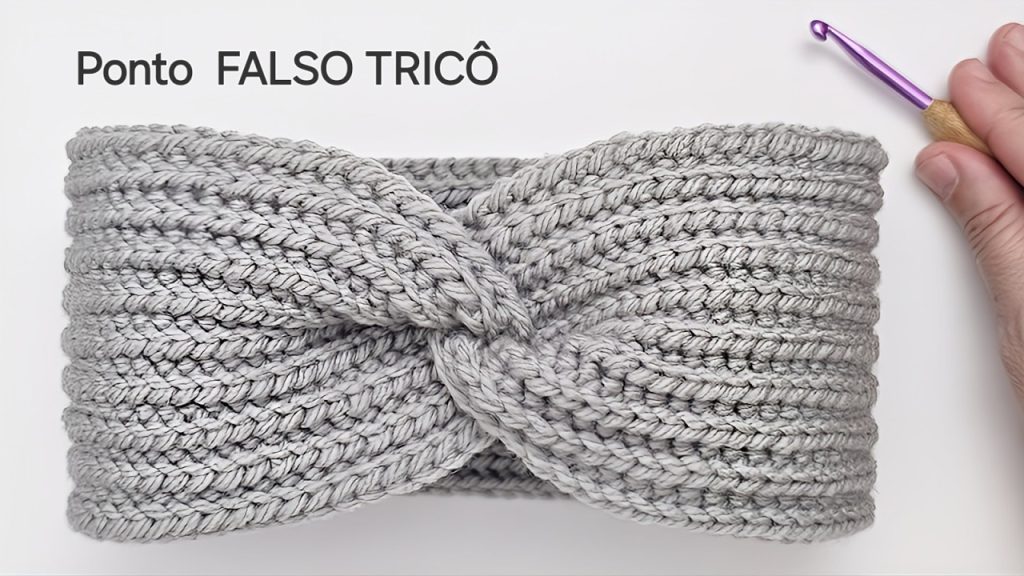
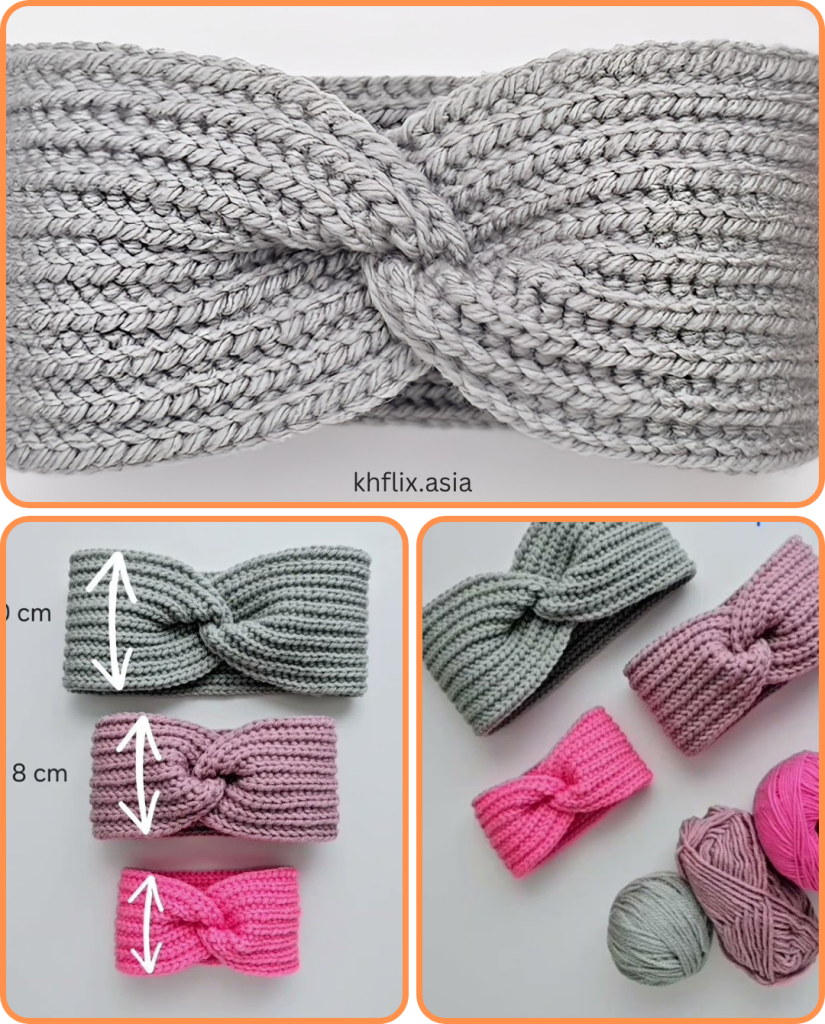
Also known as the camel stitch, the false knitting stitch is created by working half double crochet (hdc) stitches into the third loop of the previous round (or row). This forces the front two loops forward, giving a look that closely resembles knitting ribbing.
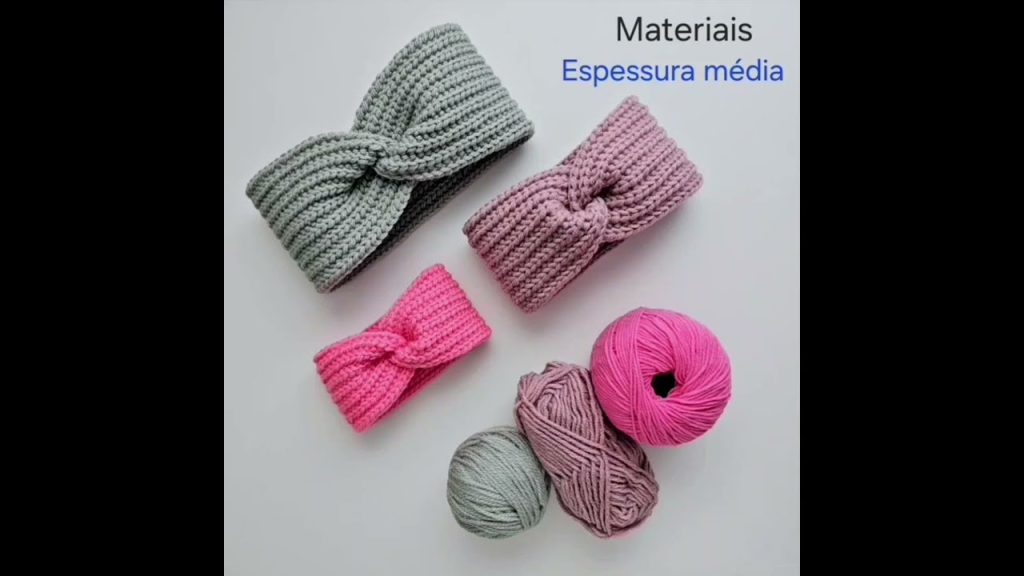
🧵 Materials You’ll Need
- Worsted weight yarn (Category 4) – Cotton or acrylic blend for warmth and stretch
- Crochet hook – Size 5.0 mm (H-8) or as recommended for your yarn
- Yarn needle – For sewing ends and seaming
- Scissors
- Tape measure

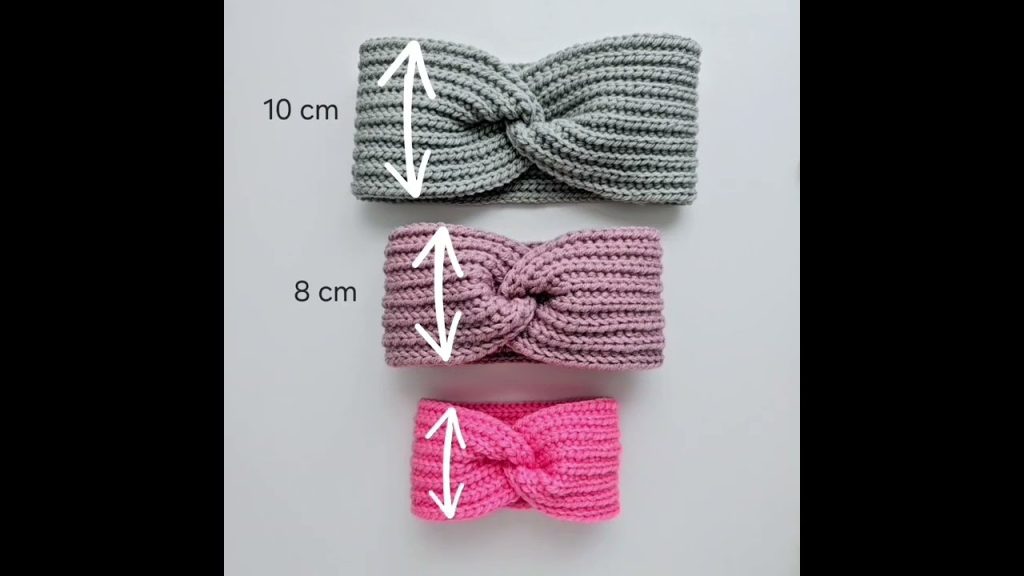
📏 Finished Size (Adjustable)
- Width: ~3–4 inches
- Circumference: ~20 inches (fits most adult heads with stretch)
✅ Note: Measure your own head or the recipient’s for a custom fit.
🧶 Abbreviations (US Terms)
- ch – Chain
- hdc – Half Double Crochet
- sl st – Slip Stitch
- st(s) – Stitch(es)
- blo – Back Loop Only
🪡 Easy Crochet Headband Pattern – False Knitting Stitch
✳️ Step 1: Foundation Chain
Ch 15 (or desired width of headband)
✳️ Step 2: Row 1
Hdc in 2nd ch from hook and in each ch across. (14 hdc)
Ch 1, turn.
✳️ Step 3: Row 2 and Onward – False Knit Rows
Hdc in the third loop only (the loop behind the back loop) of each stitch across.
Ch 1, turn.
👉 Note: The third loop is easiest to see when you’re crocheting in rows—look behind the “V” of the stitch.
Repeat Row 2 until the strip measures approximately 19–20 inches, depending on your head size and desired snugness (remember, it stretches!).
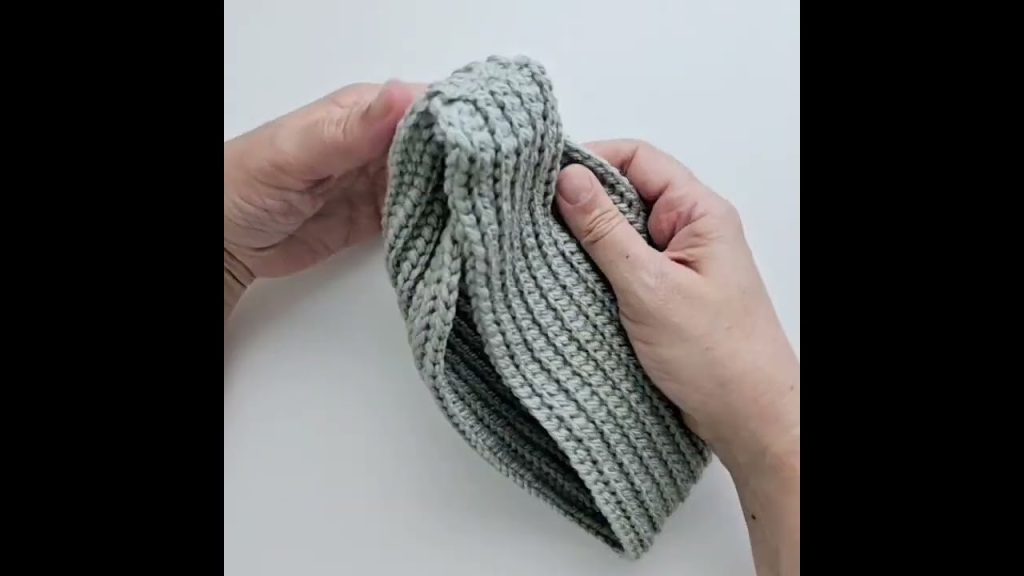
🧵 Step 4: Seaming
- Fold the two short ends of the band together.
- Use a whip stitch or slip stitch to join the ends together.
- For a twisted look, try the popular turban-style twist join:
- Fold each end in half lengthwise.
- Interlock the two folded ends like a sandwich.
- Sew through all four layers and flip inside out.
✨ Optional Finishing Touches
- Add a button or decorative patch at the seam
- Embroider initials or flowers
- Use two-tone yarns for a striped or gradient look
- Make a matching cowl or wrist warmers with the same stitch
🔁 Variations
- Chunkier headband: Use bulky yarn (Category 5) and a larger hook.
- Ear warmer style: Increase width to 5–6 inches for extra coverage.
- Kid’s version: Adjust length to 17–18 inches and reduce width.
🧼 Care Instructions
If made with acrylic or cotton yarn:
- Machine wash on gentle
- Lay flat to dry
- Avoid excessive stretching or wringing
🧡 Final Thoughts
This easy crochet headband using the false knitting stitch is a fantastic go-to project for chilly seasons, handmade gifts, or stylish accessories. The knit-like texture makes it look high-end, while the simple stitches make it accessible even for new crocheters.
Whether you’re cozying up with your yarn stash or prepping for your next craft market, this headband is the perfect blend of simplicity and style.
Video tutorial:


