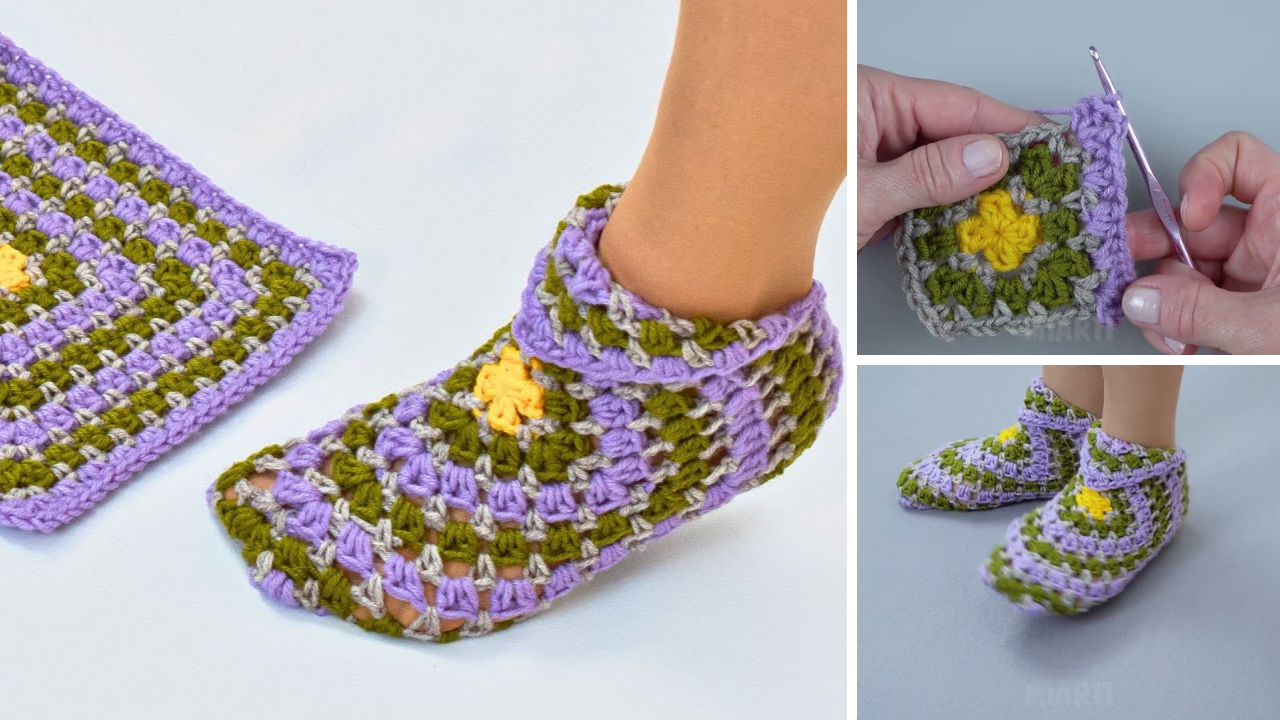
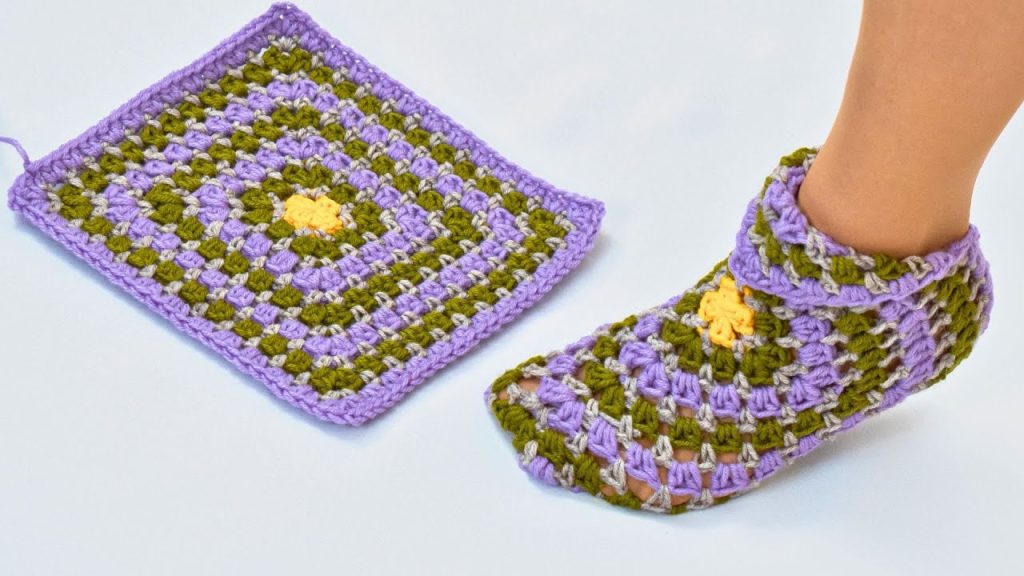
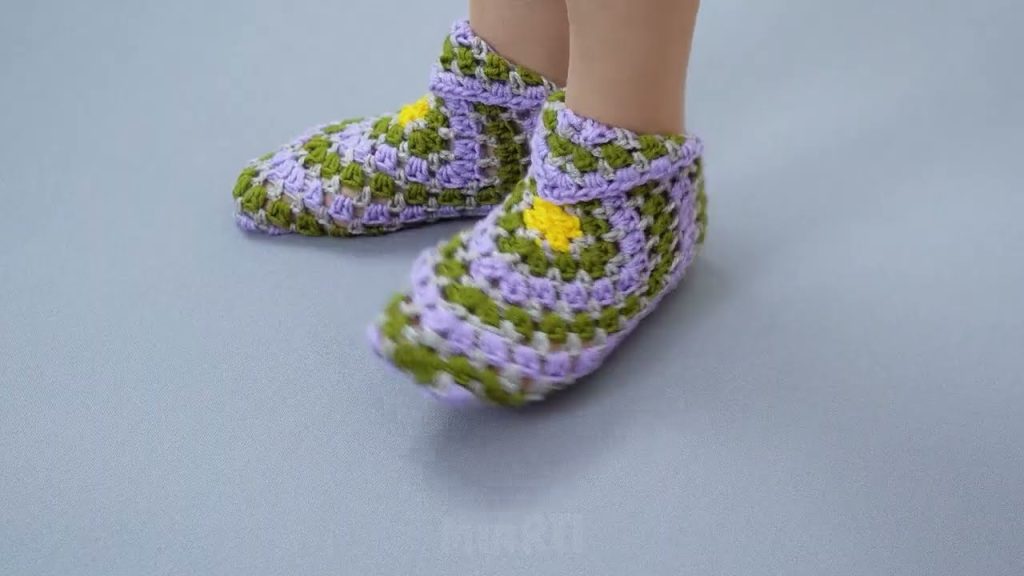
Crocheting granny square slippers is a wonderful way to combine comfort, creativity, and classic crochet skills. These slippers are stylish, warm, and surprisingly easy to make. Whether you’re looking to craft a handmade gift or treat yourself to something cozy, granny square slippers are a perfect weekend project.
What You’ll Need:
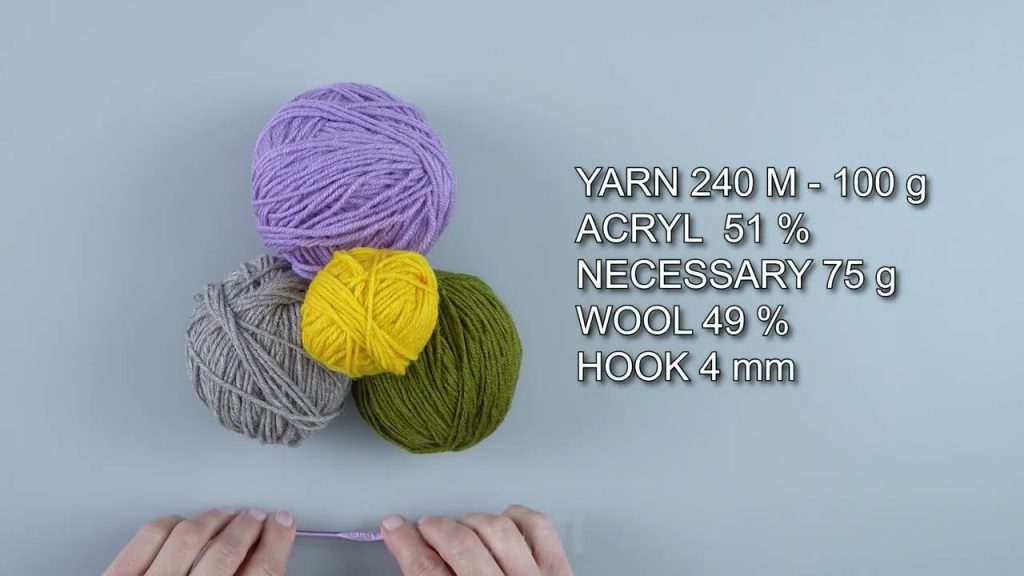
Before you begin, gather the following materials:
Materials:
- Worsted weight yarn (multiple colors or a single shade, depending on your design preference)
- 5.0 mm (H-8) crochet hook
- Yarn needle for sewing pieces together
- Scissors
- Stitch markers (optional)
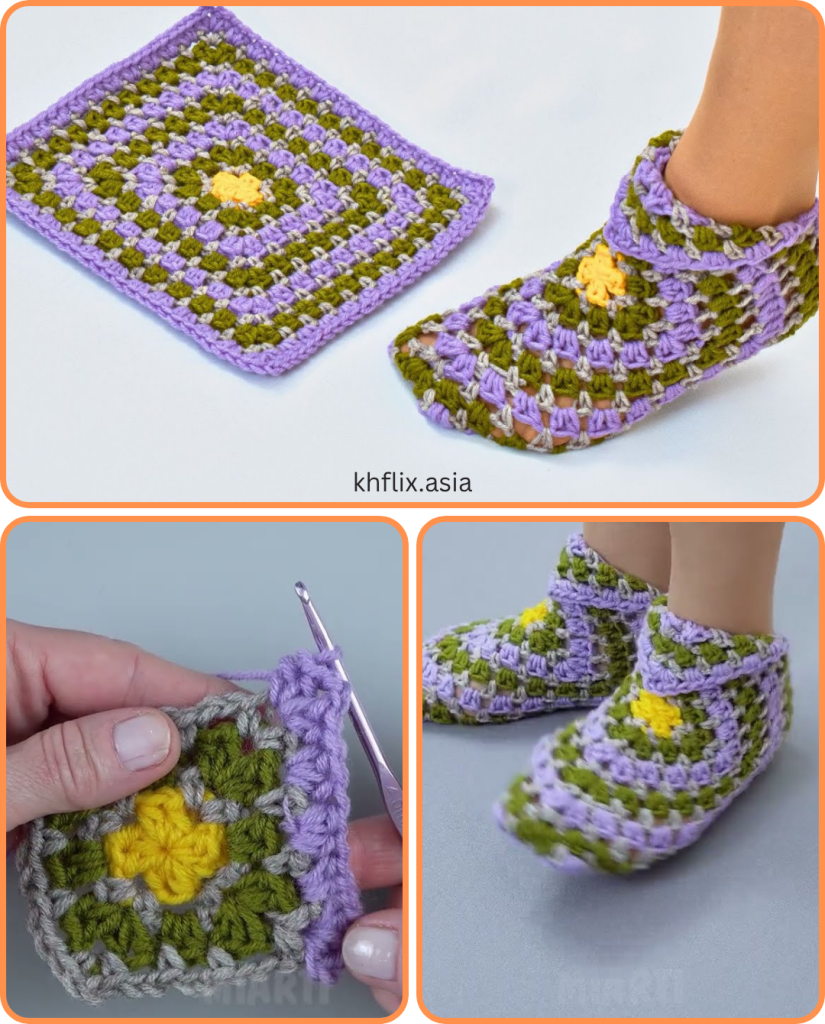
Step 1: Understand the Basics of Granny Squares
Granny squares are typically made in the round, starting from the center and working outward in a square shape. The basic granny square involves double crochets and chain spaces arranged in groups to form a square.
Basic Granny Square Pattern:
- Start with a slip knot and chain (ch) 4. Join with a slip stitch (sl st) to form a ring.
- Round 1: Ch 3 (counts as first double crochet), 2 dc into the ring, ch 2. (3 dc into ring, ch 2) repeat 3 more times. Join with sl st to top of beginning ch-3.
- Round 2: Sl st into next two dc and into ch-2 space. Ch 3, 2 dc, ch 2, 3 dc into same space. (3 dc, ch 2, 3 dc) in next ch-2 space, repeat 3 more times. Join.
- Round 3 (and beyond): Continue the pattern by placing 3 dc in each space between groups, and (3 dc, ch 2, 3 dc) in each corner ch-2 space.
Repeat rounds until each square measures about 4–5 inches (10–13 cm) across, depending on your desired slipper size.

Step 2: Make the Granny Squares
You’ll need 6 granny squares per slipper, so 12 squares total.
Layout for Each Slipper:
- 1 for the sole
- 2 for the sides
- 1 for the toe
- 1 for the heel
- 1 for the top flap (optional for a cozier design)
You can mix and match colors or keep them uniform depending on your style.
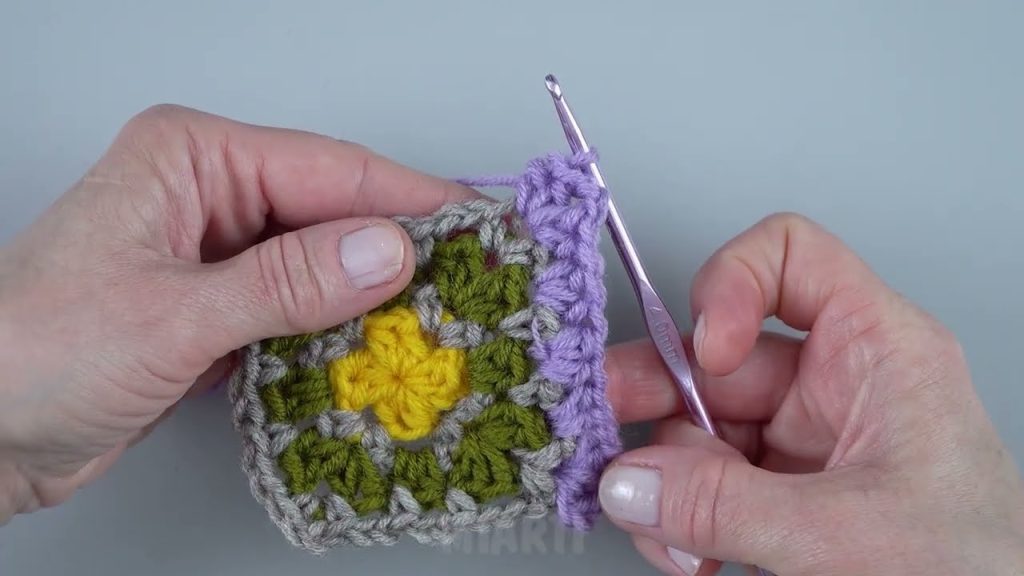
Step 3: Block the Squares (Optional)
Blocking your granny squares helps them lie flat and uniform in size, making assembly easier. Simply dampen the squares, pin them to a blocking mat, and let them dry.
Step 4: Assemble the Slipper
Arrange the squares:
Lay out 6 squares in a T-shape:
   [2]
[4][1][3]
   [5]
Where:
- [1] is the sole
- [2] and [5] are the top and heel
- [3] and [4] are side squares
- Optional: add square [6] as a cuff or flap on top
Joining the Squares:
Use your yarn needle and a whip stitch or slip stitch method to join the squares along their edges. Sew together as follows:
- Attach the heel (square 5) to the back of the sole (square 1).
- Attach the toe (square 2) to the front of the sole.
- Attach the side squares (3 and 4) to the sides of the sole.
- Connect the upper edges of the toe and sides to form the top of the slipper.
- If using a top flap (square 6), attach it to the front-top edge of the slipper.
Make sure all seams are securely sewn but not too tight to maintain comfort.
Step 5: Customize and Finish
Edging (Optional):
Add a single crochet or crab stitch (reverse single crochet) border around the ankle opening for a neater finish and extra durability.
Embellishments:
You can add buttons, pom-poms, or embroidery for a personalized touch.
Step 6: Repeat for the Second Slipper
Follow the same steps to create and assemble the second slipper. Make sure to mirror the layout if needed, especially if your design is directional or uses motifs.
Tips for Success:
- Gauge matters: If your squares are too large or small, adjust your hook size or yarn weight.
- Consistent tension: Helps keep all squares the same size.
- Yarn joining: Weave in all ends securely to prevent unraveling.
- Try them on as you go: This ensures a perfect fit.
Final Thoughts
Crocheting granny square slippers combines vintage charm with practical functionality. They’re a satisfying project for any crocheter, offering the joy of working with colorful squares and the reward of a comfy finished product. Plus, once you master the basic design, the possibilities are endless — try different patterns, textures, and even hexagon motifs for a creative twist!
Video tutorial:


