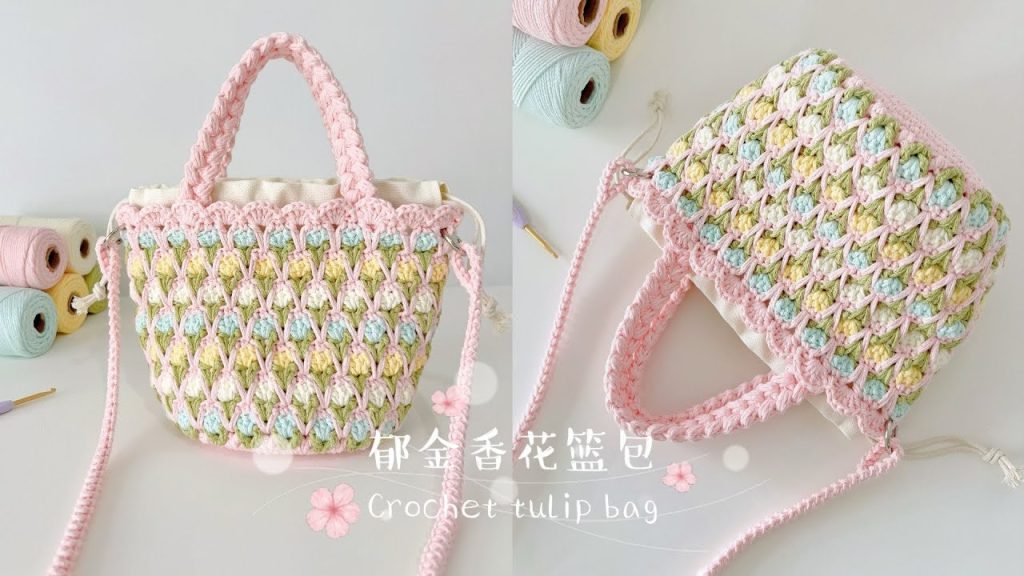
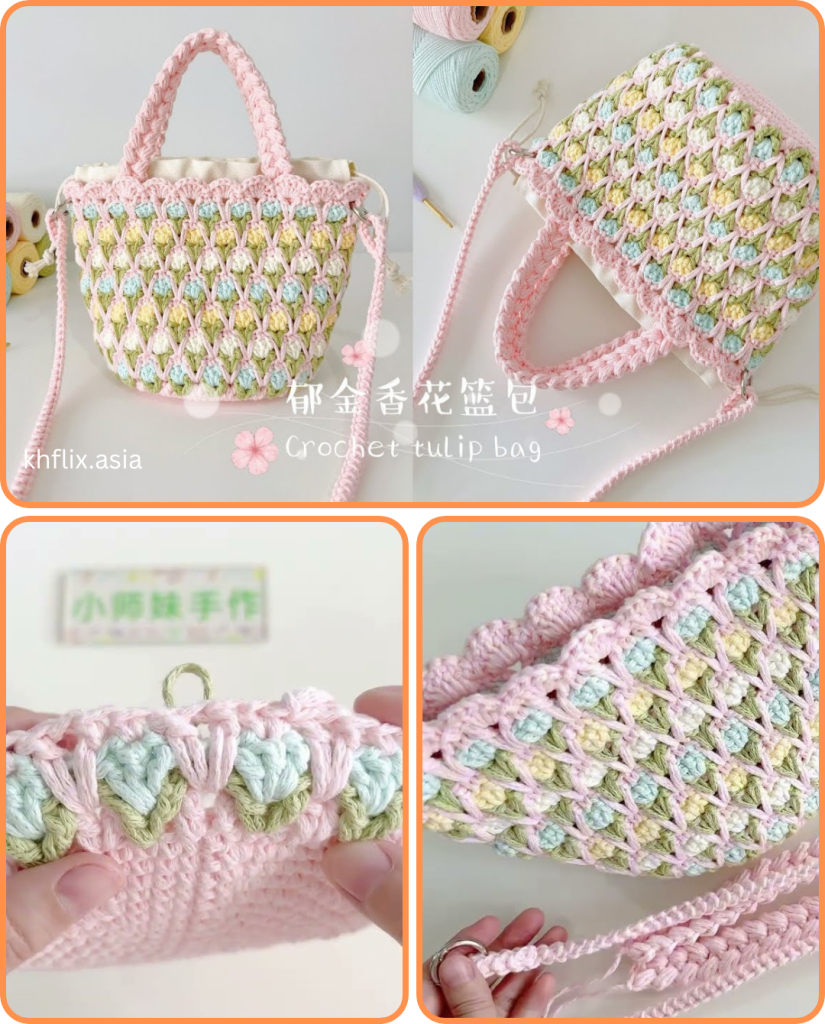
Crocheting a Tulip Handbag is a delightful project that combines charming aesthetics with practical functionality. This guide will walk you through creating a beautiful handbag featuring a distinctive tulip-like shape, perfect for spring and summer outings. The pattern incorporates basic stitches with strategic shaping to achieve the unique silhouette.
Skill Level: Intermediate
This pattern assumes you have a good grasp of basic crochet stitches and are comfortable working in both rows and rounds, as well as increasing and decreasing stitches.
Materials You’ll Need:
- Yarn: Approximately 250-350 yards of worsted weight (Aran/10-ply) cotton yarn. Cotton is recommended for its stitch definition, durability, and ability to hold shape, but a cotton blend or sturdy acrylic could also work. Choose your favorite color for the main body and a contrasting color for accents if desired.
- Crochet Hook: 4.0 mm (G/6 US) or size needed to obtain gauge.
- Stitch Markers: Several (at least 4) to mark the beginning of rounds and key points.
- Yarn Needle: For weaving in ends and seaming.
- Scissors: For cutting yarn.
- Measuring Tape: For checking gauge and dimensions.
- Optional: Fabric lining (approx. 1/2 yard), magnetic snap closure, or zipper.
- Optional: Bag feet, D-rings, or other hardware if desired for strap attachment.
Gauge:
16 single crochet (sc) stitches x 18 rows = 4 inches (10 cm) It is crucial to check your gauge before starting. A correct gauge ensures your handbag will be the intended size and hold its shape properly. If your swatch is too small, go up a hook size. If it’s too large, go down a hook size.
Finished Measurements (Approximate):
- Height (excluding handle): 8-9 inches (20-23 cm)
- Width (at widest point): 10-12 inches (25-30 cm)
- Base: 4-5 inches (10-12.5 cm) deep
Abbreviations (US Terms):
- ch: chain
- sl st: slip stitch
- sc: single crochet
- hdc: half double crochet
- dc: double crochet
- inc: increase (2 sc in one stitch)
- dec: decrease (sc2tog – single crochet 2 together)
- st(s): stitch(es)
- rnd: round
- fo: fasten off
- BLO: back loop only
- FLO: front loop only
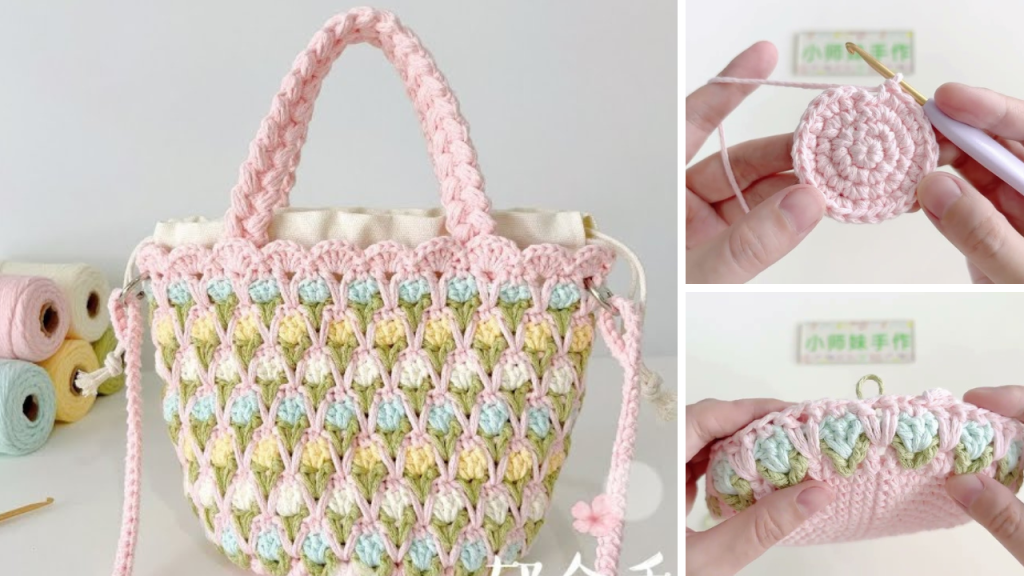
Construction Overview:
The Tulip Handbag is typically constructed in three main parts: the oval base, the body (worked in the round), and the handles.
Pattern Instructions:
Part 1: The Oval Base
The base is worked in continuous rounds (spirals) of single crochet. Use a stitch marker to mark the first stitch of each round and move it up as you go.
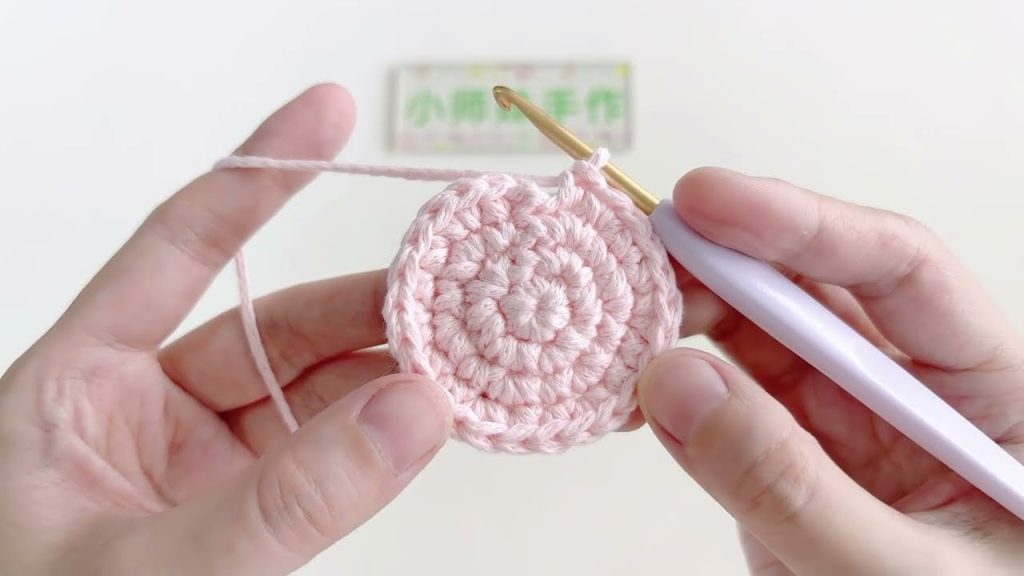
Rnd 1: Ch 21 (or adjust for desired length, remember your bag will be roughly this length + 1-2 inches for the curve). Sc in the 2nd ch from hook, sc in next 18 ch, 3 sc in the last ch. Working down the other side of the foundation chain: sc in next 18 ch, 2 sc in the last ch. (42 sc) Rnd 2: Inc in the first st, sc in next 18 sts, inc in next 3 sts, sc in next 18 sts, inc in next 2 sts. (48 sc) Rnd 3: Sc in the next st, inc in the next st, sc in next 18 sts, (sc in next st, inc in next st) 3 times, sc in next 18 sts, (sc in next st, inc in next st) 2 times. (54 sc) Rnd 4: Sc in the next 2 sts, inc in the next st, sc in next 18 sts, (sc in next 2 sts, inc in the next st) 3 times, sc in next 18 sts, (sc in next 2 sts, inc in the next st) 2 times. (60 sc) Rnd 5: Sc in the next 3 sts, inc in the next st, sc in next 18 sts, (sc in next 3 sts, inc in the next st) 3 times, sc in next 18 sts, (sc in next 3 sts, inc in the next st) 2 times. (66 sc)
Continue increasing evenly at the ends of the oval as needed until your base measures approximately 4.5-5 inches (11-12.5 cm) at its widest point. Each round will add 6 stitches. Ensure your final stitch count is a multiple of a number that works for shaping later (e.g., 6 or 8). Let’s assume you end with 72 sc after your desired number of increase rounds.
Part 2: The Body of the Bag
The body starts by working into the back loops only to create a defined edge for the base.
Rnd 1 (Transition): Sc in the BLO of each st around. (72 sc). This creates a crisp edge.Rnd 2: Sc in each sc around. Repeat Rnd 2 for 3-4 more rounds. (Total 4-5 rounds of regular sc).
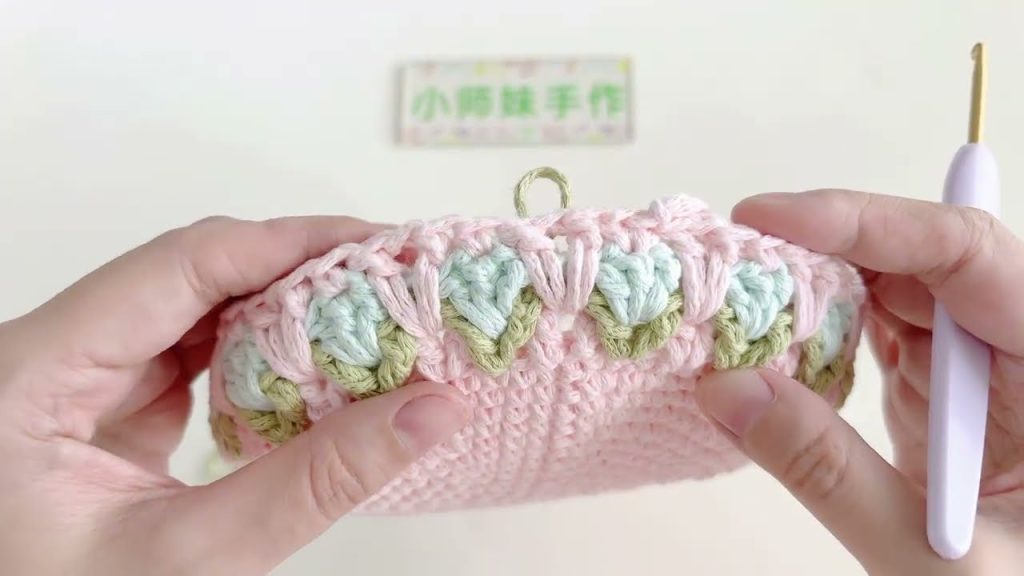
Now we begin to shape the “tulip” form. This involves creating the flared bottom and then decreasing to form the narrower top.
Flare Rounds (Increase):Rnd 1: Sc in next 11 sts, inc in next st, repeat from * to * 6 times around. (78 sc) Rnd 2-3: Sc in each sc around.Rnd 4: Sc in next 12 sts, inc in next st, repeat from * to * 6 times around. (84 sc) Rnd 5-6: Sc in each sc around.
Continue this pattern of increasing evenly every 2-3 rounds, then working plain rounds, until your bag body is approximately 5-6 inches (12.5-15 cm) tall from the base transition row and has reached its widest point. A good target for the widest point could be around 96-108 stitches in circumference.
Shaping Rounds (Decrease): Once you’ve reached your maximum desired width, you’ll start decreasing to form the “petals” of the tulip.
Rnd 1: Sc in next 14 sts, dec, repeat from * to * 6 times around. (e.g., if you had 96 sts, you now have 90 sts).Rnd 2-3: Sc in each sc around.Rnd 4: Sc in next 13 sts, dec, repeat from * to * 6 times around. (84 sts) Rnd 5-6: Sc in each sc around.
Continue this pattern of decreasing evenly every 2-3 rounds, followed by plain rounds, until the bag is approximately 8-9 inches (20-23 cm) tall from the base and the opening has narrowed to about 72-78 stitches in circumference. You want the opening to be comfortable for accessing the bag but not too wide.
Final Edge Rounds: Work 2-3 rounds of sc in each stitch around for a neat top edge. Sl st to join and fasten off.
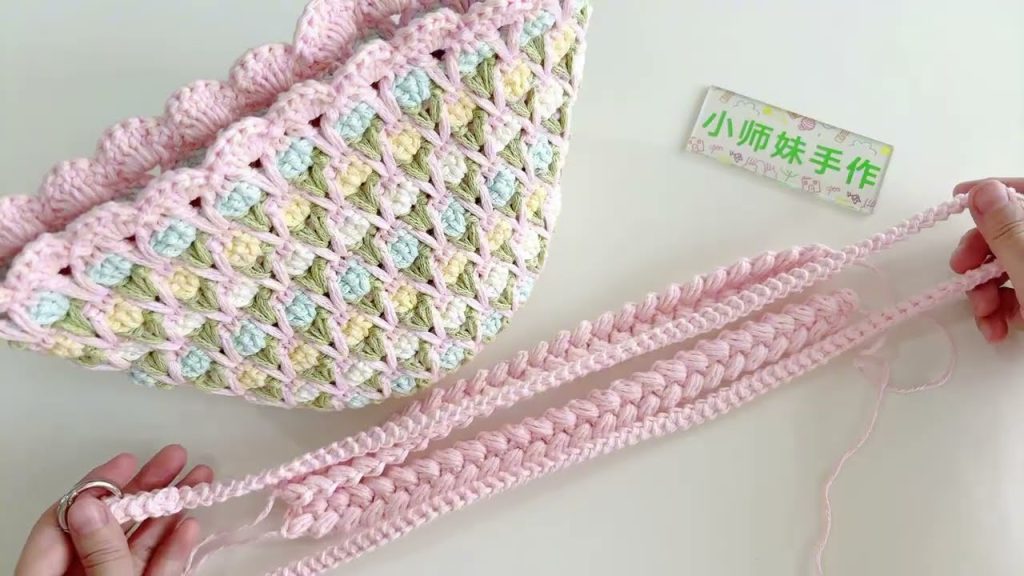
Part 3: The Handles (Make 2)
You can choose to crochet simple flat handles or more rounded ones.
Option 1: Flat HandlesRow 1: Ch 5 (adjust width as desired). Sc in the 2nd ch from hook, sc in next 3 ch. (4 sc) Row 2: Ch 1, turn, sc in each sc across. (4 sc) Repeat Row 2 until the handle measures approximately 18-20 inches (46-51 cm) long, or desired length. Fasten off, leaving a long tail for sewing.
Option 2: Rounded Handles (Stronger/Thicker)Row 1: Ch 8. Sl st in the 2nd ch from hook, sl st in each ch across. (7 sl st) Row 2: Ch 1, turn, sc in BLO of each sl st across. (7 sc) Row 3: Ch 1, turn, sc in each sc across. (7 sc) Repeat Row 3 until the handle measures approximately 18-20 inches (46-51 cm) long. To finish, work a row of sl st along each long edge of the handle to create a rounded look. Fasten off, leaving a long tail for sewing.
Assembly:
- Attach Handles: Position the handles evenly on the top opening of the bag. Place them on the inside of the bag, approximately 3-4 inches (7.5-10 cm) from each side seam, or wherever they look best. Using your yarn needle and the long tails, securely sew the handles to the bag. Reinforce the attachment points by sewing back and forth several times.
- Weave in all remaining ends meticulously for a clean finish.
- Optional: Add a Lining. If you’re adding a fabric lining, cut and sew a lining that matches the shape of your bag, leaving a seam allowance. Hand-stitch or machine-stitch the lining into the inside of your crocheted bag. This adds durability and helps the bag maintain its shape.
- Optional: Add Closure. Sew a magnetic snap closure, zipper, or a button-and-loop closure to the inside of the bag’s opening.
Tips for Success:
- Sturdy Yarn: Using cotton or a blend with good structure is key for a handbag that holds its shape.
- Tight Tension: Crocheting with a slightly tighter tension than usual can help create a firmer fabric, which is desirable for bags.
- Stitch Markers are Your Friends: Especially when working in continuous rounds for the base and body, using a stitch marker to indicate the start of each round will save you headaches.
- Measure Frequently: Don’t rely solely on stitch counts. Regularly measure your base, height, and width to ensure the bag is growing to your desired dimensions.
- Blocking (Optional but Recommended): While cotton doesn’t “block” as dramatically as wool, a light steam or wet block can help even out your stitches and refine the shape of your finished bag.
- Personalization: Feel free to experiment with color changes, adding stripes, or even embroidering small details onto your finished bag.
Enjoy creating your unique and stylish Tulip Handbag! It’s a wonderful accessory to complement your spring and summer outfits.
Video tutorial: