
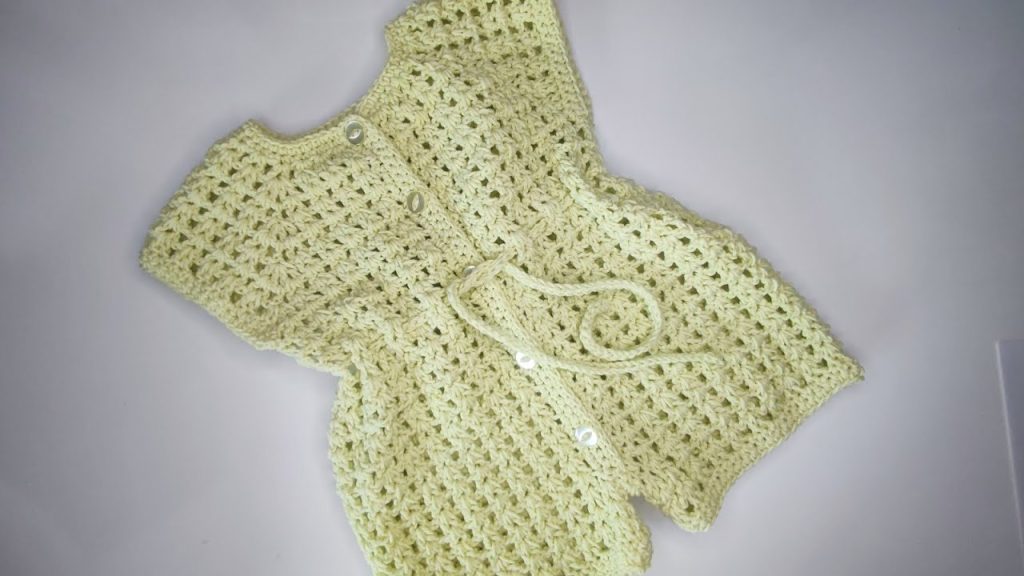
Crocheting a summer baby romper is a delightful project that results in an adorable, comfortable, and breathable garment perfect for warm weather. This detailed guide will walk you through creating a charming romper for a little one, complete with adjustable straps and snap closures for ease of dressing.
Skill Level: Intermediate
This pattern assumes familiarity with basic crochet stitches and techniques.
Materials You’ll Need:
- Yarn: Approximately 200-300 yards of DK (double knitting) or sport weight yarn. Opt for a breathable fiber like cotton, cotton blend, or bamboo for comfort in warm weather. Choose light, summery colors or a variegated yarn for a fun look.
- Crochet Hook: 3.5 mm (E/4 US) or size needed to obtain gauge.
- Stitch Markers: 4-6 to mark key points.
- Yarn Needle: For weaving in ends and seaming.
- Scissors: For cutting yarn.
- Buttons/Snaps: 2-3 small buttons for the straps (approx. 10-12mm) OR sew-on snaps for the crotch area (3-5 sets). Buttons for the crotch are also an option if preferred.
- Measuring Tape: For checking gauge and sizing.
Gauge:
20 double crochet (dc) stitches x 10 rows = 4 inches (10 cm) Checking your gauge is crucial. A correct gauge ensures your romper will be the right size. If your swatch is too small, go up a hook size. If it’s too large, go down a hook size.
Abbreviations (US Terms):
- ch: chain
- sl st: slip stitch
- sc: single crochet
- hdc: half double crochet
- dc: double crochet
- st(s): stitch(es)
- sk: skip
- fo: fasten off
- sp: space
- inc: increase (usually 2 dc in one stitch)
- dec: decrease (dc2tog – double crochet 2 together)
- BLO: back loop only
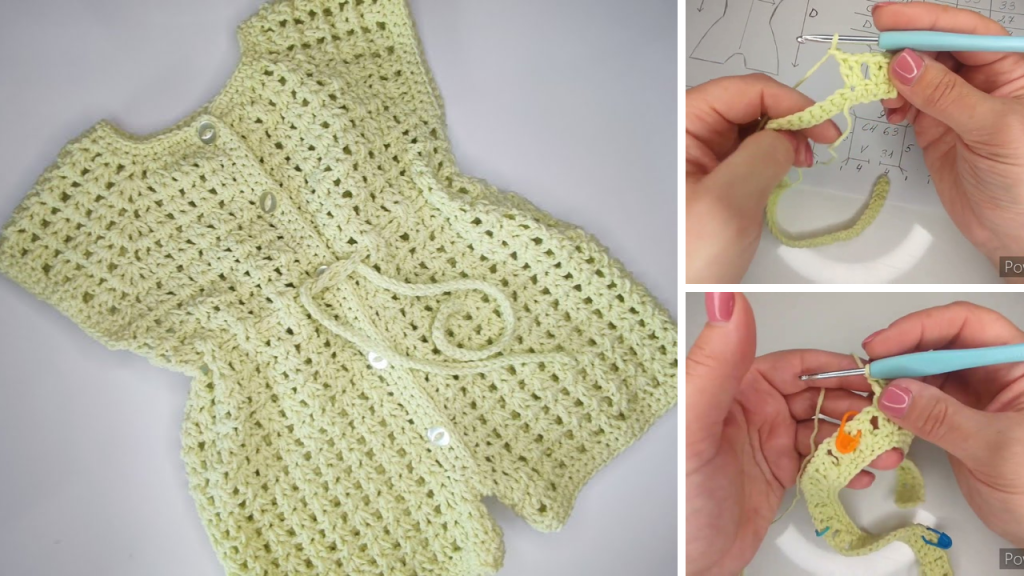
Construction Overview:
This romper is constructed in sections: first, the back and front panels, then seamed at the sides. Legs are worked in the round, and straps are added last.
Pattern Instructions:
This pattern is typically sized for 6-12 months. Adjustments for smaller/larger sizes will be noted.
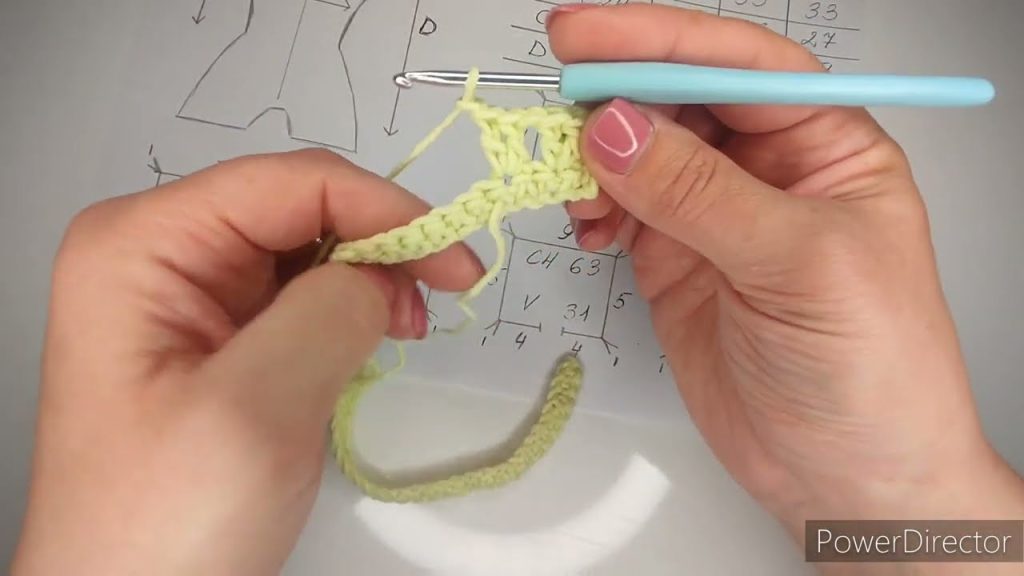
Back Panel:
Row 1 (Foundation Chain): Ch 46 (for 0-6 months: ch 40; for 12-18 months: ch 52). Row 2: Dc in the 4th ch from the hook (counts as 1st dc), dc in each ch across. (44 dc for 6-12 months; 38 dc for 0-6 months; 50 dc for 12-18 months). Row 3: Ch 3 (counts as 1st dc), dc in each dc across. Repeat Row 3 until the back panel measures approximately 8 inches (20 cm) from the beginning chain (for 0-6 months: 7 inches/18 cm; for 12-18 months: 9 inches/23 cm). This will form the main body of the romper. Do not fasten off.
Shaping the Back Top:
This section forms the top edge of the back panel.
Row 1 (Decrease): Ch 3, dc in the next st, dc2tog, dc in each st across until 4 sts remain, dc2tog, dc in the next 2 sts. (40 dc for 6-12 months) Row 2: Ch 3, dc in each st across. Repeat Rows 1 and 2 until the back top measures approximately 3 inches (7.5 cm) from the start of the shaping, ending with a decrease row. You should have about 32-34 stitches remaining. Fasten off and weave in ends.

Front Panel:
Work exactly as for the Back Panel until you complete the main body rows (8 inches/20 cm for 6-12 months). Do not fasten off.
Shaping the Front Neckline and Top:
This section forms the top edge of the front panel, creating the armholes and neckline.
Row 1 (Decrease): Ch 3, dc in the next st, dc2tog, dc in each st across until 4 sts remain, dc2tog, dc in the next 2 sts. (40 dc) Row 2: Ch 3, dc in each st across. Repeat Rows 1 and 2 two more times. (32 dc) Now you will create the neckline opening.
Row 7 (Neckline Split): Ch 3, dc in the next 9 sts (right shoulder/strap section). Turn. Row 8 (Right Shoulder Shaping): Ch 3, dc in the next 8 sts. Row 9: Ch 3, dc in the next 7 sts, dc2tog. (8 sts) Row 10: Ch 3, dc in each st across. Repeat Rows 9 and 10 once more. (6 sts) Fasten off.
Count 8 stitches from the left side of the remaining 32 stitches. Attach yarn to the 9th stitch (skipping the middle 14 sts for the neckline). Row 7 (Left Shoulder/Strap Section): Ch 3, dc in the next 9 sts. Turn. Row 8 (Left Shoulder Shaping): Ch 3, dc in the next 8 sts. Row 9: Ch 3, dc2tog, dc in the next 7 sts. (8 sts) Row 10: Ch 3, dc in each st across. Repeat Rows 9 and 10 once more. (6 sts) Fasten off and weave in ends.
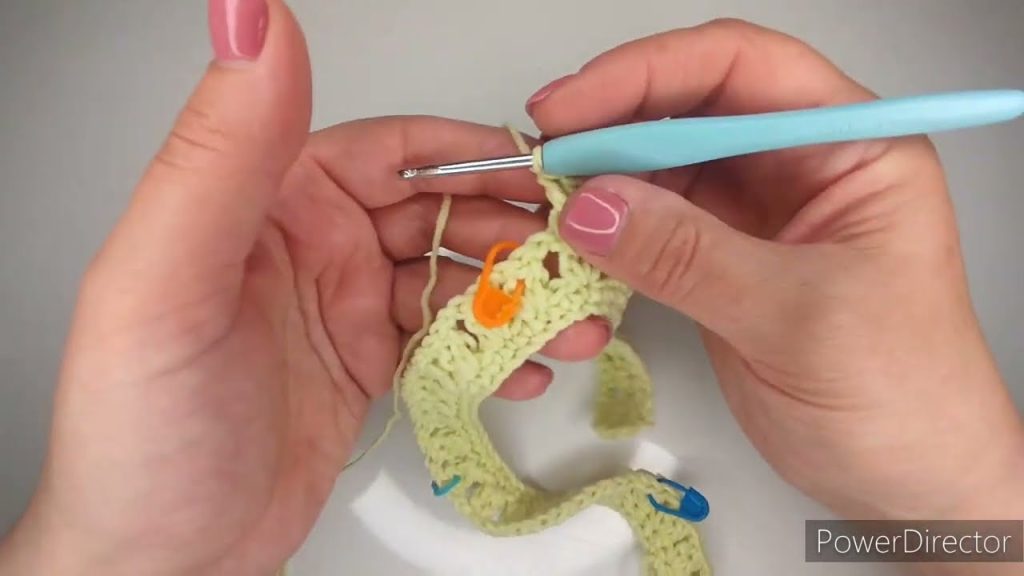
Seaming:
- Side Seams: Lay the front and back panels flat, right sides facing. Using your yarn needle and whip stitch or mattress stitch, sew the side seams from the bottom edge up to the armhole openings (where you started the top shaping).
Leg Openings:
You will now work in the round to create the leg openings. Attach yarn to one of the raw edges of the leg opening.
Round 1: Ch 1, sc evenly around the entire leg opening. Aim for approximately 45-50 sc stitches, ensuring an even number. Join with a sl st to the first sc. Round 2: Ch 3, dc in each st around. Join with a sl st. Repeat Round 2 for 2-3 more rounds, or until the leg portion measures approximately 1-1.5 inches (2.5-4 cm). This creates a short “short” style leg. Fasten off and weave in ends. Repeat for the second leg.
Crotch Opening and Edging:
This section will create the opening for diaper changes and allow for snap or button closure.
Attach yarn to the inside of one leg opening, at the crotch seam. Row 1: Ch 1, sc evenly across the crotch opening of the front panel, around the bottom curve. You want this to be tight and neat. Fasten off. Attach yarn to the inside of the other leg opening, at the crotch seam. Row 1: Ch 1, sc evenly across the crotch opening of the back panel, around the bottom curve. You want this to be tight and neat. Fasten off.
This creates two separate “flaps” that will overlap and be secured by snaps or buttons.
Straps (Make 2):
Attach yarn to the outer corner of one of the front shoulder sections (the 6 stitches remaining from the shaping).
Row 1: Ch 1, sc evenly across the 6 stitches. (6 sc) Row 2: Ch 1, sc in each sc across. Repeat Row 2 until the strap measures approximately 9-10 inches (23-25 cm) long (adjust as needed for desired fit and button placement). You can also make them longer and knot them for adjustability.
Buttonhole Row (Optional, if using buttons): On one strap (or both if you want interchangeable), you can create a buttonhole. Ch 1, sc in the first 2 sc, ch 2, sk 2 sc, sc in the last 2 sc. (4 sc, 1 ch-2 sp) Next Row: Ch 1, sc in each sc and 2 sc in the ch-2 sp. Continue with plain sc rows for another 1-2 rows.
Fasten off and weave in ends. Repeat for the second strap.
Finishing:
- Weave in all loose ends. This is crucial for a tidy and professional finish.
- Block your romper. Wet blocking or steam blocking will help even out your stitches, define the shape, and give the garment a more polished look.
- Attach buttons or snaps:
- For strap buttons: Sew the two small buttons onto the back panel, directly in line with where the straps will attach. You can cross the straps or keep them straight.
- For crotch snaps/buttons: Sew the snaps or buttons onto the crotch flaps. The front panel flap will overlap the back panel flap. Ensure they are securely attached.
Sizing Notes:
- 0-6 Months: Use initial chain of 40, body length approx. 7 inches, strap length approx. 8-9 inches.
- 6-12 Months (Pattern provided): Initial chain of 46, body length approx. 8 inches, strap length approx. 9-10 inches.
- 12-18 Months: Use initial chain of 52, body length approx. 9 inches, strap length approx. 10-11 inches.
Always measure! Children grow at different rates. Holding the work up to the child or a well-fitting garment is the best way to ensure proper sizing.
Tips for Success:
- Choose light, breathable yarn: Cotton or cotton blends are ideal for summer garments, as they are soft, absorbent, and allow for airflow.
- Maintain consistent tension: This will help ensure an even fabric and proper gauge.
- Use stitch markers: Especially helpful for marking the beginning of rounds for the legs and keeping track of stitch counts in shaping rows.
- Consider adjustable features: Long straps that can be knotted or multiple buttonholes allow the romper to grow with the baby.
- Experiment with color: A single color makes for a classic look, while stripes or color blocking can add a playful touch.
- Embellishments: You can add a small appliqued design, embroidered details, or a little bow for extra cuteness.
Creating a crocheted summer baby romper is a rewarding experience, resulting in a unique and heartfelt gift or a lovely addition to your own little one’s wardrobe. Enjoy the process of crafting this special piece!
Video tutorial:


