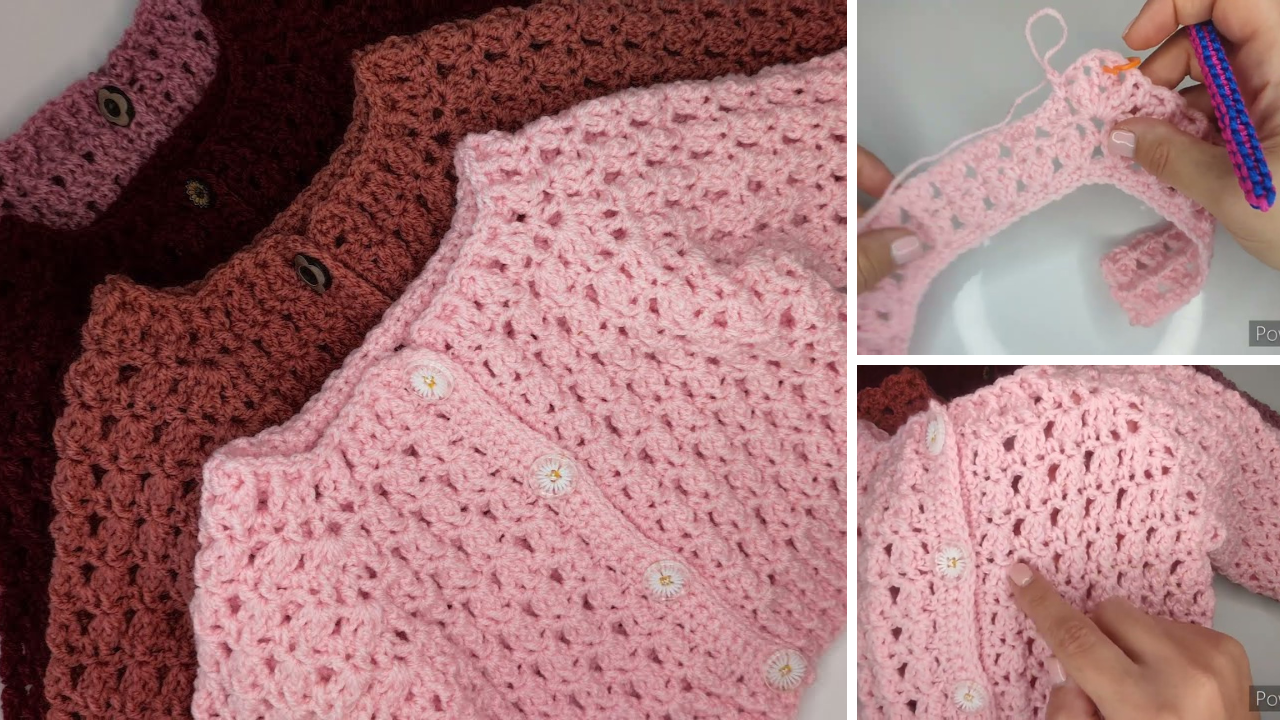
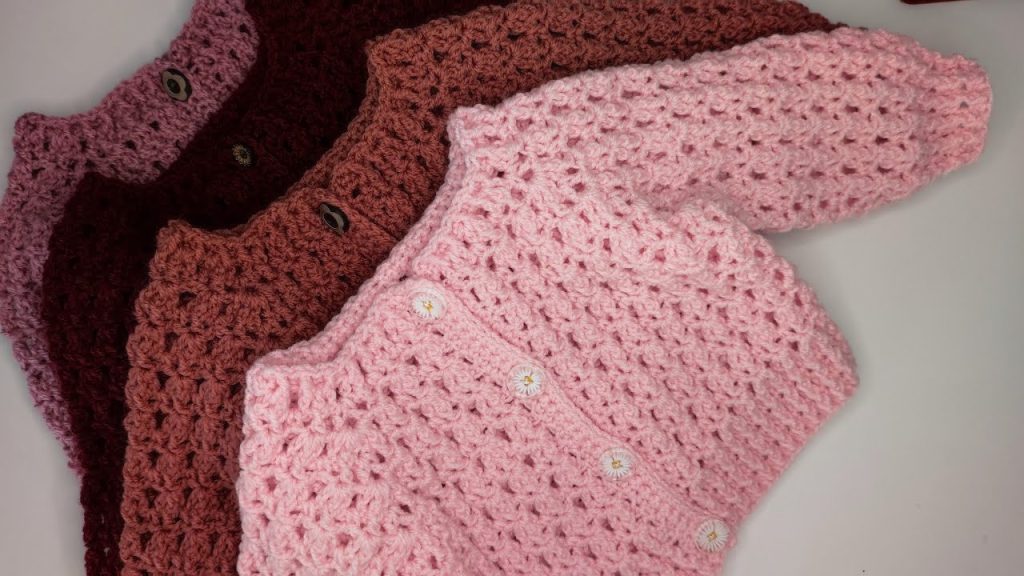
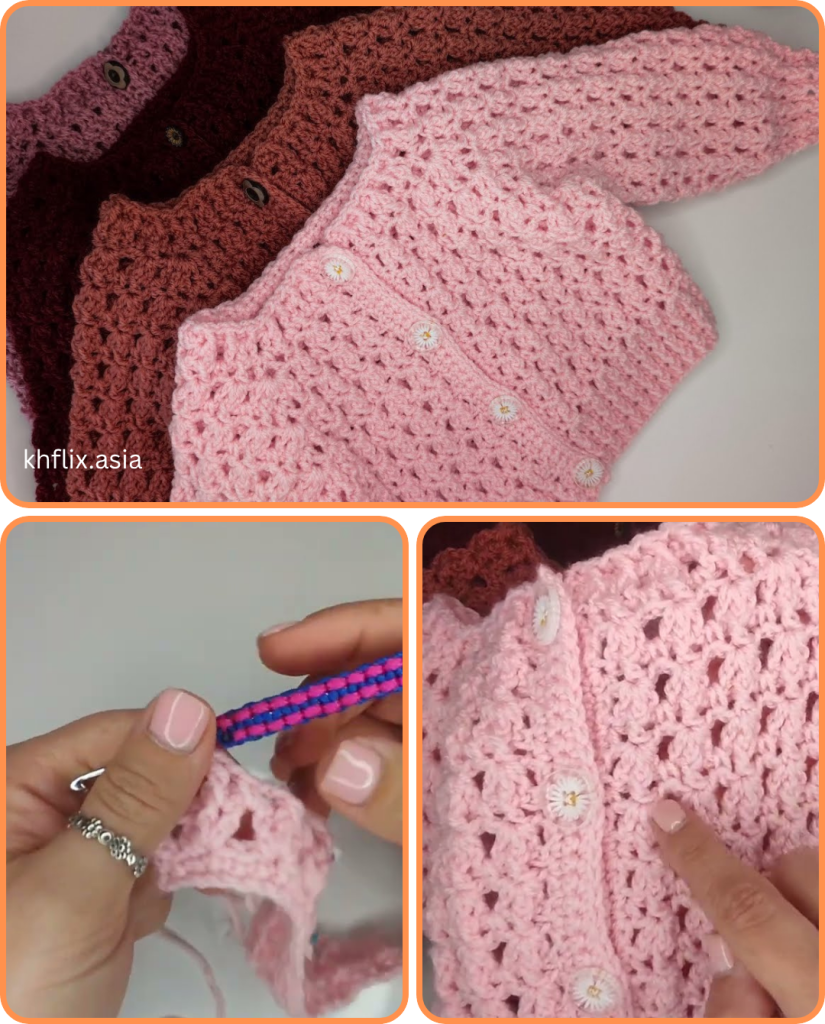
Crocheting a short winter cardigan for a 1-3-year-old is a delightful project that yields a cozy and adorable garment perfect for chilly days. This guide will walk you through the process, providing a detailed pattern and helpful tips to ensure your little one stays warm and stylish.
Skill Level: Intermediate
This pattern assumes you have a basic understanding of crochet stitches and techniques.
Materials You’ll Need:
- Yarn: Approximately 300-400 yards of DK (double knitting) weight yarn. Choose a soft, warm fiber like merino wool, alpaca blend, or a high-quality acrylic that is gentle on sensitive skin. Consider a variegated yarn for a playful look or a solid color for a classic touch.
- Crochet Hook: 4.0 mm (G/6 US) or size needed to obtain gauge.
- Stitch Markers: 4-6 to mark key points.
- Yarn Needle: For weaving in ends and seaming.
- Buttons: 3-5 (approximately 15-20mm in diameter), depending on your preference.
- Measuring Tape: For checking gauge and sizing.
- Scissors: For cutting yarn.
Gauge:
18 double crochet (dc) stitches x 10 rows = 4 inches (10 cm) It is crucial to check your gauge before starting. A correct gauge ensures your cardigan will be the right size. If your swatch is too small, go up a hook size. If it’s too large, go down a hook size.
Abbreviations (US Terms):
- ch: chain
- sl st: slip stitch
- sc: single crochet
- hdc: half double crochet
- dc: double crochet
- fpdc: front post double crochet
- bpdc: back post double crochet
- st(s): stitch(es)
- sk: skip
- fo: fasten off
- sp: space
- inc: increase (usually 2 dc in one stitch)
- dec: decrease (dc2tog – double crochet 2 together)

Construction Overview:
The cardigan will be worked in one piece from the top down, starting with the yoke, then splitting for the sleeves and body. This method allows for easy size adjustments and minimizes seaming.
Pattern Instructions:
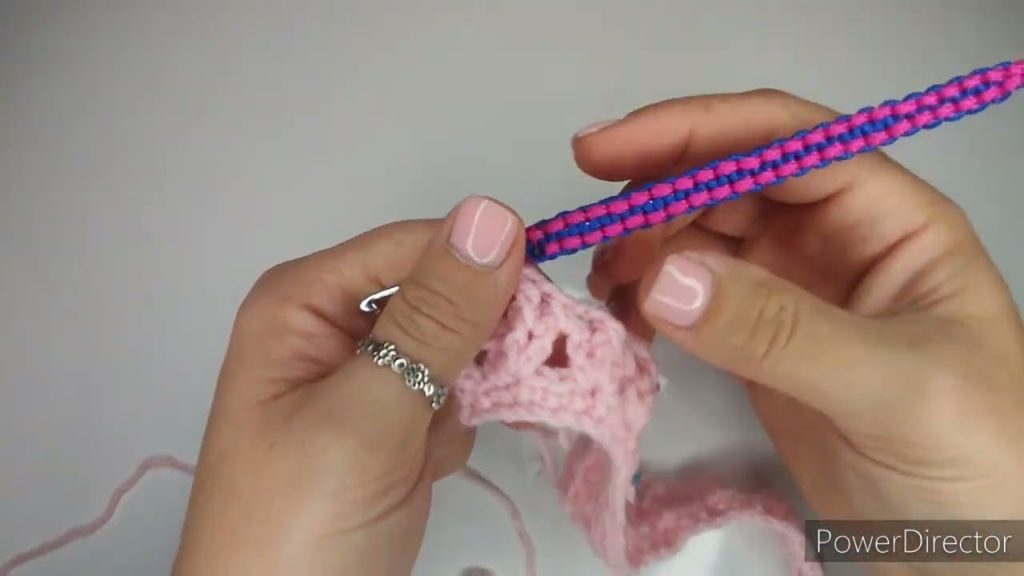
Yoke:
Row 1 (Foundation Chain): Ch 54.
Row 2 (DC Row): Dc in the 4th ch from the hook (counts as 1st dc), dc in each ch across. (52 dc)
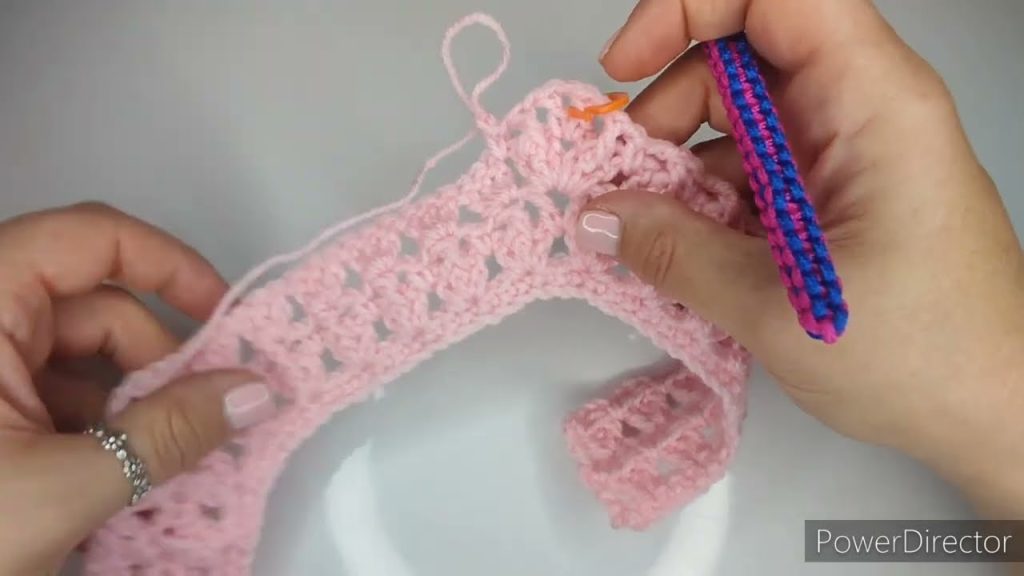
Row 3 (Increase Row): Ch 3 (counts as 1st dc), dc in the next 7 sts, (dc, ch 1, dc) in the next st (corner 1), dc in the next 12 sts, (dc, ch 1, dc) in the next st (corner 2), dc in the next 12 sts, (dc, ch 1, dc) in the next st (corner 3), dc in the next 8 sts, (dc, ch 1, dc) in the next st (corner 4), dc in the last 7 sts. (60 dc, 4 ch-1 sps). Place stitch markers in each ch-1 sp.
Row 4 (Increase Row): Ch 3, dc in each st until the first ch-1 sp, (dc, ch 1, dc) in the ch-1 sp, dc in each st until the next ch-1 sp, (dc, ch 1, dc) in the ch-1 sp, repeat from * to * two more times, dc in each remaining st. Repeat Row 4 until you have a total of 10-12 rows for the yoke (or until the yoke measures approximately 5-6 inches from the top to the corner). Ensure the yoke is wide enough to comfortably fit around the child’s chest and shoulders, allowing for movement. At this point, you should have approximately 116-124 dc stitches across the last row.
Separating for Sleeves and Body:
Row (Divide): Ch 3, dc in each st until the first ch-1 sp (front panel). Sk all sts between the first and second ch-1 sps (first sleeve opening). Dc in the second ch-1 sp. Ch 2 for underarm. Dc in each st until the third ch-1 sp (back panel). Sk all sts between the third and fourth ch-1 sps (second sleeve opening). Dc in the fourth ch-1 sp. Ch 2 for underarm. Dc in each remaining st (front panel).
You will now have a front left panel, a back panel, and a front right panel connected, forming the body. The skipped sections are your armholes.
Body:
Continue working in rows on the body stitches.
Row 1: Ch 3, dc in each st across, including the ch-2 underarm spaces. Continue working dc rows until the body measures approximately 6-7 inches from the underarm, or desired length for a short cardigan. Ensure to measure from the underarm downwards.
Bottom Ribbing:
Row 1: Ch 2 (does not count as a st), hdc in each st across. Row 2 (Ribbing): Ch 2, fpdc around the next hdc, bpdc around the next hdc, repeat from * to * across. Repeat Row 2 for 2-3 more rows, or until your ribbing measures about 1 inch.
Sleeves (Make 2):
Attach yarn to one of the armhole openings.
Round 1: Ch 3, dc around the entire armhole opening, including the 2 ch from the underarm. Join with a sl st to the top of the initial Ch 3. Round 2: Ch 3, dc in each st around. Join with a sl st. Continue working dc rounds until the sleeve measures approximately 7-8 inches from the underarm, or desired length for a 3/4 or full-length sleeve. You may want to decrease a stitch or two evenly in a round every 3-4 rounds to create a slight taper if desired (e.g., dc2tog).
Sleeve Cuff Ribbing:
Round 1: Ch 2, hdc in each st around. Join with a sl st. Round 2 (Ribbing): Ch 2, fpdc around the next hdc, bpdc around the next hdc, repeat from * to * around. Join with a sl st. Repeat Round 2 for 1-2 more rounds, or until your cuff ribbing measures about 1 inch. Fasten off and weave in ends. Repeat for the second sleeve.
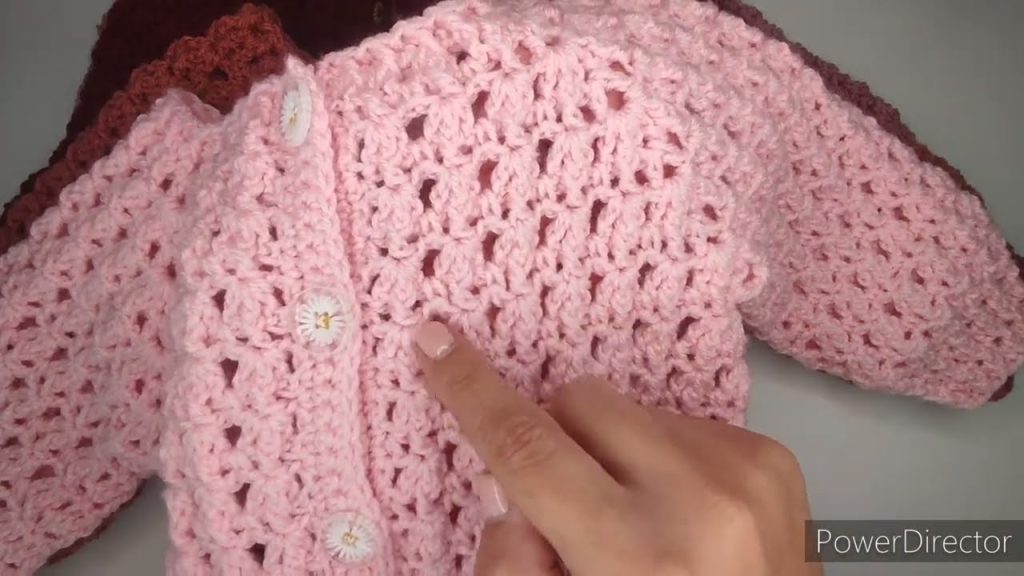
Front Edging and Button Band:
Attach yarn to the bottom corner of one of the front panels.
Row 1: Ch 1, sc evenly up the front edge, across the neckline, and down the other front edge. Make sure to work enough sc stitches to create a neat edge, typically 1 sc per dc row and 2 sc per 3 dc rows for the body. For the neckline, sc in each stitch.
Row 2 (Buttonholes – if desired, for right-handed crocheters this will be the buttonhole band on the right front panel): Ch 1, sc in the first few sts. Ch 2, sk 2 sts (buttonhole), sc in the next few sts. Repeat from * to * for 3-5 buttonholes, evenly spaced. Continue sc to the end of the row. Adjust buttonhole placement and number based on your button size and preference.
Row 3: Ch 1, sc in each sc and 2 sc in each ch-2 sp (to close buttonhole). Row 4: Ch 1, sc in each st across. Fasten off and weave in ends.
For the opposite front band (button band), simply work 3-4 rows of sc evenly along the edge without creating buttonholes.
Finishing:
- Weave in all loose ends using your yarn needle. This step is crucial for a professional-looking finish.
- Block your cardigan. Wet blocking or steam blocking will help even out your stitches, shape the garment, and make the ribbing more defined.
- Sew on the buttons opposite the buttonholes.
Sizing Notes for 1-3 Years:
This pattern is designed to fit an average 1-3 year old. However, children grow at different rates. To ensure a good fit, consider these general measurements:
- Chest Circumference: Approximately 20-22 inches (51-56 cm)
- Cardigan Length (from shoulder to hem): Approximately 10-12 inches (25-30 cm) for a short cardigan.
- Sleeve Length (from underarm): Approximately 7-9 inches (18-23 cm)
Feel free to adjust the number of rows for the yoke, body, and sleeves to achieve your desired length and fit. It’s always a good idea to periodically hold the growing cardigan up to your child (or a similar-sized garment) to check the progress.
Tips for Success:
- Use stitch markers liberally: They are invaluable for keeping track of your corners in the yoke and for marking your first and last stitches in rows.
- Count your stitches: Especially during the yoke increases and after separating for the sleeves, regularly counting your stitches will prevent errors and ensure symmetry.
- Don’t be afraid to adjust: If the cardigan seems too small or too large, make adjustments as you go. Crochet is forgiving, and you can always undo a few rows if needed.
- Choose the right yarn: A soft, non-irritating yarn is essential for baby and toddler garments. Consider machine-washable options for easy care.
- Consider a hood: For extra warmth, you could adapt this pattern to add a simple hood by picking up stitches around the neckline and working in rows or rounds.
Crocheting a garment for a child is a labor of love. Take your time, enjoy the process, and soon you’ll have a beautiful, handmade short winter cardigan that will keep your little one snug and stylish all season long!
Video tutorial:


