
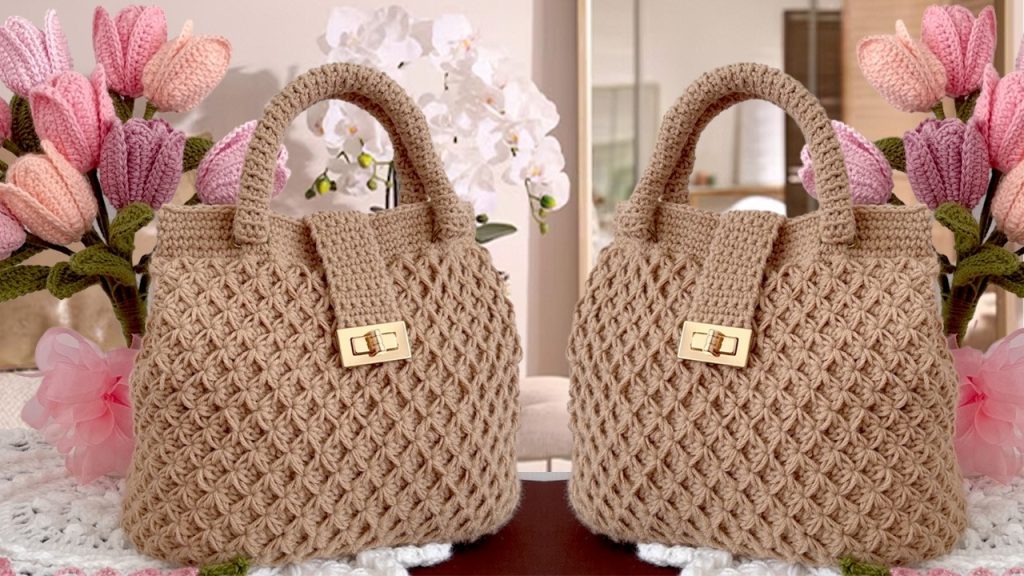
Designing a new crocheted handbag is a fantastic creative endeavor. Unlike following a pattern, you’re the architect here, deciding on everything from the shape and size to the stitch pattern and hardware. This guide will walk you through the entire process, helping you bring your unique handbag vision to life.
Phase 1: Conceptualization & Inspiration
This is where your idea begins to take shape. Don’t skip this crucial first step; a clear vision will streamline your design process significantly.
- Find Your Spark:
- Inspiration Gathering: Look everywhere! Scroll through fashion blogs, browse Pinterest, check out boutique windows, or even observe bags people carry on the street. Pay attention to shapes, sizes, textures, and colors that catch your eye. Do you like structured totes, slouchy hobos, elegant clutches, or practical crossbody bags?
- Trend Awareness: While you’re creating something unique, it helps to be aware of current handbag trends. Are chunky textures in? Are minimalist designs popular? Knowing this can inform your choices, even if you decide to go in a completely different direction.
- Define Your User: Who is this bag for? Is it for you? A friend? A potential customer? Consider their lifestyle. Do they need a large bag for work essentials, a small one for evenings out, or something durable for daily errands?
- Functionality First:
- What Needs to Fit? This is crucial. Will it hold a laptop, a water bottle, a large wallet, or just a phone and keys? This will dictate the bag’s overall size.
- Accessibility: How easy should it be to get items in and out? Do you need quick-access pockets, or a very secure main compartment?
- Carrying Style: How will the bag be carried? Shoulder, crossbody, handheld, or a combination? This will determine strap length, width, and attachment points.
- Sketching Your Vision:
- Rough Outlines: Start with quick, loose sketches. Don’t worry about perfection. Draw different silhouettes, flap designs, handle placements, and pocket ideas.
- Detailed Drawings: Once you have a few promising concepts, refine them. Draw front, back, side, and top views. Try to add basic dimensions or proportions.
- Annotate: Label parts, note down stitch ideas (e.g., “front in single crochet, sides in half double crochet”), and mark where hardware might go.
Phase 2: Material Selection & Stitch Experimentation
The yarn and stitch pattern you choose will profoundly impact the bag’s look, feel, and structure.
- Yarn Choice – The Foundation:
- Fiber Content:
- Cotton or Cotton Blends: Excellent for bags. They offer good stitch definition, are sturdy, and don’t stretch much.
- Acrylic: Widely available, affordable, vast color range, and often machine washable. Can be a bit stretchier than cotton.
- T-shirt Yarn: Creates a very chunky, sturdy bag with a modern, substantial feel.
- Raffia/Paper Yarn: Ideal for structured, lightweight summer bags with a natural texture.
- Recycled/Eco-Friendly Yarns: If sustainability is a priority, explore yarns made from recycled plastics or natural fibers.
- Yarn Weight: This determines the density and drape.
- Worsted (Aran) or Bulky: Great for quick projects and sturdy bags.
- Super Bulky: For very chunky, quick-to-make designs.
- Fingering/Sport: Generally not ideal for the main body of a bag unless held double or triple, or if you want a very delicate, open-work clutch.
- Quantity: Always buy more yarn than you think you’ll need. It’s better to have a little extra than to run out mid-project and not find the exact dye lot.
- Fiber Content:
- Hook Size:
- Always refer to your yarn label for a recommended hook size.
- For bags, you often want a smaller hook size than recommended to create a denser, sturdier fabric that holds its shape well and prevents items from poking through. Experiment!
- Stitch Pattern Play:
- Structure vs. Drape:
- Single Crochet (sc): Creates a very dense, sturdy fabric, perfect for structured bags.
- Half Double Crochet (hdc): Offers a good balance of density and drape.
- Double Crochet (dc) / Treble Crochet (tr): Creates a looser, drapier fabric. Best for slouchy bags or when worked with a very small hook.
- Textural Stitches:
- Moss Stitch (Granite Stitch): Alternating sc and ch-1 spaces. Creates a lovely, subtle texture.
- Basketweave Stitch: Creates a woven, textured look, often quite thick.
- Post Stitches (fpdc, bpdc): Can create ribbed effects or defined textures.
- Puff Stitches, Bobbles, Popcorn Stitches: Add significant texture and dimension.
- Practice Swatches: Before starting your bag, make several swatches with different stitch patterns and hook sizes using your chosen yarn. See how they feel, how much they stretch, and how they hold their shape. This is your personal “gauge swatch” for feel and look.
- Structure vs. Drape:
Phase 3: Pattern Drafting & Prototyping (The Test Drive)
Now it’s time to translate your ideas into a working model.
- Rough Pattern Drafting:
- Measurements: Based on your sketches and desired functionality, determine the approximate dimensions for each main part of your bag (front/back panel, side/bottom gussets, flap, strap).
- Rectangles & Basic Shapes: Many bags can be broken down into simple rectangular or trapezoidal pieces. Even a round bag starts with a circle.
- Consider Construction: Think about how the pieces will join. Will you crochet them flat and seam them? Or work in the round?
- The First Prototype (The “Muslin”):
- Use Inexpensive Yarn: Don’t use your beautiful, expensive yarn for the first try. Grab some cheap acrylic yarn in a similar weight.
- Crochet Your Pieces: Start crocheting the main components based on your rough pattern.
- Work in the round for seamless sides: For a tube-like bag, you might crochet a base oval and then continue in continuous rounds for the body.
- Work flat and seam: For a more structured, boxy bag, you’ll crochet individual panels (front, back, sides, bottom) and then seam them together.
- The Flap: If your bag has a flap, decide if it’s crocheted directly onto the back panel (like the one-piece purse) or a separate piece attached later.
- Assembly: Once the pieces are crocheted, use stitch markers or even yarn scraps to “pin” them together. See how they fit.
- Evaluate:
- Does the size feel right?
- Are the proportions balanced?
- Do the sides meet neatly?
- Is the flap the correct length?
- Does the strap feel like it will be comfortable?
- Is the stitch pattern holding its shape as desired?
- Make Adjustments: This prototype stage is crucial for identifying flaws. Adjust your stitch counts, row counts, or overall dimensions. Don’t be afraid to unravel and re-do sections.
Phase 4: Construction & Finishing Touches
With a refined prototype, you’re ready to create the final product.
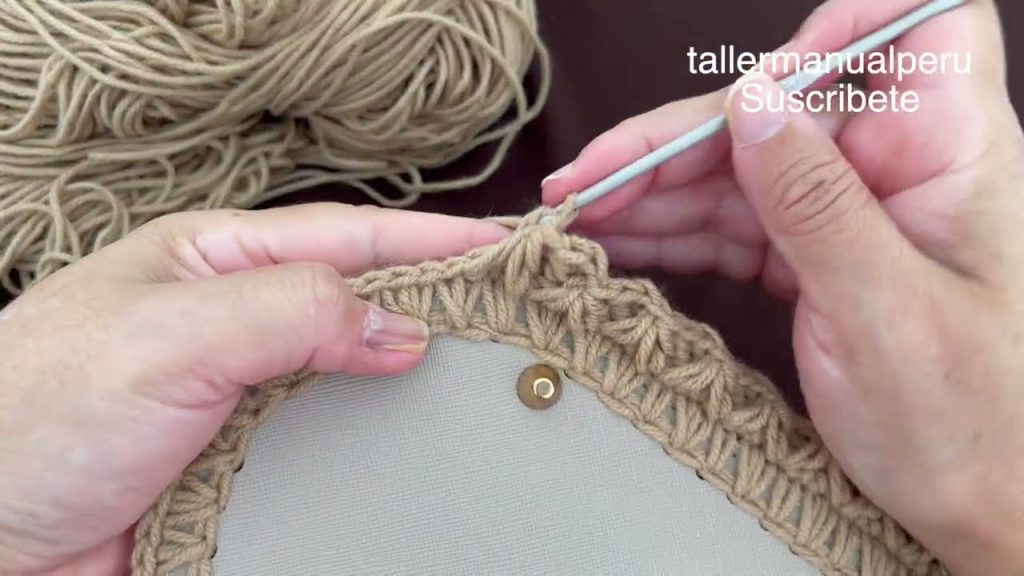
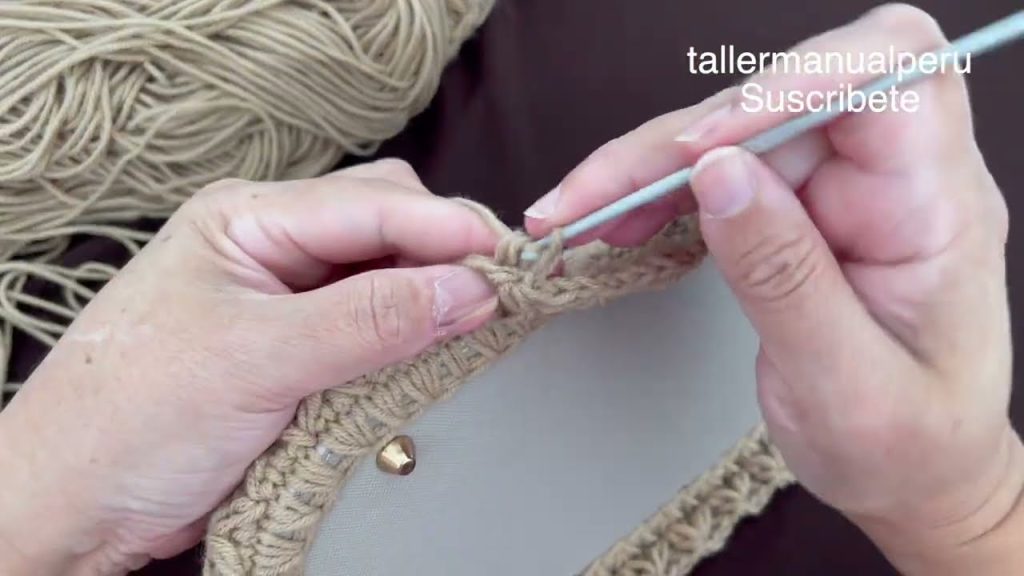
- Crocheting the Final Bag:
- Patience and Precision: Take your time with your chosen yarn. Count your stitches and rows carefully. Consistent tension is key for a professional look.
- Seaming: If your bag has seams, choose a method that creates a neat, strong join (e.g., slip stitch seam, whip stitch, mattress stitch).
- Reinforcement:
- For Structure: Consider adding a plastic canvas insert to the bottom for a flat, sturdy base. You can also line the entire bag with fabric for extra structure and durability.
- For Stress Points: Crochet extra rows of single crochet at the top opening or where straps attach for added strength.
- Adding the Strap/Handles:
- Crocheted Straps: You can crochet a long strap directly onto the bag or create a separate piece and sew it on securely. Vary the stitch (e.g., dense single crochet) and width for comfort.
- Hardware Integration: D-rings, O-rings, and swivel clasps can elevate your design. Integrate them as you crochet or attach them later.
- Store-Bought Handles: Leather, bamboo, or metal handles can give your crocheted bag a polished, high-end look. Sew them on securely.
- Hardware & Closures:
- Magnetic Snaps: Easy to install and provide a clean closure.
- Buttons & Loops: A classic crochet closure. Crochet a small chain loop on the flap that fits over a decorative button sewn to the bag front.
- Zippers: Can be hand-sewn into the top opening of your crocheted bag or into a fabric lining.
- Turn Locks/Twist Locks: Add a sophisticated touch, often used on flaps.
- Lining (Highly Recommended):
- Why Line? A fabric lining protects your crocheted stitches from stretching and wear, prevents small items from slipping through gaps, and gives your bag a much more finished, professional appearance.
- How to:
- Measure the dimensions of your finished crocheted bag.
- Cut fabric pieces (e.g., cotton, broadcloth, satin) slightly larger than your bag’s dimensions, allowing for seam allowances.
- Sew the fabric pieces into a bag shape that fits snugly inside your crocheted bag. Add interior pockets to the lining before assembling it, if desired.
- Insert the fabric lining into your crocheted bag. Fold under the raw top edge of the lining and hand-stitch or machine-stitch it securely to the inside of your crocheted bag just below the top opening.
- Finishing Touches:
- Weave in Ends: This is critical! Use a yarn needle to weave in all loose ends securely and invisibly. A poorly woven end can unravel your hard work.
- Blocking (Optional but helpful): Lightly dampen your finished bag, shape it to your desired dimensions, and let it air dry completely. This can even out stitches and improve the overall look.
- Embellishments: Add tassels, pompoms, charms, or embroidered details to truly personalize your new model.
Phase 5: Documentation & Future Designs
You’ve created a new handbag model! Now, make sure you can replicate it or build upon it.
- Document Your Design:
- Write it Down: Immediately after finishing, jot down all the details: yarn type and weight, hook size, starting chain, stitch counts per row/round for each section, assembly notes, and hardware used. This is your “pattern.”
- Take Photos: Capture clear photos from all angles. These are great for your personal portfolio and for remembering your design.
- Refine & Replicate:
- Test It Out: Use your new bag! See how it holds up, what you love about it, and what you might change next time.
- Version 2.0: Your first model is a learning experience. You might decide to make a slightly larger version, use a different stitch, or alter the flap design. Each new bag builds on your skills and creativity.
Designing and crocheting your own handbag model is a deeply satisfying process. It allows you to express your unique style and create something truly bespoke. Enjoy the journey of bringing your vision from concept to a beautifully handmade accessory!
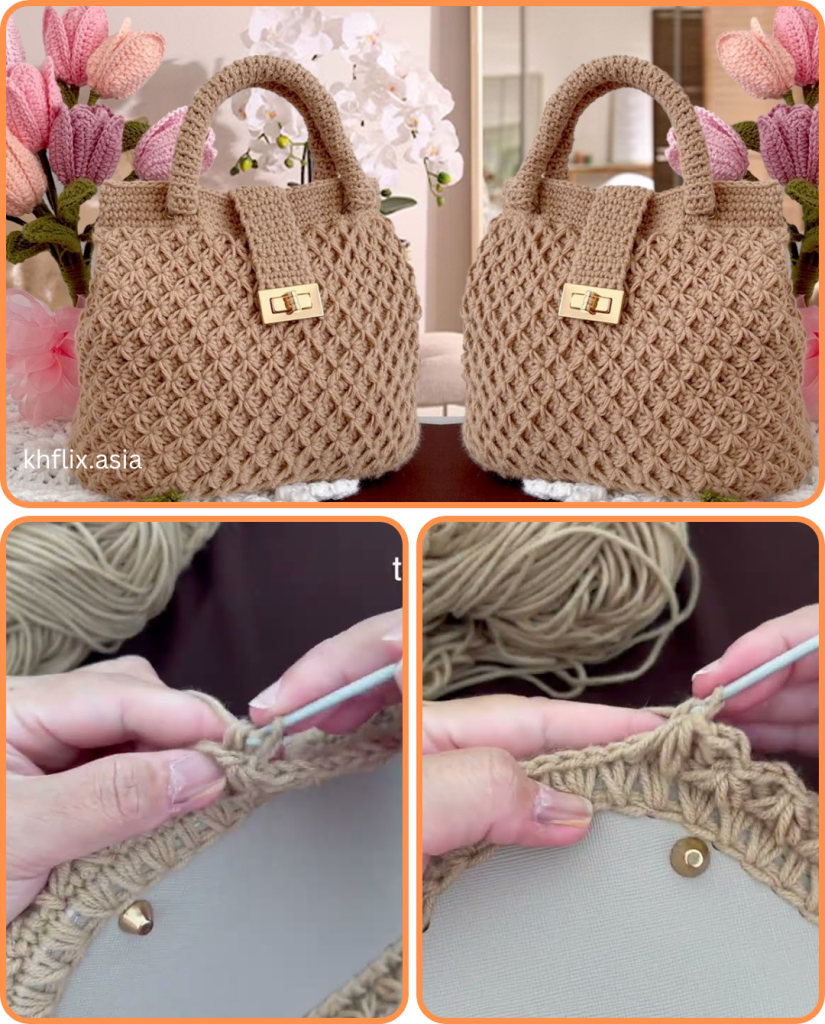
Video tutorial:


