
Crochet Your First Phone Bag: A Simple Step-by-Step Tutorial for Beginners
In today’s digital age, our phones are almost always by our side. While pockets are great, sometimes you need a more secure and stylish way to carry your device, especially when you’re on the go and want to keep your hands free. Enter the crochet phone bag! This project is not only incredibly practical but also a fantastic starting point for crochet beginners.
If you’re new to the world of yarn and hooks, don’t worry. This tutorial breaks down each step, using basic crochet stitches that are easy to learn. You’ll create a charming, custom-made phone bag in no time, building your confidence with every stitch.

Why a Crochet Phone Bag is Perfect for Beginners
- Uses Basic Stitches: This project primarily relies on chain (ch), slip stitch (sl st), and single crochet (sc) – the foundational stitches of crochet.
- Quick to Finish: You can often complete a phone bag in just a few hours, giving you a satisfying sense of accomplishment.
- Minimal Yarn: It’s a great way to use up leftover yarn scraps, making it a cost-effective and eco-friendly project.
- Practical Outcome: You’ll end up with a genuinely useful item that you can use daily or give as a thoughtful handmade gift.
- Customizable: Once you learn the basic shape, you can easily experiment with different colors, stripes, or add simple embellishments.
What You’ll Need to Get Started
Gathering your materials beforehand will make your crocheting experience smooth and enjoyable.
- Yarn: Choose a worsted weight (Aran) or DK (double knitting) cotton or acrylic yarn. Cotton offers good structure and durability, while acrylic is soft and comes in many colors. Pick a color you love! You’ll only need a small amount, typically less than one skein.
- Crochet Hook: Check your yarn label for the recommended hook size. For worsted weight, a 4.0mm (G/6) or 5.0mm (H/8) hook is usually a good fit. For DK, a 3.5mm (E/4) or 4.0mm (G/6).
- Yarn Needle (Tapestry Needle): Essential for weaving in loose ends neatly.
- Scissors: For cutting yarn.
- Stitch Marker (Optional but Recommended): Helpful for marking the beginning of rounds, especially if you’re new to working in the round.
- Your Phone: To test the fit as you go!
Understanding Basic Crochet Stitches
Before we begin, here’s a quick refresher on the stitches we’ll be using:
- Chain (ch): Yarn over (YO), pull hook through loop on hook. Creates the foundation row.
- Slip Stitch (sl st): Insert hook into stitch, YO, pull through stitch and loop on hook. Used for joining or moving across stitches without adding height.
- Single Crochet (sc): Insert hook into stitch, YO, pull up a loop (2 loops on hook), YO, pull through both loops on hook. This is a very common, compact stitch.
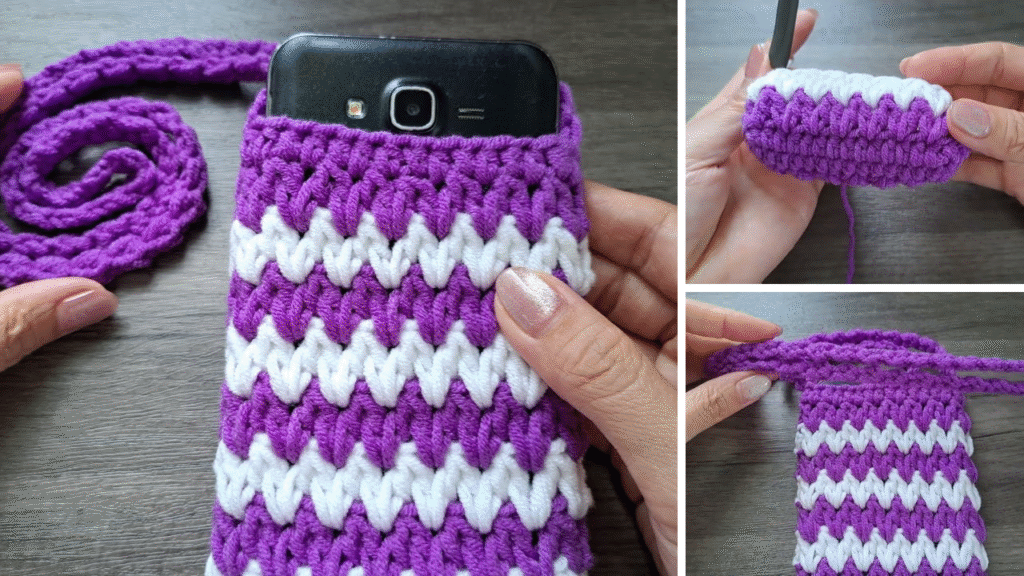
Easy Crochet Phone Bag Tutorial: Step-by-Step
This pattern creates a simple pouch. You’ll need to adjust the starting chain based on your phone’s width.
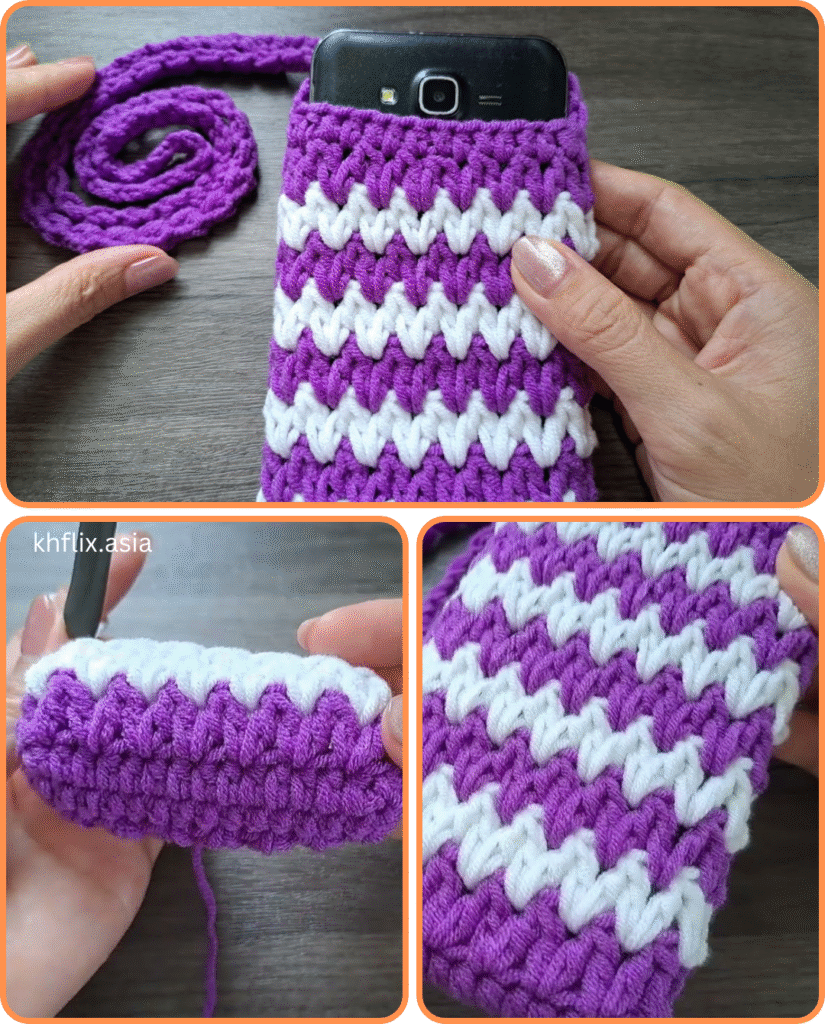
Step 1: The Base (Foundation Chain and First Round)
We’ll start by making an oval base, which forms the bottom of your phone bag.
- Measure Your Phone: Hold your phone horizontally. Measure its width.
- Make a Chain: Create a chain (ch) that is about 1 inch (2.5 cm) shorter than the width of your phone. For example, if your phone is 3 inches wide, chain 2 inches. My sample uses a ch 12 for a standard smartphone.
- Round 1:
- Work 1 single crochet (sc) in the 2nd chain from your hook.
- Work 1 sc in each of the next chains until you reach the very last chain.
- In the last chain, work 3 sc into that same stitch. This helps turn the corner smoothly.
- Now, you’ll work down the other side of your starting chain. Work 1 sc into each stitch until you reach the very first chain you crocheted into.
- Work 2 sc into that first chain (the same one where you worked your very first sc).
- Join with a slip stitch (sl st) to the first sc you made in this round.
Step 2: Building Up the Sides (Creating the Pouch)
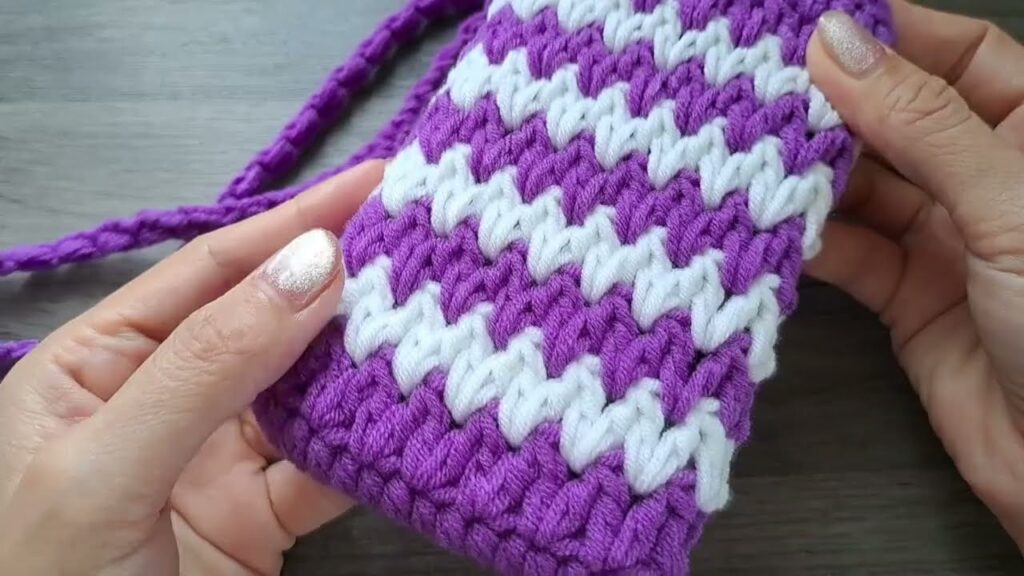
This part forms the body of the bag, making it tall enough for your phone. We’ll work in continuous rounds, meaning you won’t join at the end of each round unless specified. This creates a seamless look.
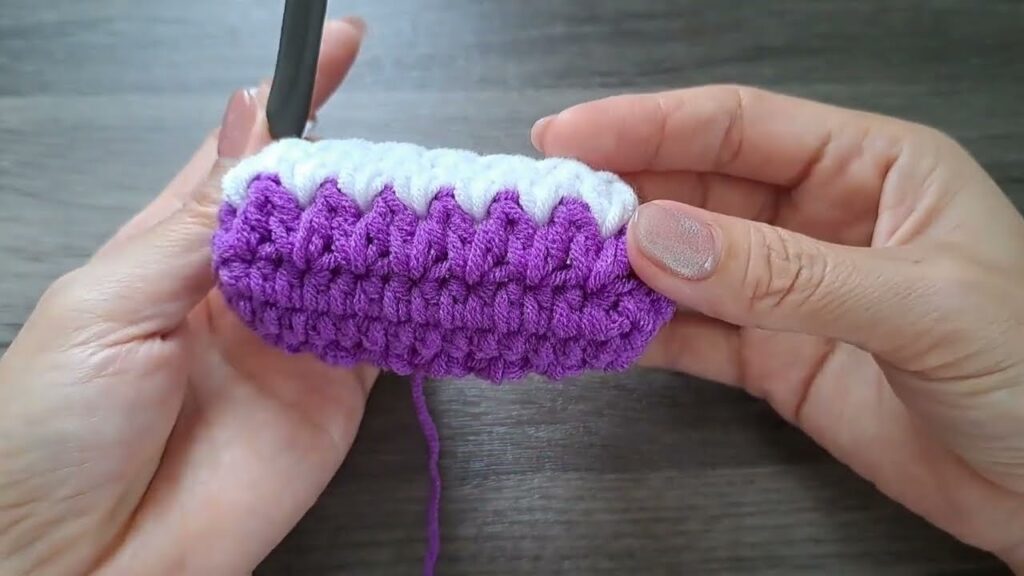
- Round 2:Chain 1 (ch 1) (this doesn’t count as a stitch). Work 1 single crochet (sc) into the back loop only (BLO) of each stitch around. This creates a neat, defined edge between the base and the sides of your bag.
- Tip: Use a stitch marker in the first sc of this round to help you keep track of where your rounds begin.
- Continue with Single Crochet Rounds: For all subsequent rounds, work 1 single crochet (sc) into both loops of each stitch around. Continue in a spiral, without joining, until your phone bag is tall enough to comfortably hold your phone.
- Periodically insert your phone into the bag to check the height. You want it to be snug but easy to get in and out.
Step 3: Finishing the Top Edge (Optional)
A simple slip stitch round can create a neat finish.
- Slip Stitch Round (Optional): Once your bag is the desired height, work 1 slip stitch (sl st) into each stitch around.
- Join with a sl st to the first sl st you made in this round. This finishes the top edge cleanly.
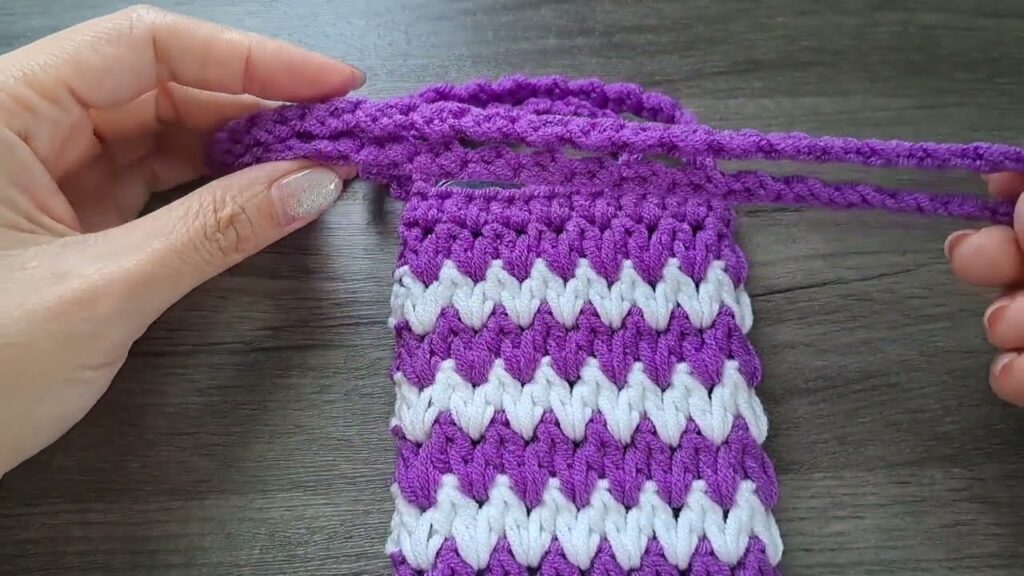
Step 4: Making the Strap
Now, for the part that makes it a bag! You can make a simple strap or a longer cross-body strap.
- Determine Strap Length: Decide how long you want your strap to be. A good estimate is to measure from one side of your bag, over your shoulder, to the other side.
- Chain Your Strap: From where you finished your bag, chain (ch) a length that equals your desired strap length. For example, ch 60-80 for a wristlet, or ch 120-150 for a cross-body strap.
- Attach the Strap: Carefully lay your bag flat. Once you’ve chained your desired length, slip stitch (sl st) into a stitch on the opposite side of the phone bag opening. Make sure the strap isn’t twisted.
- If you prefer a thicker strap, you can then slip stitch (sl st) back along your chain, working into the back bumps of the chain stitches, or work single crochet (sc) stitches back along the chain.
Step 5: Fasten Off and Weave in Ends
Almost done! This is where you clean up your work.
- Fasten Off (FO): Cut your yarn, leaving a tail of about 6 inches (15 cm). Yarn over your hook, pull the tail completely through the loop on your hook, and pull tight to secure the stitch.
- Weave in Ends: Thread your yarn tail through your yarn needle. Carefully weave the tail back and forth through several stitches on the inside of your phone bag. Do this with all loose ends to hide them and prevent unraveling.
Tips for Beginner Success
- Check Your Gauge (Looseness/Tightness): Don’t worry too much about exact gauge for this project, but be mindful of your tension. If your stitches are too tight, your phone might not fit; if they’re too loose, it could fall out.
- Use a Stitch Marker: Seriously, it’s a game-changer when working in the round. It helps you identify the start of each new round.
- Don’t Be Afraid to Undo: Everyone makes mistakes! If a round doesn’t look right, gently pull out your hook and unravel the stitches until you’re back to where you need to be. It’s part of the learning process.
- Watch Video Tutorials: If a stitch or step is confusing, search for “how to single crochet” or “how to join crochet in round” on YouTube. Visual aids are incredibly helpful.
- Customize It! Once you’ve made your first basic bag, try adding stripes by changing colors every few rounds, or sew on a cute button or applique for extra flair.
You’ve just created your very own handmade phone bag! This project is a fantastic introduction to basic crochet techniques and will give you the confidence to tackle more complex patterns in the future. Enjoy showing off your new, custom accessory!
Video tutorial:


