
Cute and Easy Crochet Baby Shoes: A Perfect Project for Beginners
There’s something incredibly heartwarming about tiny baby shoes. Their miniature size, the promise of little feet taking their first steps, and the endless possibilities for adorning them make them an irresistible subject for crafters. For those who love the art of crochet, baby shoes offer a delightful and surprisingly simple project, even for beginners. Not only are they quick to make, but they also provide an excellent opportunity to learn fundamental crochet stitches while creating something both adorable and practical.
Why Crochet Baby Shoes?
Crocheted baby shoes are a popular choice for a multitude of reasons:
- Quick to Make: Unlike larger crochet projects like blankets or garments, a pair of baby shoes can often be completed in just a few hours, making them perfect for last-minute gifts or when you need a quick crafting fix.
- Beginner-Friendly: Many patterns for baby shoes utilize basic stitches like single crochet (sc), half double crochet (hdc), and double crochet (dc), making them an ideal starting point for those new to crochet. You’ll gain confidence in your stitches and learn how to work in rounds, create shaping, and finish off your work neatly.
- Customizable: The possibilities for customization are endless! You can play with different yarn colors, add embellishments like bows, buttons, appliques, or even embroider tiny details. This allows you to create truly unique and personalized gifts.
- Thoughtful Gifts: Handmade baby shoes are a cherished gift for baby showers, christenings, or welcoming a new arrival. They show an extra level of care and effort that store-bought items simply can’t replicate.
- Eco-Friendly: Using natural fibers like cotton or bamboo yarn makes for breathable and gentle shoes for delicate baby skin, and they are a more sustainable option than mass-produced synthetic alternatives.
Essential Supplies
Before you begin, gather these basic crochet supplies:
- Yarn: For baby items, it’s crucial to choose a soft, washable yarn. Cotton, bamboo, or acrylic yarns are excellent choices. Look for yarns labeled “DK” (double knitting) or “light worsted” for a good gauge for baby shoes. You’ll typically only need one skein, often less, for a pair.
- Crochet Hook: The yarn label will recommend a hook size, usually ranging from 3.5mm to 4.5mm for DK weight yarn. It’s a good idea to have a few sizes on hand to adjust your gauge if needed.
- Yarn Needle (Tapestry Needle): Essential for weaving in ends neatly and seamlessly.
- Scissors: For cutting yarn.
- Stitch Markers (Optional but Recommended): Helpful for marking the beginning of rounds or specific stitches, especially for beginners.
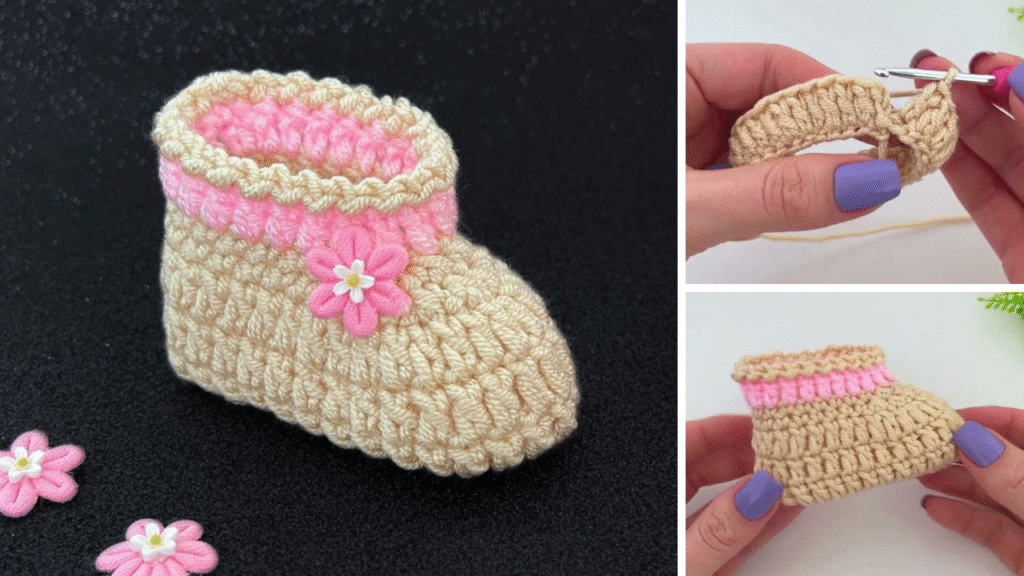
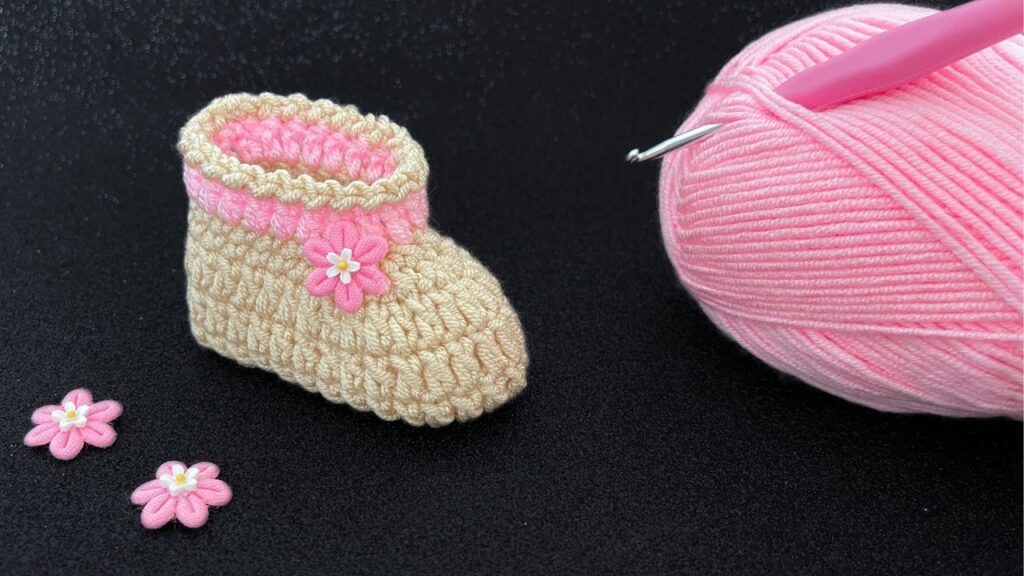
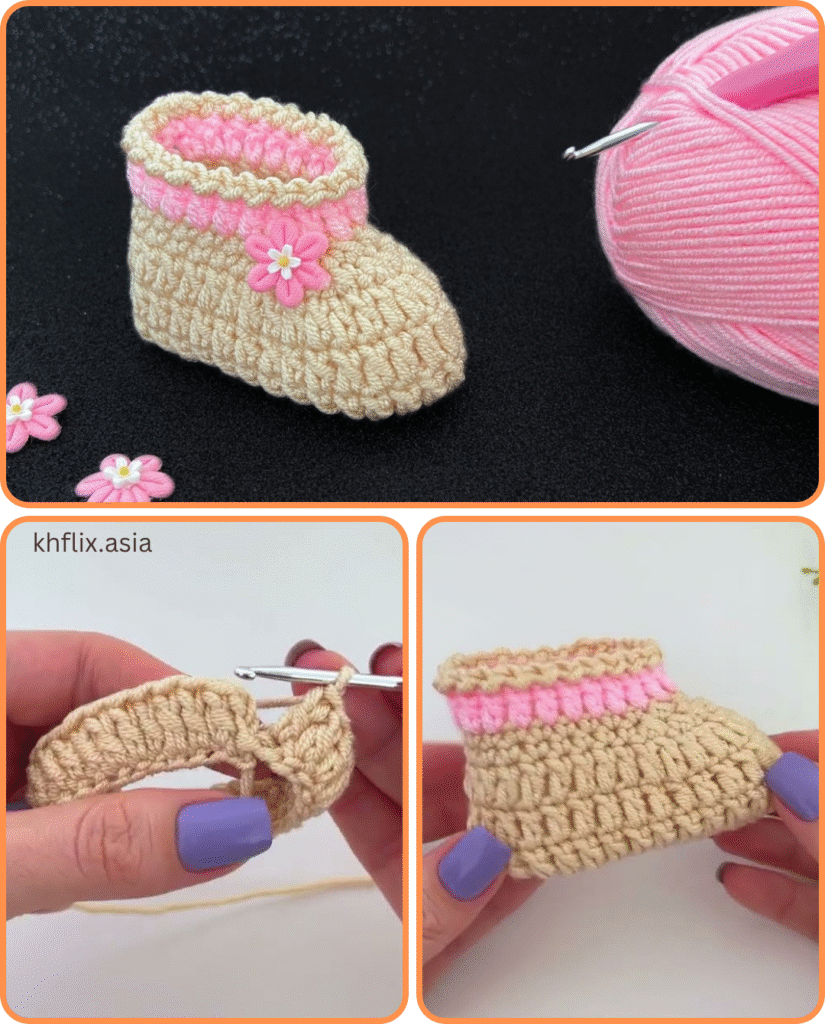
A Basic Crochet Baby Shoe Pattern (Newborn Size)
This simplified pattern provides a foundation for a classic baby shoe. Once you master this, you can easily adapt it with different stitches and embellishments.
Abbreviations:
- ch: chain
- sl st: slip stitch
- sc: single crochet
- hdc: half double crochet
- dc: double crochet
- inc: increase (work 2 stitches into the same stitch)
- BLO: back loop only
- FO: finish off
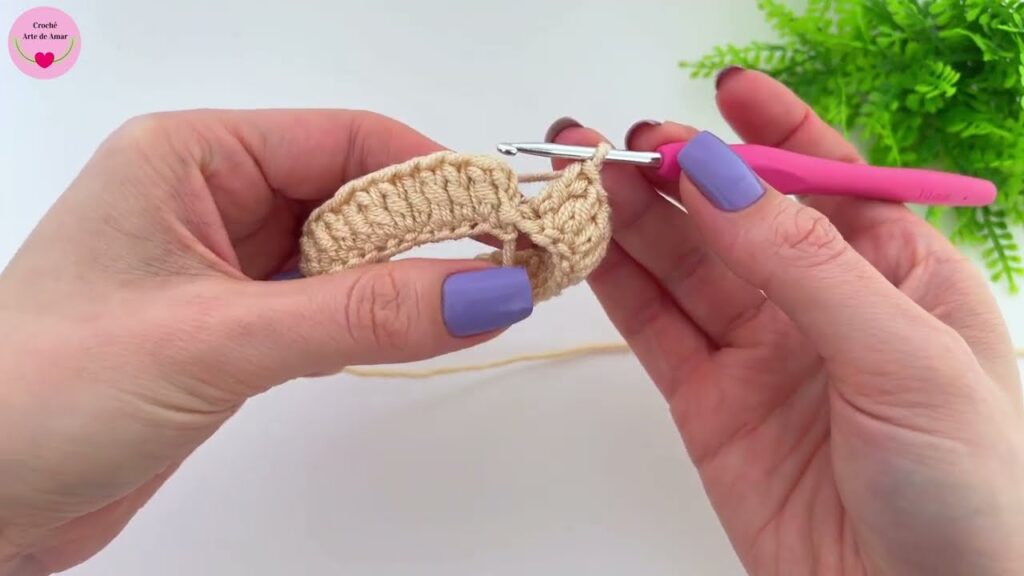
Sole:
- Ch 10.
- Round 1: Sc in the 2nd ch from hook, sc in next 7 ch, 3 sc in last ch. Working down the other side of the chain, sc in next 7 ch, 2 sc in last ch. (20 stitches)
- Round 2: Ch 1, 2 sc in first sc, sc in next 7 sc, 2 sc in next 3 sc, sc in next 7 sc, 2 sc in next 2 sc. Join with a sl st to first sc. (26 stitches)
- Round 3: Ch 1, sc in first sc, 2 sc in next sc, sc in next 8 sc, (2 sc in next sc, sc in next sc) 3 times, sc in next 8 sc, (2 sc in next sc, sc in next sc) 2 times. Join with a sl st to first sc. (32 stitches)
Sides of the Shoe:
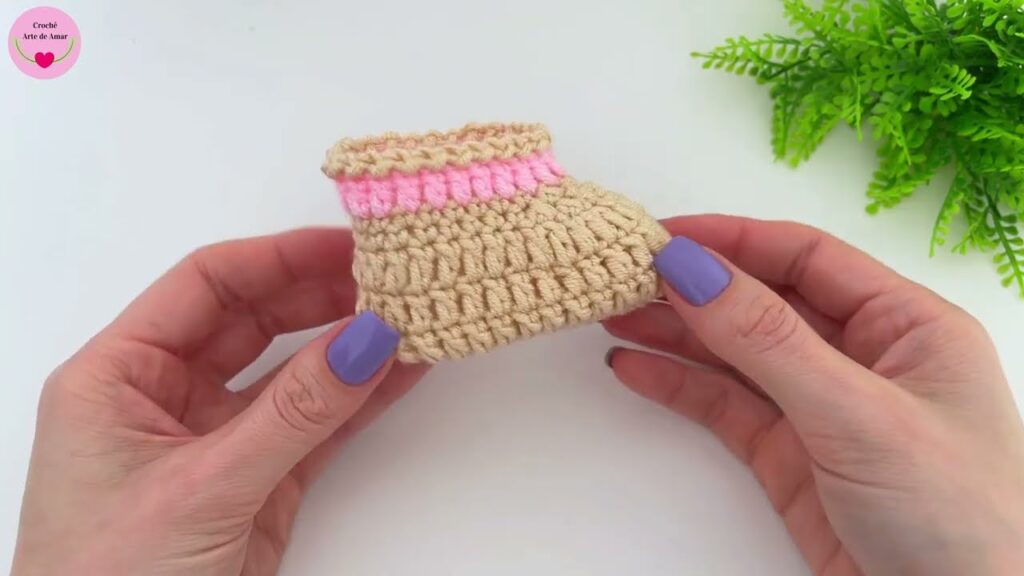
- Round 4: Ch 1, sc in BLO around. Join with a sl st to first sc. (32 stitches) This creates a defined edge for the sole.
- Round 5-6: Ch 1, sc around. Join with a sl st to first sc. (32 stitches)
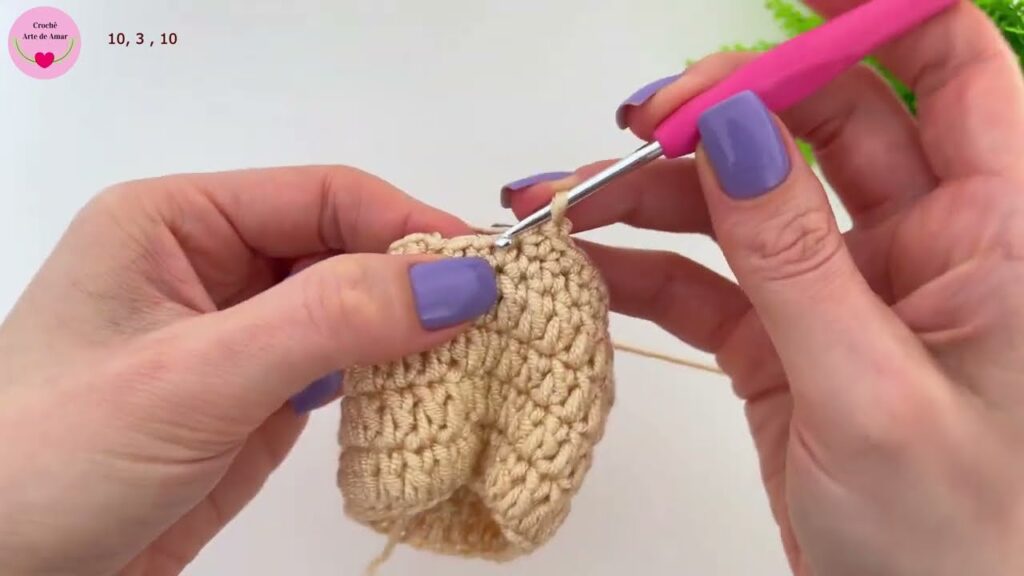
Toe Shaping:
- Round 7: Ch 1, sc in next 10 sc, (sc2tog) 6 times, sc in next 10 sc. Join with a sl st to first sc. (26 stitches)
- Round 8: Ch 1, sc in next 8 sc, (sc2tog) 5 times, sc in next 8 sc. Join with a sl st to first sc. (21 stitches)
Ankle Cuff (Optional):
You can leave the shoe as is for a slip-on style, or add a small cuff.
- Round 9: Ch 2 (counts as hdc), hdc around. Join with a sl st to top of ch 2. (21 stitches)
- Round 10: Ch 1, sc around. Join with a sl st to first sc. (21 stitches)
Finishing:
- FO, leaving a long tail.
- Weave in all ends securely using your yarn needle.
- Repeat for the second shoe.
Tips for Success
- Gauge: While not as critical as for garments, checking your gauge (the number of stitches and rows per inch) will help ensure your shoes are the correct size. If your shoes are too small, try a larger hook; if too large, use a smaller hook.
- Read the Pattern Carefully: Before you start, read through the entire pattern to familiarize yourself with the steps and any special instructions.
- Practice Your Stitches: If you’re new to a particular stitch, practice it a few times before incorporating it into your project.
- Use Stitch Markers: Especially when working in the round, stitch markers are invaluable for keeping track of the beginning of your rounds and preventing mistakes.
- Don’t Be Afraid to Undo: Everyone makes mistakes! Don’t hesitate to unravel a few stitches or even a whole round if something doesn’t look right. It’s part of the learning process.
- Block Your Shoes (Optional): Lightly dampen your finished shoes and gently shape them to the desired form. Let them air dry. This helps even out stitches and gives a more polished look.
Adding Your Personal Touch
Once you’ve mastered the basic baby shoe, let your creativity shine!
- Color Blocking: Use two or more contrasting colors for a vibrant look.
- Stripes: Add simple stripes by changing colors every few rounds.
- Appliques: Crochet small flowers, stars, or animals and sew them onto the shoes.
- Buttons or Bows: Sew on cute buttons or tie small satin bows for an elegant touch.
- Embroidery: Embroider tiny dots, stars, or even the baby’s initial onto the toe.
- Different Stitches: Experiment with different textures by using stitches like puff stitch, bobble stitch, or shell stitch for a more intricate design.
Crocheting baby shoes is a truly rewarding experience. The process is enjoyable, the results are adorable, and the joy they bring to both the maker and the recipient is immeasurable. So grab your hook and yarn, and embark on this delightful journey into the world of cute and easy crochet baby shoes!
Video tutorial:


