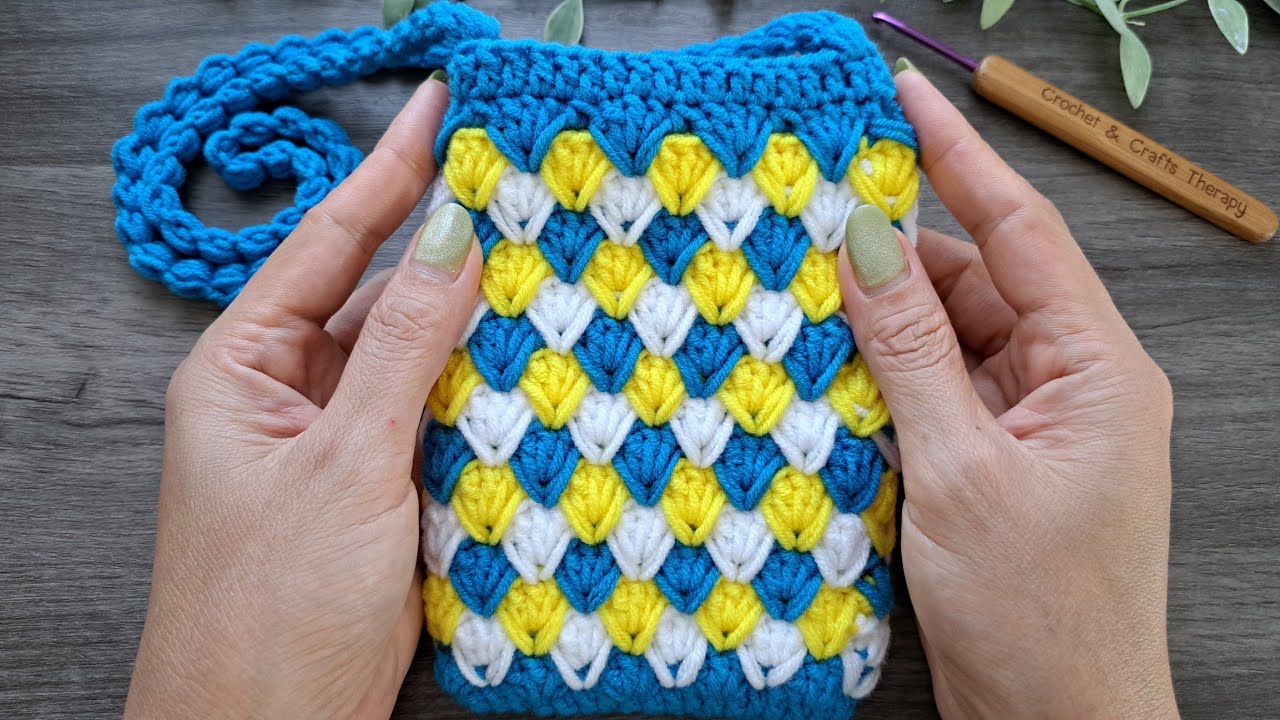
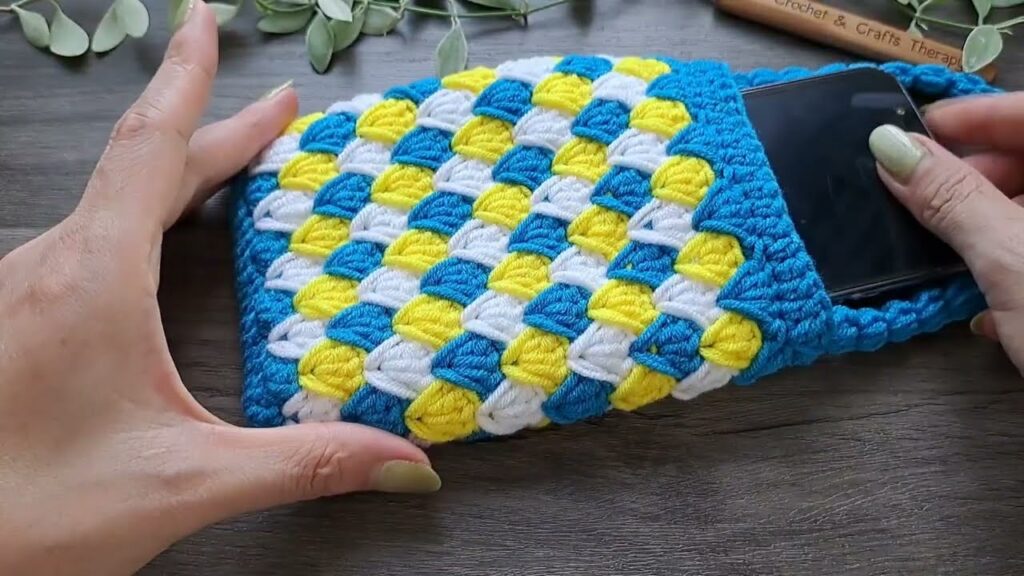
Crochet isn’t just for cozy blankets and baby booties—it’s also a fantastic way to make functional, fashionable accessories like the mobile phone crossbody bag. This compact and hands-free bag is perfect for carrying your phone, cards, and keys on the go, whether you’re heading out for errands or going for a walk.
This tutorial walks you through how to crochet a simple yet stylish mobile phone crossbody bag, even if you’re a beginner. The pattern uses basic stitches, and you can customize it with color, texture, or embellishments.

👜 Why Make a Crochet Crossbody Bag?
- Convenient & Lightweight: Perfect for minimal everyday use
- Great Gift Idea: Easy to personalize and gift to friends
- Fast & Fun: Can be completed in 1–2 hours
- Beginner Friendly: No complex shaping or stitching
- Eco-friendly: A reusable, handmade alternative to store-bought bags
🧶 Materials You’ll Need
| Item | Details |
|---|---|
| Yarn | Worsted weight (cotton or acrylic); approx. 50–100g |
| Hook | 4.0 mm (G/6) or as recommended on your yarn label |
| Scissors | For cutting yarn |
| Yarn needle | For weaving in ends |
| Stitch markers (optional) | To track round beginnings |
| Button or snap (optional) | For flap closure |
| Strap options | Yarn strap (crocheted), leather cord, or metal chain |
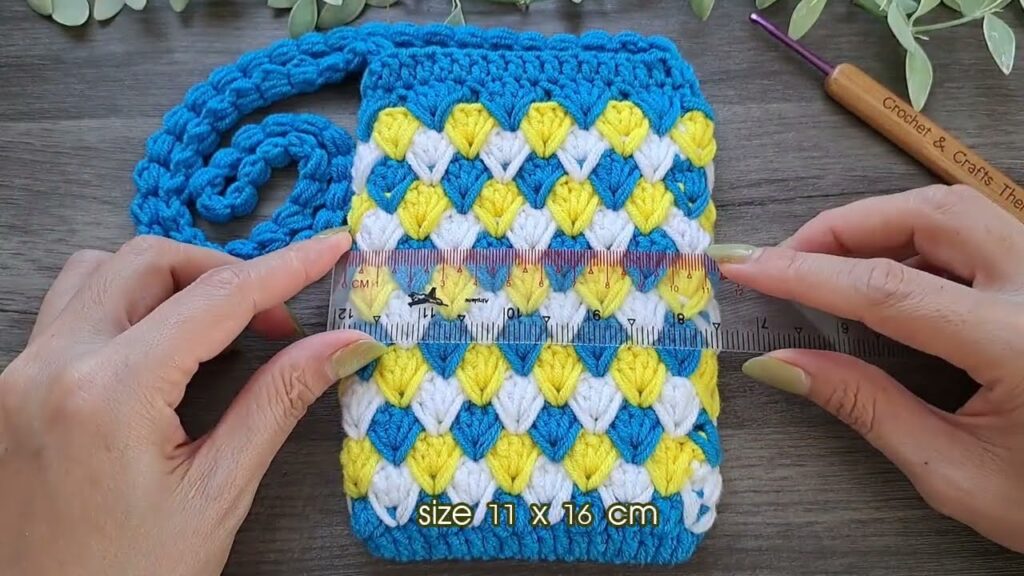
📏 Finished Size
- Approx. 4″ x 7″ (fits most smartphones)
- Strap Length: Adjustable; ~40–50 inches for crossbody
🧵 Basic Stitches Used (U.S. Terms)
If you need help with any stitch, I can explain it or provide visuals.
- ch – chain
- sc – single crochet
- hdc – half double crochet (optional)
- sl st – slip stitch
- sc2tog – single crochet two together (for shaping)
🪡 Step-by-Step: Crochet Phone Crossbody Bag
🔸 Step 1: Create the Base
Ch 16 (adjust based on your phone’s width)
Row 1:
- sc in 2nd ch from hook and across (15 sc)
- 3 sc in the last chain to curve the corner
- Work along the other side of the foundation chain: 1 sc in each chain, 2 sc in last ch
- Join with sl st to first sc (34 sc total)
This creates an oval-shaped base for your bag.
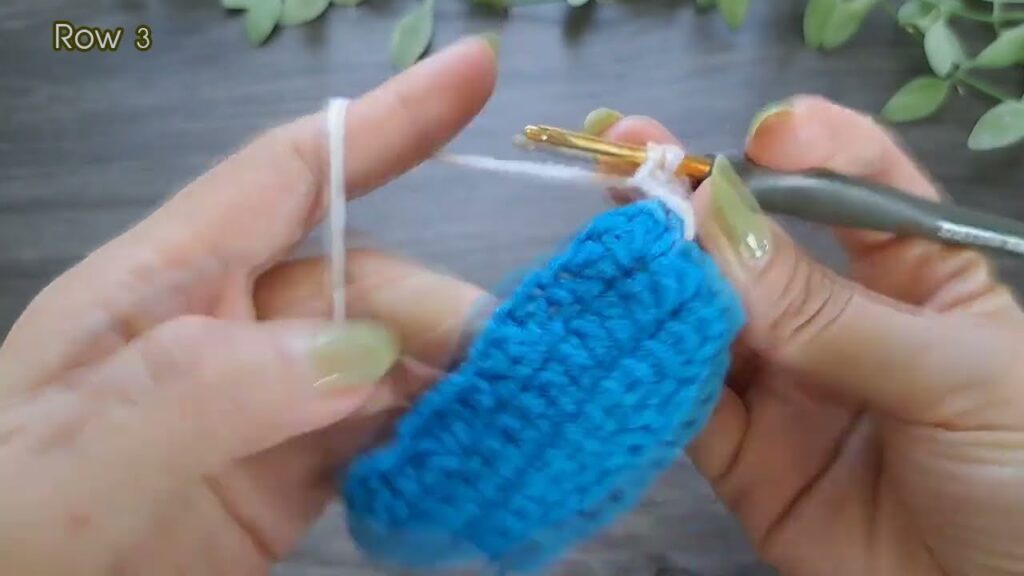
🔸 Step 2: Build the Body (Worked in the Round)
Rounds 2–20:
- ch 1, sc in each stitch around
- Join with sl st to first sc at the end of each round
You can also switch to hdc for taller stitches if you want a quicker build. Stop when the bag reaches desired height (typically 6.5–7 inches).
🔸 Step 3: Optional Flap Closure
Row 1 (Start flap at back center):
- ch 1, sc in next 12 stitches across the back
- ch 1, turn
Rows 2–6:
- sc across, ch 1, turn
Row 7:
- sc2tog at each end for a gentle taper, sc in middle sts, ch 1, turn
Row 8:
- Repeat sc2tog at ends, sc in middle
Row 9 (Buttonhole):
- sc 4, ch 2, skip 2, sc to end
Fasten off and weave in ends.
🔸 Step 4: Create the Strap
Option 1: Crochet Strap
Ch 150–180 (based on how long you want it)
- Row 1: sl st or sc in each chain
- Attach ends securely to each side of the bag
Option 2: Use Leather Cord or Chain
- Thread through corner holes or sew to the sides with a yarn needle
For added strength, stitch a few rows at the strap connection points.
🔸 Step 5: Add Finishing Touches
- Sew a button aligned with the flap’s buttonhole
- Add a snap if preferred for easier closure
- Lining: (optional) hand-sew a small fabric pouch and stitch it inside for added durability
- Embellish with appliqués, embroidery, tassels, or beads
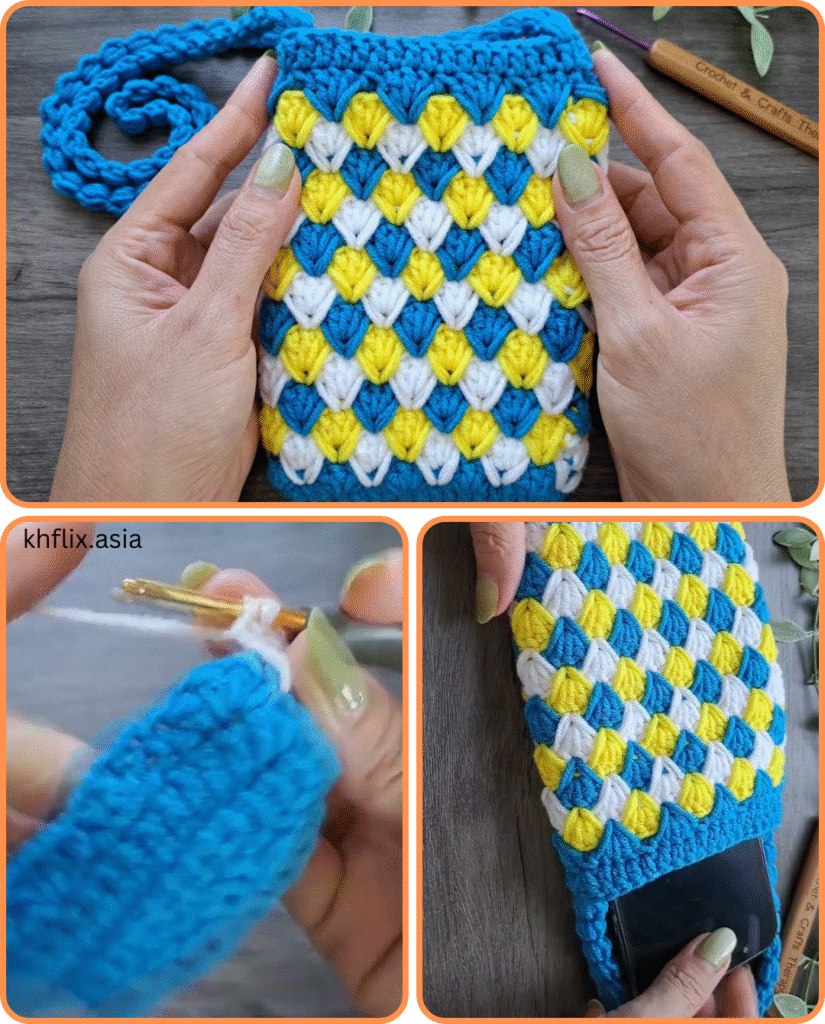
🌈 Customization Ideas
- Color Block: Use different colors for body, flap, and strap
- Texture: Alternate between sc and hdc rows or use puff/bobble stitches
- Appliqué: Add a crocheted flower or heart
- Mesh Version: Use chain spaces to create an open weave summer-style bag
🧼 Care Instructions
- Wash gently in cold water by hand or in a mesh laundry bag
- Air dry flat to preserve shape
- Avoid wringing or tumble drying
Video tutorial:
🧵 Final Thoughts
The crochet mobile phone crossbody bag is an ideal project for beginners and a practical accessory for anyone. It’s quick to make, endlessly customizable, and incredibly handy. Plus, once you’ve mastered the basic version, you can experiment with shapes, textures, and colors to make bags for every occasion—or every outfit!


