
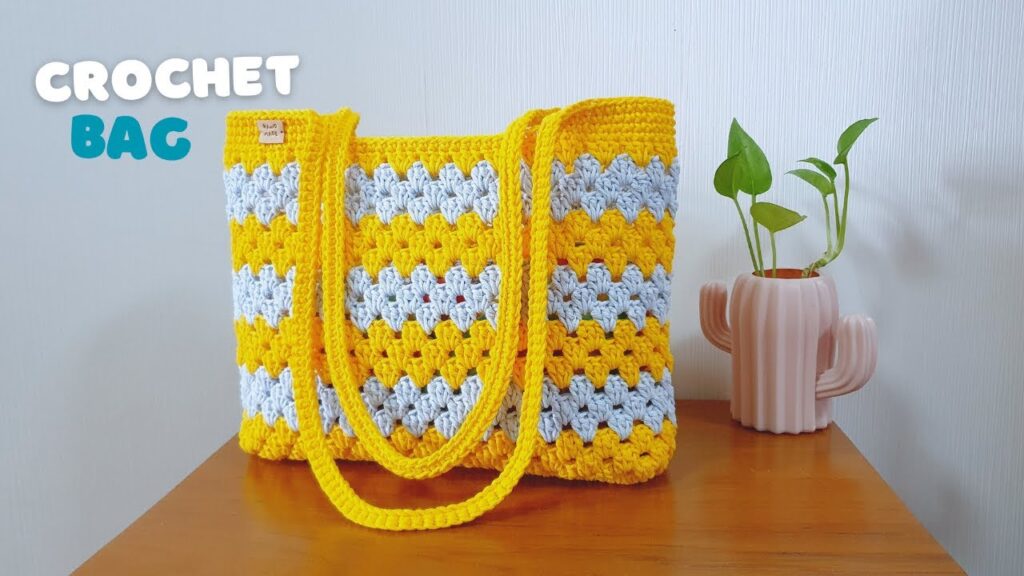
If you’re new to crochet and looking for a fun, useful project that’s quick to make, look no further than the super easy crochet tote bag. Combining simplicity and practicality, this project is perfect for beginners who want to practice basic stitches while creating something functional and stylish.
Whether you use it for groceries, books, beach trips, or everyday errands, this easy-to-make bag will become your go-to accessory. Let’s explore everything you need to know to get started.
👜 What Is a Crochet Tote Bag?
A crochet tote bag is a soft-sided, reusable carryall made using yarn and a crochet hook. These bags can be as simple or as complex as you like. In this article, we focus on a super easy, flat-bottomed tote that requires only basic stitches and minimal shaping.
🧵 Why Make a Tote Bag?
- Eco-friendly: A reusable alternative to plastic bags
- Stylish: Customize colors, textures, and handles
- Beginner-friendly: Use basic stitches and rectangles
- Fast: Finish in a few hours to a weekend
- Practical: Great for everyday use or gifts
🧶 Materials You’ll Need
- Yarn:
- Worsted weight cotton yarn (approx. 200–300g)
- Cotton is durable and doesn’t stretch too much
- Hook:
- 5.0 mm (H) or 5.5 mm (I) crochet hook
- Notions:
- Yarn needle (for weaving in ends)
- Scissors
- Stitch markers (optional)
- Optional:
- Magnetic snap or button for closure
- Fabric lining (for advanced customization)
🧷 Stitches You’ll Use (U.S. Terminology)
Great for absolute beginners!
- ch – chain
- sc – single crochet
- hdc – half double crochet
- sl st – slip stitch
- inc – increase (2 stitches in 1 stitch)
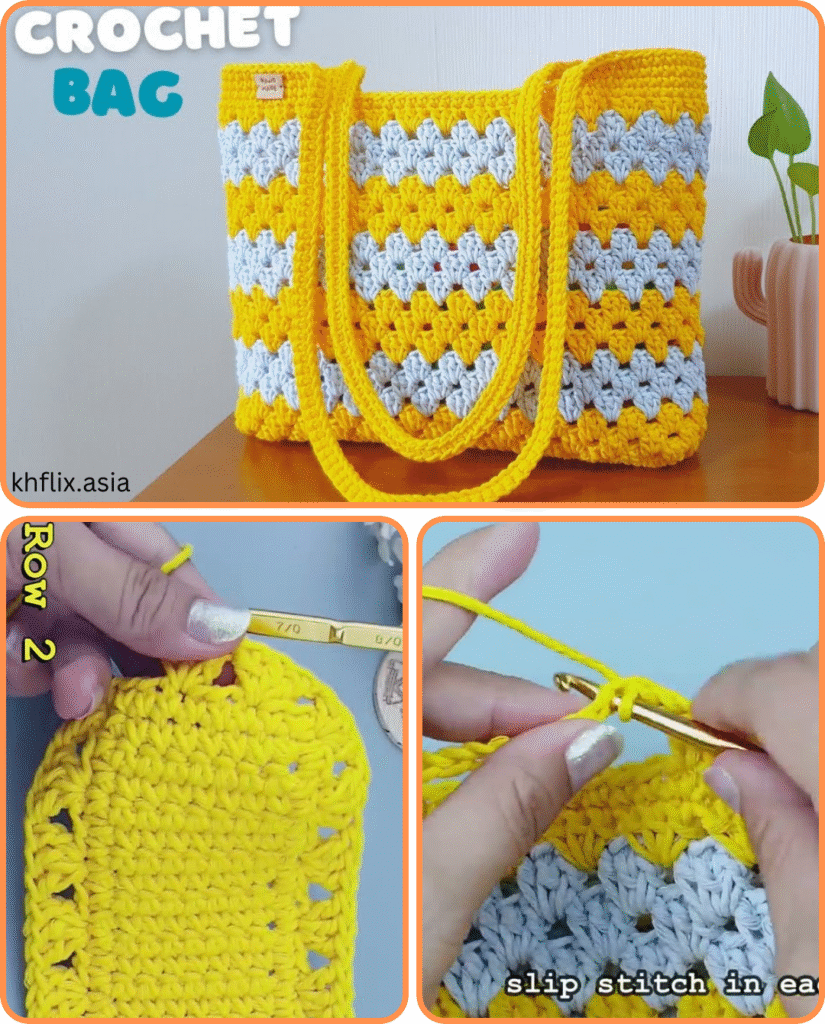
🧵 Super Easy Crochet Tote Bag Pattern
✂️ Finished Size
- Approx. 12” wide x 14” tall (not including handles)
🪢 Step 1: Make the Base
Ch 41
(This will be the width of your bag. Adjust for a wider or narrower tote.)
Row 1:
- sc in 2nd ch from hook and across (40 sc), ch 1, turn
Rows 2–8:
- sc in each stitch across, ch 1, turn
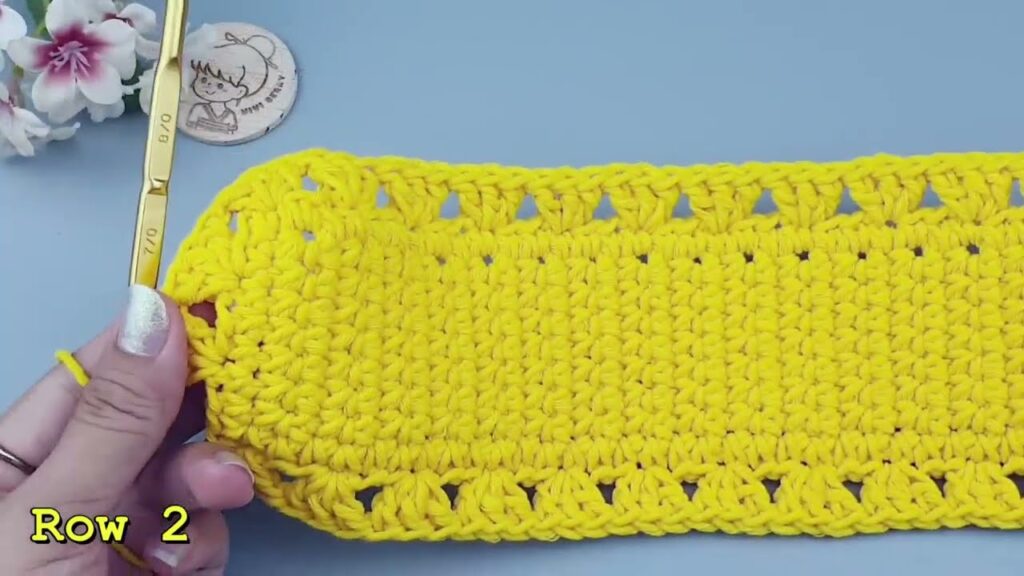
You now have a solid base rectangle—this forms the bottom of the bag.
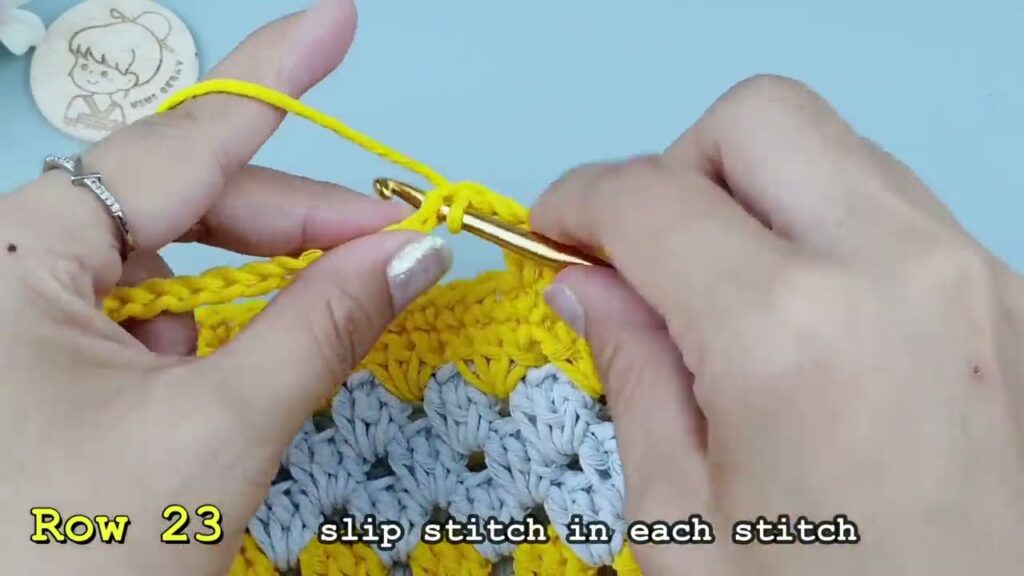
🪢 Step 2: Build the Body
Round 1:
- sc evenly around the entire base (including the short sides), placing 3 sc in each corner to help curve the edges. Join with sl st.
Rounds 2–30 (or until desired height):
- hdc in each stitch around, join with sl st at end of each round
- ch 1 at beginning of each round
This creates a tube-like body. You can switch to double crochet (dc) for taller stitches if preferred.
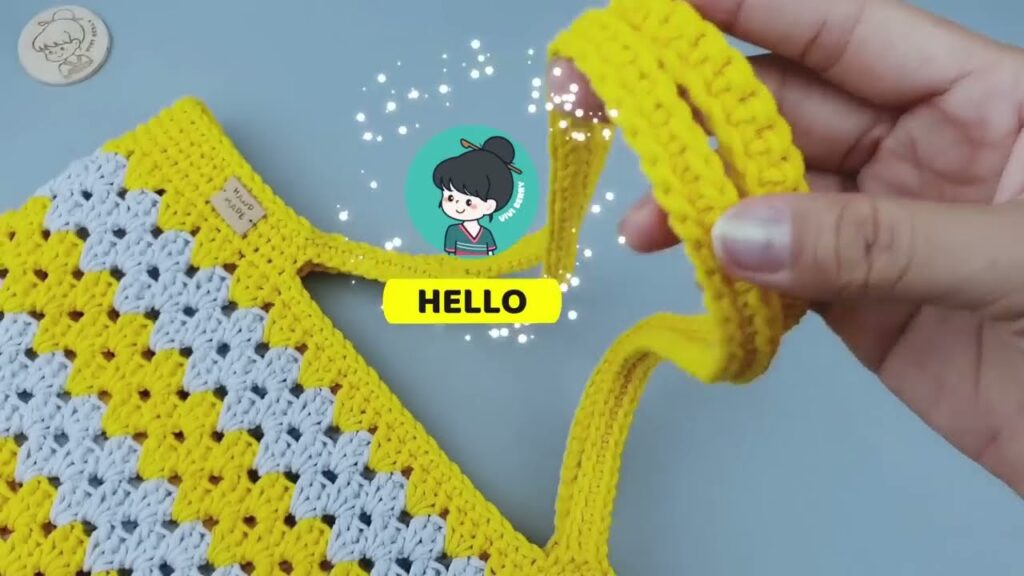
🪢 Step 3: Add the Handles
To make simple chain handles:
After finishing the body height:
- Mark handle positions on each side (about 4–5 inches apart)
- Ch 40 (or adjust for your preferred handle length), skip the stitches between the marked points, sl st to rejoin
- Repeat on the opposite side
Next round:
- sc around entire top edge, including in each ch of the handles for stability
- sl st to join, fasten off and weave in ends
🎨 Customization Ideas
- Use color blocks or stripes
- Add texture with puff, bobble, or mesh stitches
- Sew in a fabric lining to prevent stretching
- Add a button or toggle for closure
- Try a square base instead of rectangular
🧼 Care Instructions
- Use cold water and mild detergent
- Hand wash or machine wash in a laundry bag
- Air dry to avoid stretching
- Do not iron if using synthetic blends
🧵 Tips for Success
- Use cotton yarn for strength and less stretch
- Mark your rounds with a stitch marker to stay even
- Practice consistent tension for a polished look
- Don’t worry about perfection—this is a fun, forgiving project!
🛍️ When and Where to Use It
- Grocery shopping
- Library or book bag
- Beach or park day tote
- Gift bag for handmade items
- Craft tote for holding your next crochet project
Video tutorial:
🧵 Final Thoughts
A super easy crochet tote bag is a perfect project for beginners looking to make something beautiful and practical. With just a few basic stitches and some yarn, you can create a stylish accessory you’ll use every day. Plus, it’s a great way to practice your crochet skills while producing something eco-friendly and totally custom.


