
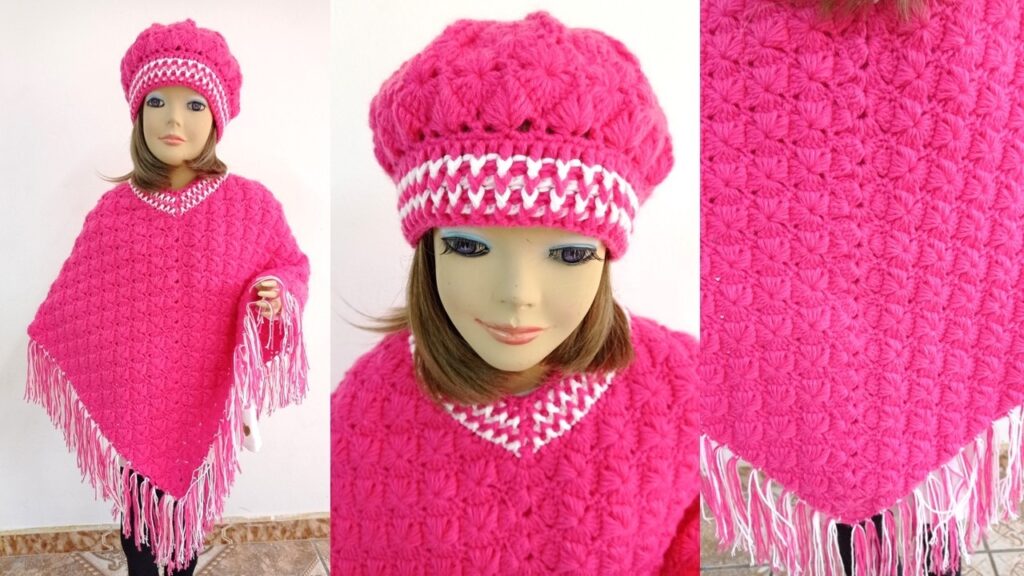
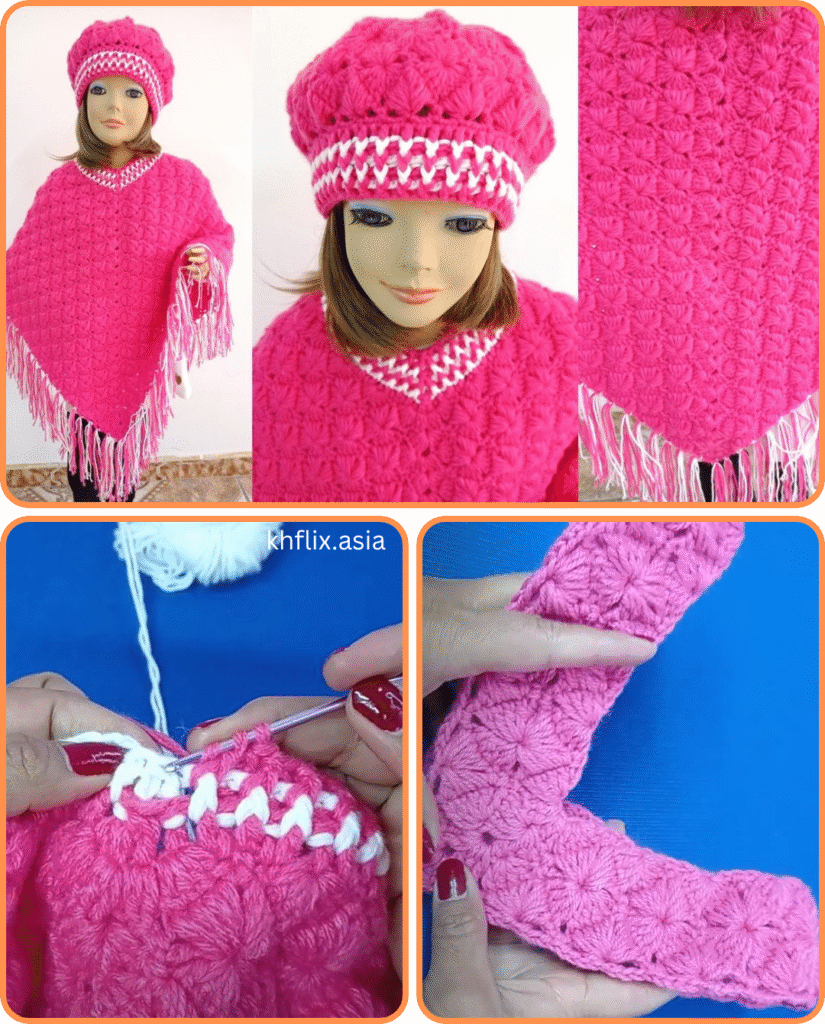
A crocheted poncho is a timeless and versatile garment, offering a cozy layer of warmth and a touch of effortless style. The “Full Diamond Stitch,” also known as the “Crossed Double Crochet Diamond” or “Diamond Trellis Stitch,” is a fantastic choice for a poncho. Its intricate, raised texture creates a striking visual appeal that resembles elegant lattice work or interwoven diamonds, making your finished piece truly stand out.
This comprehensive guide will walk you through the process of crocheting a poncho using the beautiful Full Diamond Stitch, from understanding the stitch pattern to assembling your finished garment. While the stitch looks complex, it’s built upon basic double crochets and strategic skipping, making it achievable for intermediate crocheters and adventurous beginners alike.
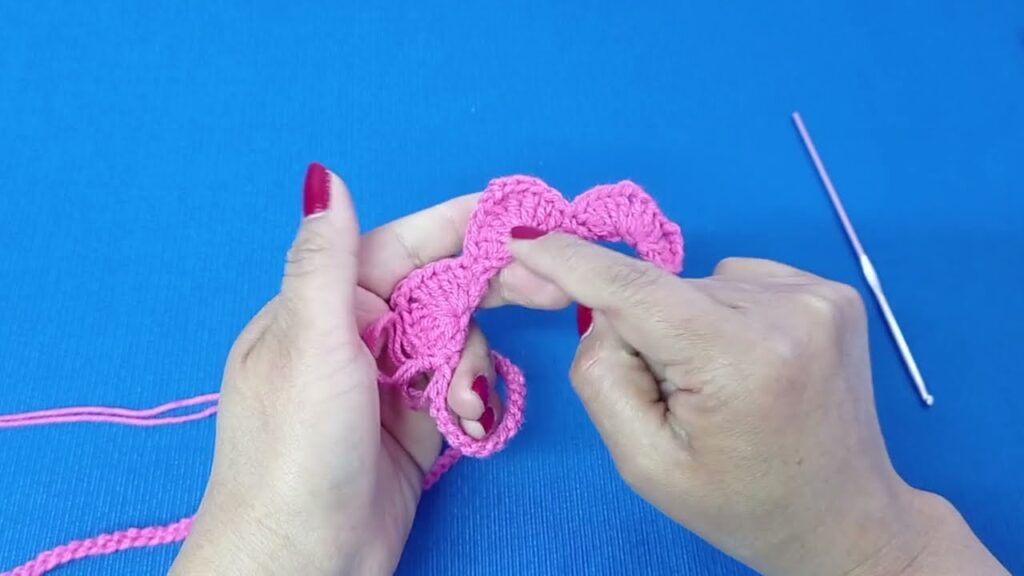
Understanding the Full Diamond Stitch
The Full Diamond Stitch is a repeat of several rows, typically involving double crochets and strategically placed skipped stitches to create the “crossed” or “overlapping” effect that forms the diamond. It’s usually worked in multiples of a specific stitch count (often 4 or 6, plus a turning chain). For this pattern, we’ll use a common version that creates a lovely, dense fabric.
Key Characteristics:
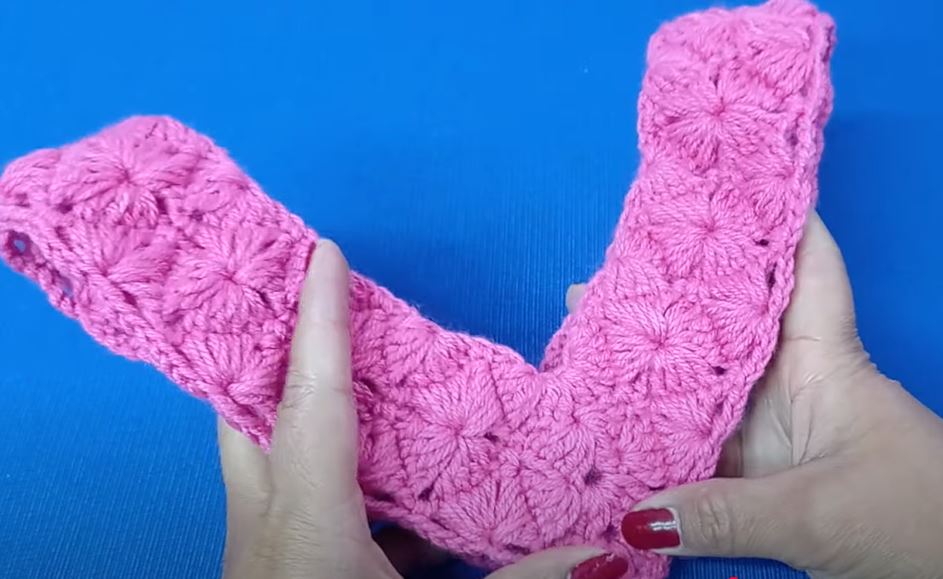
- Texture: Creates a raised, intricate diamond pattern.
- Density: Can be quite dense, offering good warmth.
- Drape: Achieves a lovely drape, especially with softer yarns.
- Reversible (mostly): While one side might have more pronounced relief, both sides generally look good, making it ideal for a garment like a poncho.
Materials You’ll Need:
- Yarn: Medium worsted weight (Aran/weight 4) yarn is ideal for a poncho. Choose a fiber content that suits your needs:
- Acrylic: Affordable, wide color range, durable, easy care.
- Wool/Wool Blends: Warm, excellent drape, classic feel.
- Cotton/Cotton Blends: Breathable, good for warmer climates or if you prefer natural fibers.
- Quantity: For an adult-sized poncho, you’ll typically need between 1000-1500 yards (900-1400 meters), depending on your size, gauge, and desired length. Always buy an extra skein just in case.
- Crochet Hook: A hook size appropriate for your yarn. For worsted weight, a 5.0mm (H/8) or 5.5mm (I/9) hook is a good starting point. Always check your yarn label for the recommended hook size and make a gauge swatch!
- Scissors: For cutting yarn.
- Tapestry Needle: For weaving in ends and seaming (if applicable).
- Stitch Markers (Optional but Recommended): Especially helpful for marking repeats, the beginning of rounds, or the center of your work.
- Measuring Tape: To check gauge and garment length.
Gauge Swatch: Your Best Friend!
Before starting, crochet a gauge swatch (at least 4×4 inches or 10×10 cm) of the Full Diamond Stitch. This is crucial for ensuring your poncho will be the correct size.
- Example Gauge (adjust based on your pattern/yarn): 14 stitches and 8 rows of Full Diamond Stitch = 4 inches (10 cm).
- Adjusting: If your swatch is too large, go down a hook size. If it’s too small, go up a hook size. Re-swatch until you match the gauge.
Poncho Construction Methods:
There are a few common ways to crochet a poncho:
- Two Rectangles Sewn Together: This is the easiest method for beginners. You crochet two identical rectangles of fabric, then seam them together along one edge to form the neck opening and shoulder line.
- One Large Rectangle/Square: You crochet one large piece of fabric (either a rectangle or a very large square), then fold it and seam it to create the poncho shape.
- Top-Down in the Round: You start at the neck and work outwards in rounds, increasing evenly to create the poncho shape. This method avoids seaming but requires more attention to stitch counts and increases.
For this tutorial, we will focus on Method 1: Two Rectangles Sewn Together, as it’s straightforward and excellent for showcasing the stitch pattern.
The Full Diamond Stitch Pattern (Worked Flat)
The Full Diamond Stitch is worked over a multiple of 4 stitches + 1 for the starting chain (or + a specific number for the edge stitches, depending on the exact variant).
Stitch Multiple: For this pattern, it will be a multiple of 4 + 2 (for the first and last stitches of the row). Example: For a starting chain of 42 (40 stitches for pattern + 2 for edges).
Abbreviations (US Crochet Terms):
- ch: chain
- sl st: slip stitch
- sc: single crochet
- dc: double crochet
- sk: skip
- st(s): stitch(es)
- sp: space
- yo: yarn over
- rep: repeat
Full Diamond Stitch Row Repeats (Worked Flat):
Foundation Chain: Chain a multiple of 4 + 2. The length of this chain will determine the width of one side of your poncho. For an adult S/M, aim for about 20-24 inches (50-60 cm) across one side, so your starting chain might be around 82-102 stitches depending on your gauge. (Let’s assume a starting chain of 82 for this example, giving 80 pattern sts).
Row 1 (RS): Dc in 4th ch from hook (counts as first dc). Dc in each ch across. Turn. (You will have [starting chain – 3] dc stitches).
Row 2 (WS): Ch 1 (does not count as a st), sc in each st across. Turn.
Row 3 (RS – Setting up the Diamonds): Ch 3 (counts as 1 dc). Sk 1 st, dc in next st. Ch 2, sk 3 sts, dc in next st. Repeat from * to * across to last 3 sts. Ch 2, sk 1 st, dc in last st. Turn.
Row 4 (WS): Ch 1 (does not count as a st), sc in first dc. Working into the next ch-2 sp, make 2 sc. Sc in next dc. Repeat from * to * across, ending with sc in the top of the turning chain. Turn. (This row sets up the base for the next level of diamonds).
Row 5 (RS – Forming Diamonds): Ch 3 (counts as 1 dc). Sk first 2 sc. Working into the next skipped stitch (the dc from 2 rows below, i.e., Row 3) that is between the previous two dc’s of Row 3, make 1 dc (this stitch crosses over the ch-2 space of Row 3). Ch 2, sk 3 sc. Repeat from * to * across. When you reach the last group of stitches, you should have 3 sc left. Make 1 dc in the last skipped stitch from Row 3. Sk 1 sc, dc in last sc. Turn.
Row 6 (WS): Ch 1 (does not count as a st), sc in first dc. Working into the next ch-2 sp, make 2 sc. Sc in next dc. Repeat from * to * across, ending with sc in the top of the turning chain. Turn.
Repeat Rows 5 and 6 until your rectangle reaches the desired length for one side of your poncho. For an adult S/M, this is typically 20-25 inches (50-63 cm) from the shoulder to the bottom hem. End on a Row 6.
Crocheting Your Poncho – Step-by-Step
Step 1: Create Two Identical Rectangles
- Determine your starting chain length:
- Measure from the approximate center of your chest/shoulder area outwards to where you want the poncho to fall. Double this measurement to get the total width of your flat rectangle.
- Work a swatch of the Full Diamond Stitch. Calculate how many chains you need for your desired width based on your gauge. Ensure it’s a multiple of 4 + 2.
- Example: If 14 sts = 4 inches, and you want a 22-inch width for one panel: (22 / 4) * 14 = 77 stitches. Round to the nearest multiple of 4 + 2, e.g., 78 or 82. Let’s use 82 chains for our example.
- Chain 82.
- Work Row 1: Dc in 4th ch from hook and in each ch across. (80 dc)
- Work Row 2: Sc in each st across. (80 sc)
- Work Row 3-6 (Full Diamond Stitch pattern): Follow the pattern given above.
- Repeat Rows 5 and 6: Continue repeating Rows 5 and 6 until your panel reaches the desired length from shoulder to hem. For an adult S/M, this is typically 20-25 inches (50-63 cm). Always end on a Row 6 (an sc row) for a clean edge for seaming.
- Fasten off one panel, leaving a long tail for seaming (about 20-30 inches / 50-75 cm).
- Repeat steps 1-7 to create a second identical panel.
Step 2: Seaming the Panels
This is where your two rectangles become a poncho!
- Lay out your panels: Place both rectangles side-by-side with the Right Sides (RS) facing up.
- Align for Seaming:
- Rotate one panel 90 degrees.
- Place the rotated panel over the other panel, aligning one long edge of the rotated panel with a portion of the top edge of the stationary panel.
- Imagine an “L” shape. The seam will run along the vertical part of the “L”.
- The unseamed parts of the top edges will form the neck opening. The unseamed long edges will be the side openings of the poncho.
- Mark the Seam:
- Determine your neck opening circumference. A typical adult neck opening is 20-24 inches (50-60 cm).
- Divide your desired neck circumference by two. This is the length you won’t seam on each panel’s top edge.
- For example, if your panel is 22 inches wide and you want a 22-inch neck opening, you’ll seam 11 inches on one panel, and leave 11 inches unseamed.
- Use stitch markers to mark where your seam will start and end on both panels.
- Seaming Methods (Choose one):
- Mattress Stitch (Invisible Seam): This is ideal for a clean finish.
- With RS facing you, thread your tapestry needle with the long tail.
- Work your needle under the horizontal bar of a stitch on one panel, then under the corresponding bar on the other panel. Pull gently to draw the seam together without puckering.
- Repeat along the marked seam line.
- Slip Stitch Seam (Flat Seam):
- Place wrong sides together.
- Join yarn with a sl st in the first marked stitch through both layers.
- Sl st through both loops of both layers along the marked seam line. Fasten off.
- Single Crochet Seam (Raised Seam):
- Place wrong sides together.
- Join yarn with a sc in the first marked stitch through both layers.
- Sc through both loops of both layers along the marked seam line. Fasten off.
- Mattress Stitch (Invisible Seam): This is ideal for a clean finish.
- Secure the Seam: Weave in the tail from your seam.

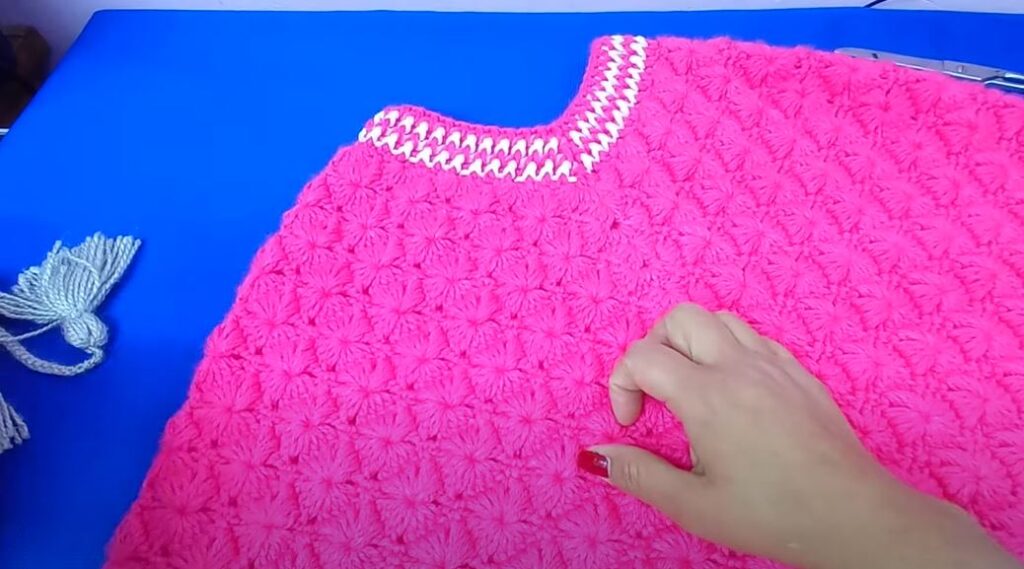
Step 3: Edging (Optional but Recommended)
An edging provides a polished finish to your poncho and helps prevent stretching.
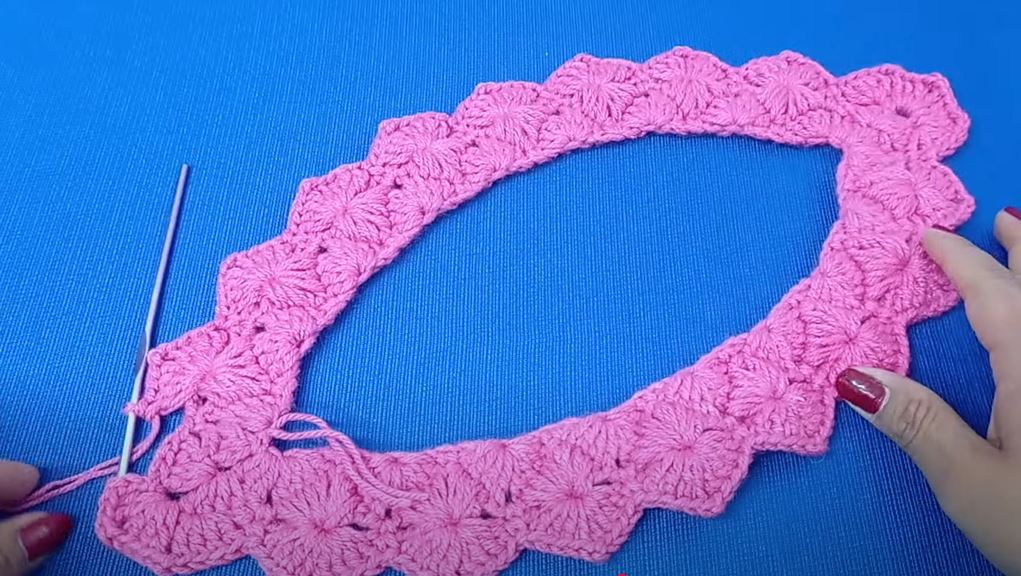
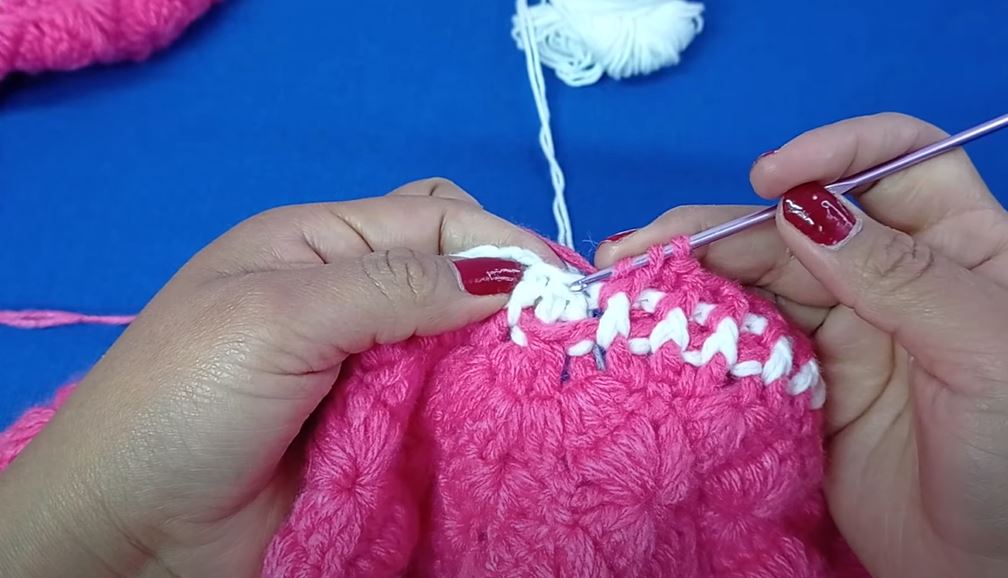
- Around the Neck Opening:
- Join yarn with a sl st anywhere on the neck opening.
- Round 1: Ch 1, sc evenly around the entire neck opening. Aim for 1 sc per stitch/row end. Join with a sl st to the first sc.
- Round 2: Ch 1, sc in each sc around. Join.
- Optional Ribbing: Instead of sc, you can create a ribbed neckband using front post/back post double crochets or by crocheting a separate ribbing strip and sewing it on.
- Around the Bottom Hem and Side Openings:
- Join yarn with a sl st at any point on the bottom hem or side opening.
- Round 1: Ch 1, sc evenly around the entire bottom hem and both side openings. Work (sc, ch 2, sc) in any “corner” where the hem meets the side opening for a neat turn. Join.
- Round 2: Ch 1, sc in each sc around, working (sc, ch 2, sc) in each ch-2 corner sp. Join.
- Optional: Add a decorative border using shell stitch, picots, or another simple stitch pattern.
Step 4: Finishing Touches
- Weave in all remaining ends: Use your tapestry needle to neatly weave in every loose yarn tail. This is crucial for durability and a professional appearance. For extra security, weave in one direction and then back in the opposite direction for a few stitches.
- Blocking (Highly Recommended): Blocking will dramatically improve the drape, even out your stitches, and help the diamond pattern pop.
- Wet Blocking: Immerse your finished poncho in lukewarm water for about 20-30 minutes. Gently squeeze out excess water (do not wring or twist). Lay it flat on a blocking mat or clean towels, shaping it to its final dimensions. Pin it in place if needed. Allow it to air dry completely.
- Steam Blocking: Pin the dry poncho to its desired shape on a heat-safe surface. Hold a steam iron a few inches above the crochet fabric (do not touch the iron directly to the yarn) and release steam. Allow to cool and dry.
- Add Fringes (Optional): Cut strands of yarn (double your desired fringe length). Loop bundles of 2-4 strands through the bottom edge of the poncho using your crochet hook. Secure with a slip knot. Trim evenly.
Customizing Your Poncho:
- Size Adjustments:
- Width: Adjust the initial chain length (always a multiple of 4 + 2).
- Length: Adjust the number of repeated rows for each panel.
- Neck Opening: Adjust the length of the seam you create.
- Yarn Choice: Experiment with different yarn weights and fibers for varying warmth and drape. A super bulky yarn would create a very chunky, quick poncho, while a sport weight yarn would make a lighter, lacier garment.
- Color Blocking: Use two or more colors, changing colors after a few rows of the diamond stitch repeat.
- Stripes: Incorporate horizontal stripes by changing colors every few rows.
- Decorative Edging: Instead of a simple sc border, explore more elaborate crochet borders.
Care Instructions:
Always refer to your yarn label for specific care instructions. Generally:
- Acrylic: Machine wash gentle cycle, tumble dry low or lay flat to dry.
- Wool/Blends: Hand wash in cool water with a mild wool wash, reshape, and lay flat to dry. Do not machine wash or tumble dry unless specified “superwash.”
- Cotton: Machine wash gentle cycle, lay flat to dry or tumble dry low.
Crocheting a poncho in the Full Diamond Stitch is a rewarding project that results in a stunning, unique garment. Take your time with each step, pay attention to your gauge, and enjoy the process of watching those beautiful diamonds emerge! Your handmade poncho will be a testament to your skill and a cozy, stylish addition to your wardrobe.
Video tutorial:


