
Crochet flowers are a timeless favorite for many crafters, and among them, the crochet rose motif stands out as one of the most beloved. Whether you’re adding a romantic accent to a hat, decorating a bag, making brooches, or embellishing a baby blanket, a crochet rose adds a beautiful handmade touch.
If you’re new to crochet, don’t worry—this guide is designed specifically for beginners. We’ll break it down into simple steps, using basic stitches and minimal materials so that even those with limited experience can enjoy the process and success of creating their own lovely rose motif.
🌺 Why Make Crochet Rose Motifs?
Crochet roses are quick, versatile, and satisfying projects. Here’s why they’re a great choice for beginners:
- ✅ Quick and Easy: Most rose motifs can be completed in 15–30 minutes.
- 🎨 Customizable: Change the size, colors, or texture to suit your project.
- 🌼 Decorative: Perfect as appliqués, pins, accessories, or gift toppers.
- 💡 Great Practice: Learn to increase, shape, and spiral your stitches.
- 💖 No Pressure: If you make a mistake, it’s easy to rip back and try again.
🧶 Materials You’ll Need
You don’t need much to make your first rose! Here’s a simple list:
Yarn:
- Type: Any light-weight or medium-weight yarn
- Fiber: Acrylic, cotton, or blends (cotton offers the most stitch definition)
- Color: Traditional red, pink, or any shade you love! Use green for leaves if you want to make a full motif.
Hook:
- Size: 4.0mm to 5.0mm (G/6 to H/8), depending on your yarn
Tools:
- Yarn needle (for sewing and weaving ends)
- Scissors
Optional:
- Brooch pin or clip
- Hot glue gun (if attaching to accessories)
🧵 Stitch Abbreviations (US Crochet Terms)
| Abbreviation | Stitch Name |
|---|---|
| ch | chain |
| sc | single crochet |
| dc | double crochet |
| sl st | slip stitch |
| st(s) | stitch(es) |
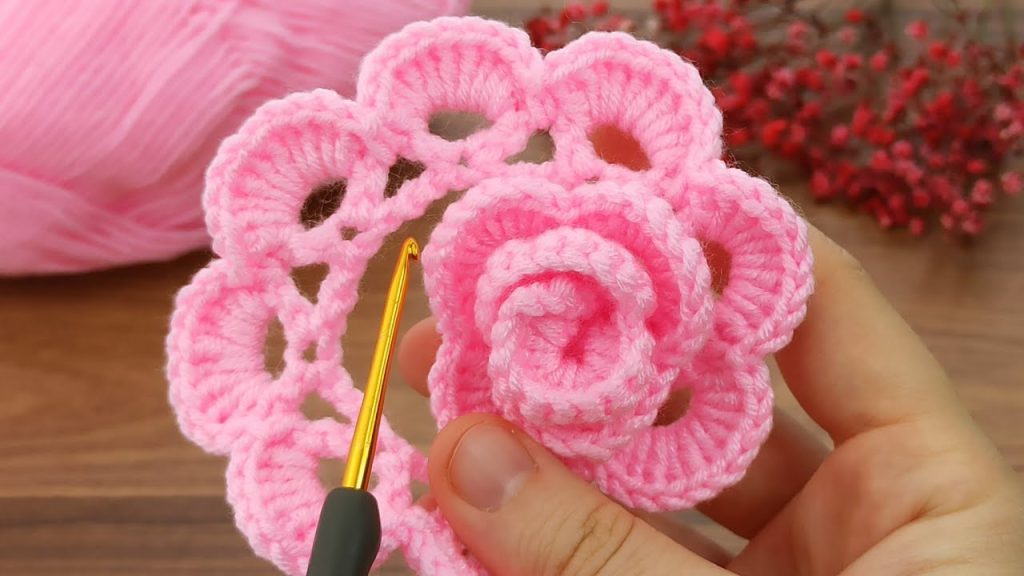
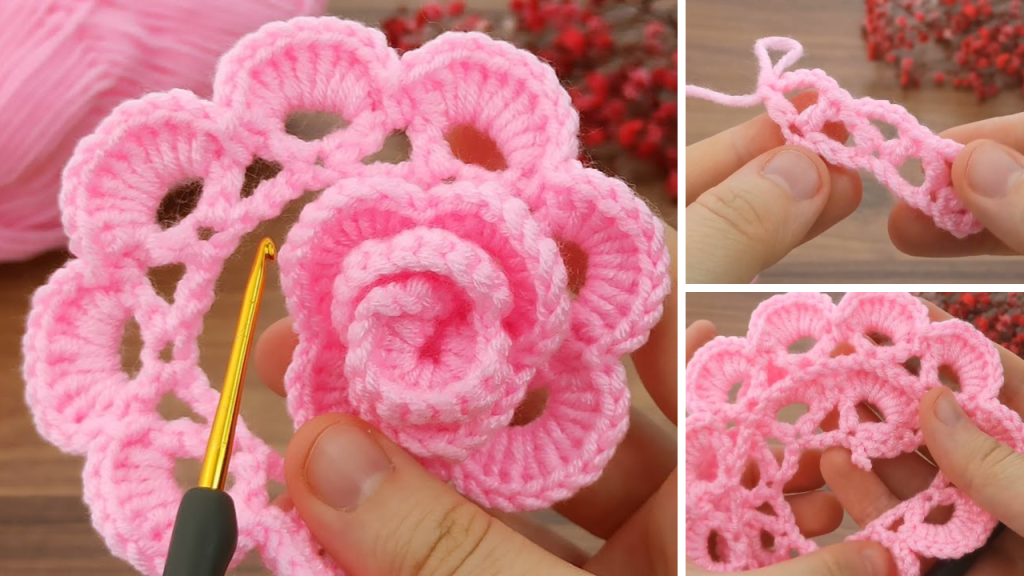
🌹 Very Easy Crochet Rose Motif – Beginner Pattern
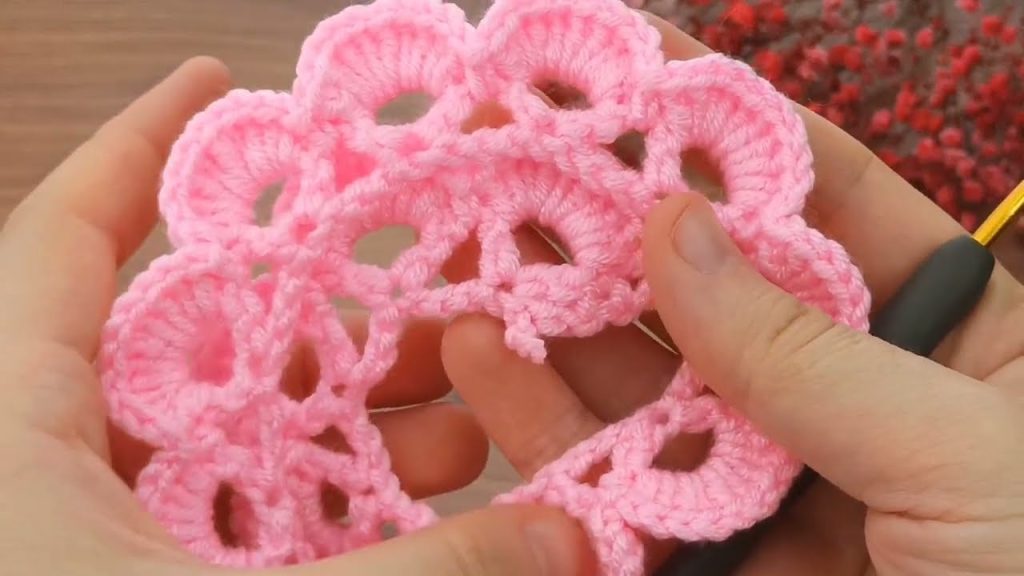
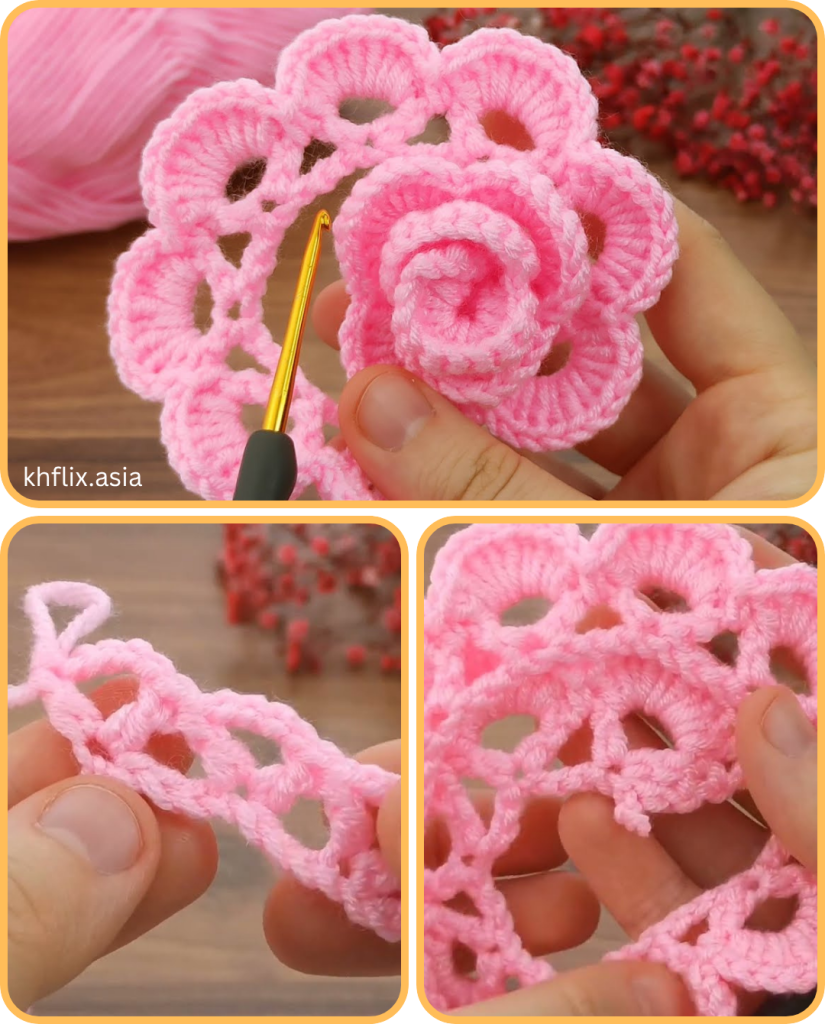
This rose is made by creating a long strip (a flat spiral of petals), then rolling it up and stitching it together into a rose shape.
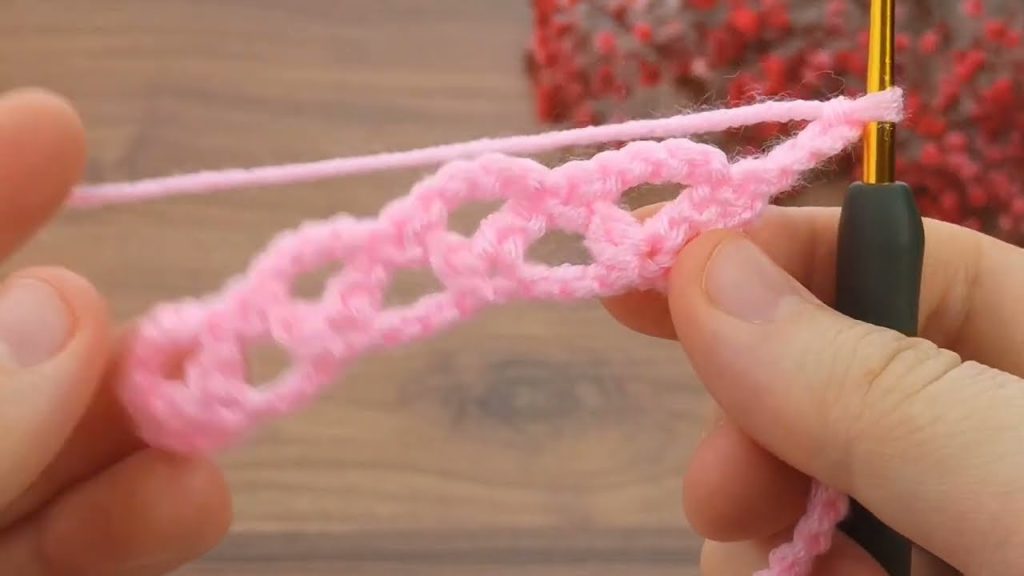
🔶 Step 1: Start with a Foundation Chain
Ch 51 (or any multiple of 6 + 1, depending on how full you want the rose to be).
- This creates the base of your rose. More chains = fuller rose.
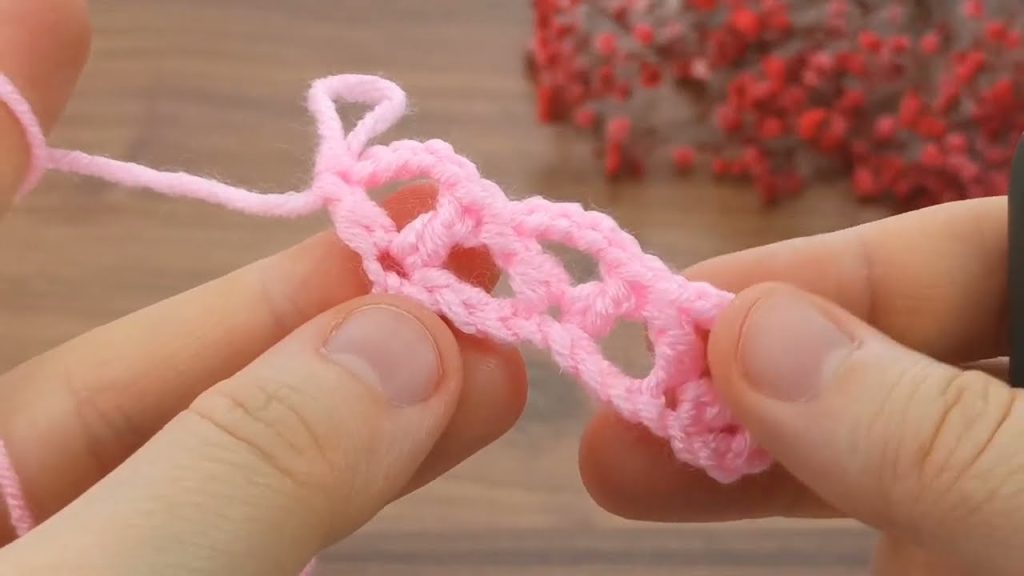
🔶 Step 2: Create the Petal Base Row
Row 1:
- In the 4th ch from hook, work 2 dc, then ch 1, sl st in next ch.
- Skip 1 ch, dc in next 3 ch, ch 1, sl st in next ch.
- Repeat from * to the end of the row.
This forms small petal bumps along the chain.
You’ll now have a flat ruffled strip.
🔶 Step 3: Form the Rose
- Gently curl the strip starting from one end, rolling it into a rose shape as if you’re making a cinnamon roll.
- Position the petals as you go so that each layer slightly overlaps the last.
- Once satisfied with the shape, use your yarn needle and a long piece of matching yarn to stitch through the base of the flower to secure it in place.
Sew across several layers from bottom to top and back to keep it sturdy.
🟢 Optional: Add a Leaf
Simple Leaf Pattern (make 1 or 2):
- Ch 7
- In 2nd ch from hook: sl st, sc in next, hdc in next, dc in next 2, hdc in next, sc in last.
- Ch 1, working on the other side of the chain: sc, hdc, dc in next 2, hdc, sc, sl st in last.
Fasten off and sew it behind the rose.
🎨 Customization Ideas
Here’s how to make your rose motif truly your own:
🌈 Color Variations
- Gradient yarn creates a naturally shaded rose.
- Two-tone roses: Change color halfway through the chain row for a bicolor effect.
- Use green to make a rosebud with leaves built-in.
🌼 Size Variations
- Shorter chain = smaller rose
- Longer chain = fuller, more layered rose
- Use thinner yarn (like lace or fingering) for tiny roses, and chunky yarn for bold statement flowers.
✨ Add Texture
- Use front post stitches for raised petals.
- Mix in picots or clusters for decorative edges.
👜 How to Use Your Crochet Rose
Your rose motif can decorate almost anything. Here are some popular ideas:
👒 Wearable Accessories
- Attach to a headband, hat, or hair clip
- Sew onto a scarf or collar
- Turn into a brooch by sewing on a pin
🏠 Home Decor
- Add to throw pillows or blankets
- Make several and string them into a garland
- Glue to a picture frame or wreath
🎁 Gifts & Keepsakes
- Use as a gift wrap embellishment
- Add to handmade cards
- Use in baby sets, especially hats and booties
✅ Tips for Beginners
- Don’t worry about perfection – the rolled rose shape hides small mistakes.
- Use stitch markers to keep track of where you started curling the rose.
- Practice with smooth, light-colored yarn – it’s easier to see your stitches.
- If your flower doesn’t hold its shape, try stitching it more securely from underneath.

🧼 Care Instructions
If your rose is part of a wearable or washable item, follow these steps:
- Hand wash or gentle machine wash if the yarn allows
- Lay flat to dry to preserve the shape
- Avoid ironing, especially on acrylic yarn, as it may melt or flatten the texture
🧵 Final Thoughts
Making a very easy crochet rose motif is the perfect project for beginners. It’s fast, fun, and incredibly satisfying—especially when you see the final flower take shape from just a few simple stitches. Once you’ve mastered the basic pattern, you’ll find endless ways to adapt, personalize, and use your crochet roses.
Whether you’re decorating a baby blanket, making a wearable accessory, or creating heartfelt gifts, these small but elegant motifs are a beautiful way to explore the world of crochet.
So grab your hook and your favorite yarn, and start your bouquet of handmade roses today!
Video tutorial:


