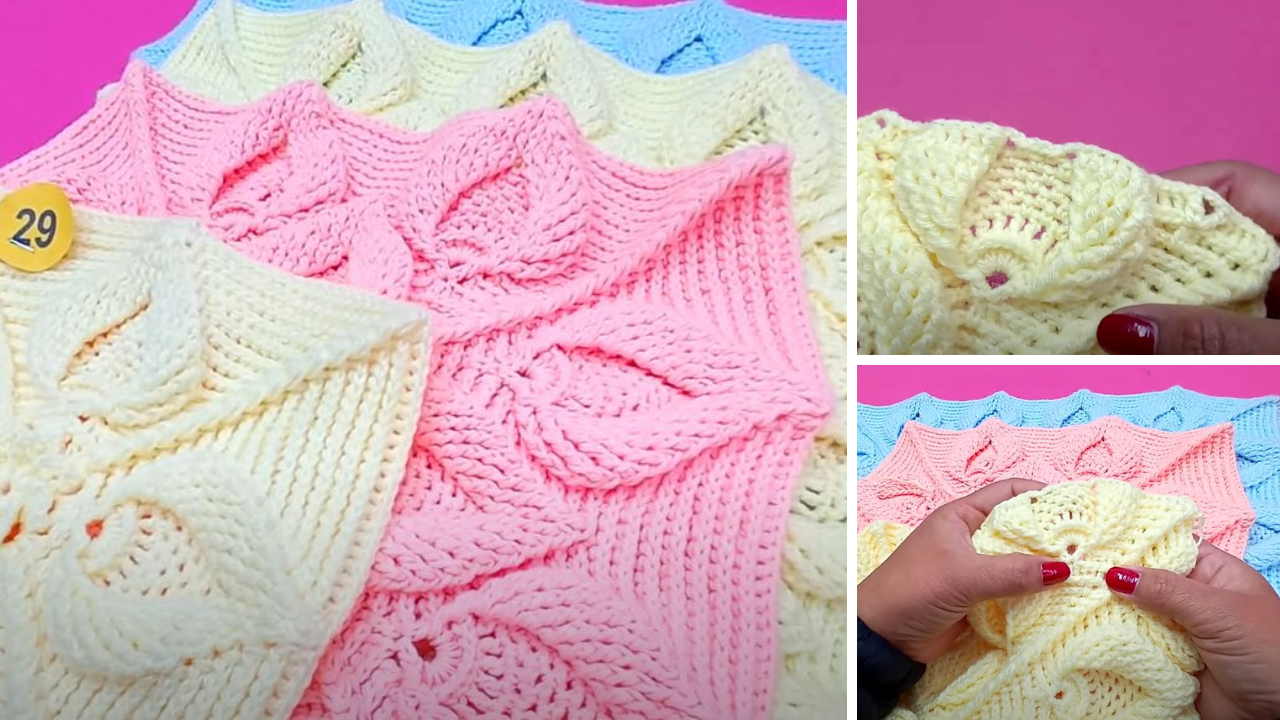
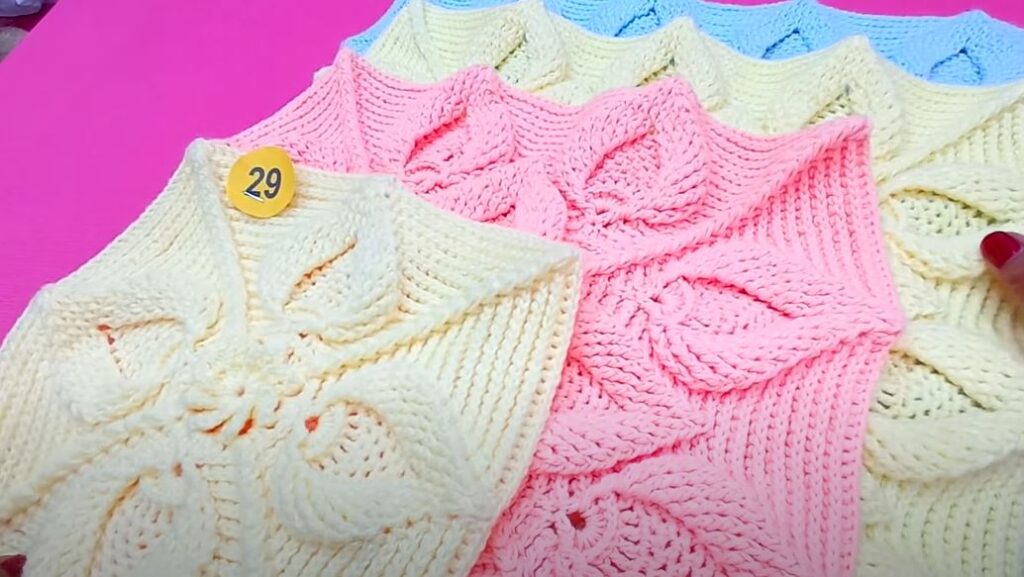
Crafting beautiful, textured cushions can add a touch of handmade elegance to any home decor. The “relief leaf stitch” is an excellent choice for such projects, creating a raised, three-dimensional leaf pattern that is both visually striking and delightful to touch. This stitch adds depth and character, making your cushions truly stand out.
This detailed guide will walk you through crocheting a square in the relief leaf stitch, perfect for assembling into a stunning cushion cover. While the stitch might look intricate, it primarily uses a combination of basic stitches and front post stitches to achieve its unique texture.
Understanding the Relief Leaf Stitch
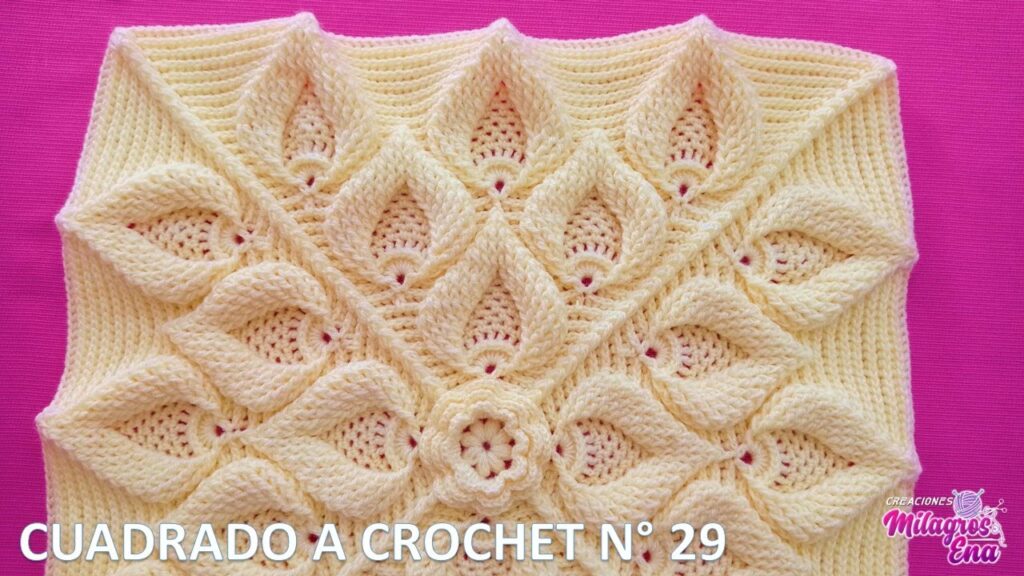
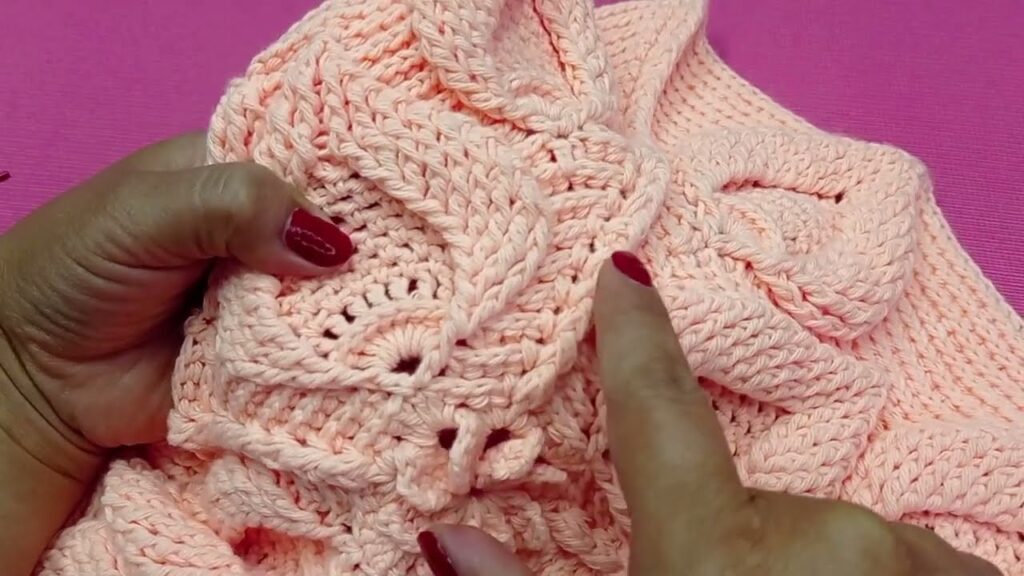
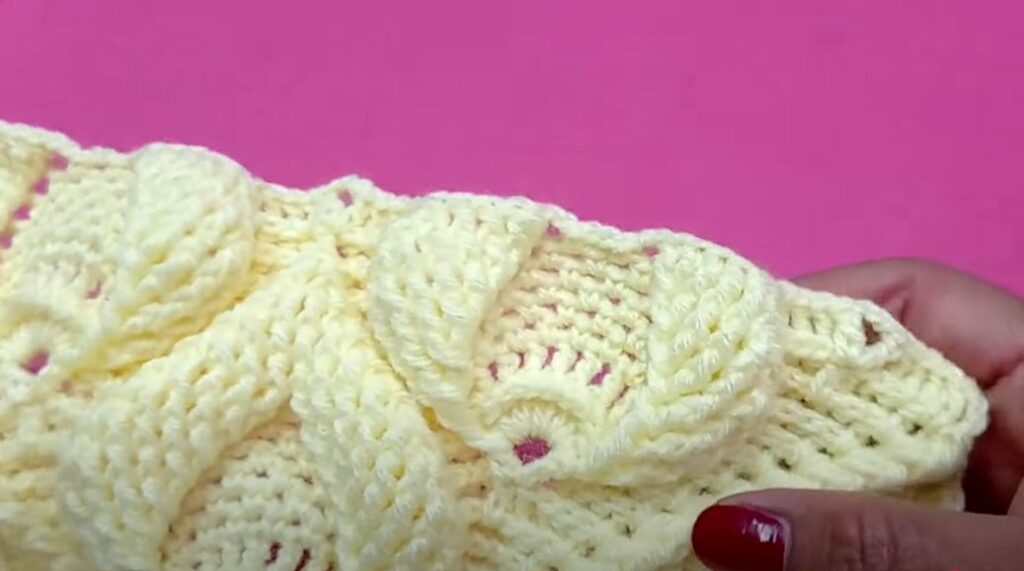
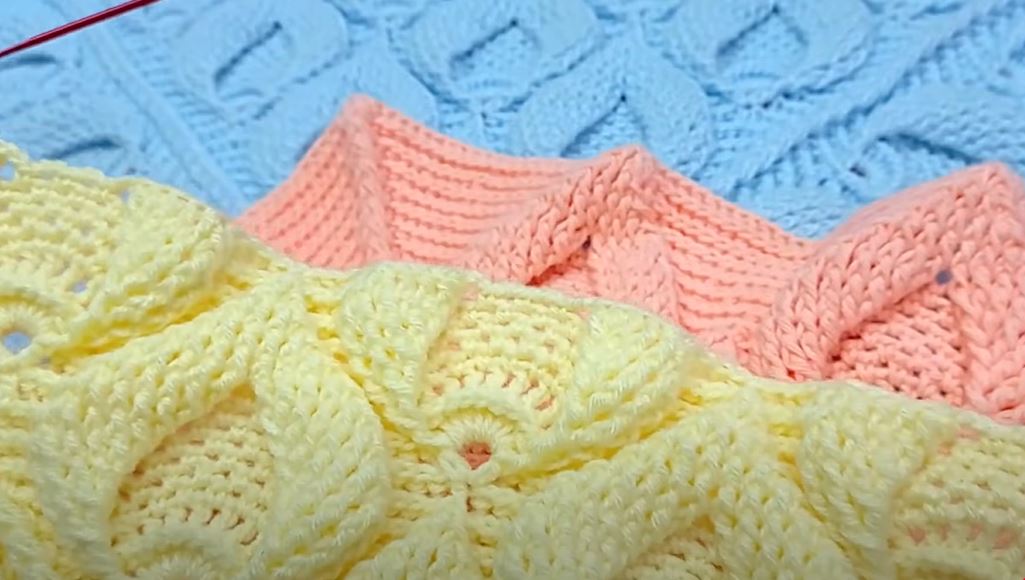
The “relief leaf stitch” often involves working stitches around the post of stitches from previous rows. This technique creates a raised, embossed effect, giving the “leaf” its three-dimensional quality. There are several variations of leaf stitches in crochet; some create individual leaves, while others form a continuous pattern that resembles falling or intertwined leaves. For a cushion square, a repeating pattern of individual leaves or a larger, central leaf motif are popular choices.
Materials You’ll Need:
- Yarn: Worsted weight (Aran/medium 4) cotton or acrylic yarn is highly recommended for cushions. Cotton offers great stitch definition and durability, while acrylic is soft and easy to care for. Choose colors that complement your decor – variegated yarns can really highlight the leaf pattern, or a solid color can create a more subtle, sophisticated look.
- Quantity: The amount will depend on the size of your square and cushion. For a standard 18-inch cushion, you’ll likely need 200-400g per square, depending on the stitch density. It’s always wise to have a little extra.
- Crochet Hook: A hook size appropriate for your yarn. For worsted weight, a 4.0mm (G/6) or 5.0mm (H/8) hook is common. Check your yarn label for recommended hook size.
- Scissors: For cutting yarn.
- Tapestry Needle: For weaving in ends and seaming squares together.
- Stitch Markers (Optional but Recommended): Especially helpful for marking corners or repeats in complex patterns.
Abbreviations (US Crochet Terms):
- ch: chain
- sl st: slip stitch
- sc: single crochet
- hdc: half double crochet
- dc: double crochet
- tr: treble crochet (sometimes used for taller parts of the leaf)
- fpdc: front post double crochet (yarn over, insert hook from front to back around the post of the indicated stitch, yarn over, pull up a loop, yarn over, pull through 2 loops, yarn over, pull through last 2 loops)
- bpdc: back post double crochet (yarn over, insert hook from back to front around the post of the indicated stitch, yarn over, pull up a loop, yarn over, pull through 2 loops, yarn over, pull through last 2 loops)
- st(s): stitch(es)
- sk: skip
- sp: space
- yo: yarn over
- tog: together (used for decreases, e.g., dc2tog)
Gauge:
Before starting your cushion square, it’s crucial to make a gauge swatch. This ensures your finished square will be the correct size.
- Example Gauge: 15 sc stitches x 18 rows = 4 inches (10 cm). Your pattern may specify a different gauge. Adjust your hook size if your swatch is too large (go down a hook size) or too small (go up a hook size).

General Tips for Working the Relief Leaf Stitch:
- Tension: Maintain consistent tension, especially with post stitches, to ensure the relief work stands out clearly.
- Reading Your Work: It can be helpful to visually identify the “posts” of stitches from previous rows before inserting your hook for a post stitch.
- Practice: If this is your first time with post stitches, practice them a few times before starting your main project.
- Weaving in Ends: For cushions, security is key. Weave in ends thoroughly, perhaps even “double darning” by weaving in one direction and then back in the opposite direction for extra security.
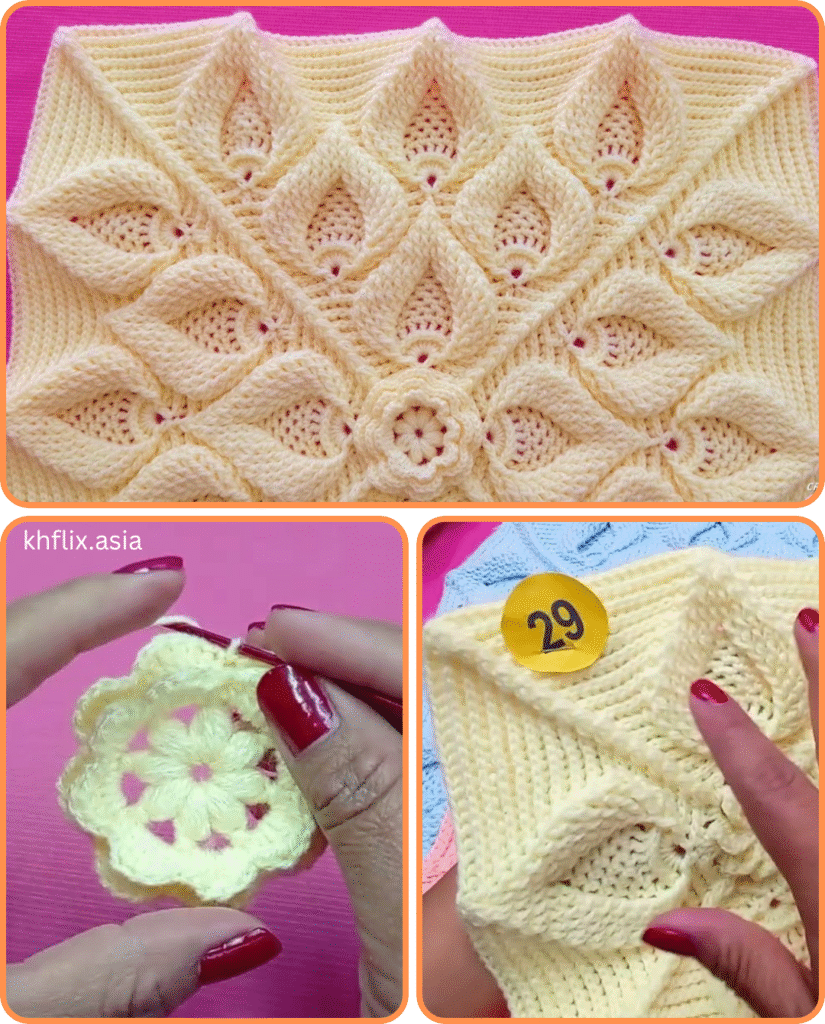
Pattern for a Relief Leaf Stitch Square for Cushions
This pattern will create a square with a central leaf motif or a repeating leaf pattern that can be joined with other squares to form a cushion cover. The exact stitch counts and row repeats will vary depending on the specific leaf stitch pattern you choose. Let’s use a common “Falling Leaves” type pattern for this example, which uses a combination of dc and fpdc.
Finished Size: Approximately 12×12 inches (30×30 cm) – adjust by adding more repeats or rounds.
Special Stitch: FPdc (Front Post Double Crochet)
To make an FPdc: Yo, insert your hook from the front of your work, going around the post of the indicated stitch from the previous row (so the hook emerges behind the stitch), yo, pull up a loop, yo, pull through 2 loops, yo, pull through last 2 loops. This creates a raised stitch.
The Square Pattern (Falling Leaves Style)
This pattern is typically worked in multiples of stitches plus a starting chain. For this example, we’ll aim for a square that’s roughly 12 inches.
Foundation Chain: Ch 42 (or a multiple of 4 + 2, then add 2 more for turning chain if starting with dc, or 1 for sc). For a square, you’ll work rows back and forth.
Row 1 (RS): Dc in 3rd ch from hook and in each ch across. (40 dc) Turn.
Row 2 (WS): Ch 1 (does not count as st), sc in each st across. (40 sc) Turn.
Row 3 (RS – Start of Leaf Pattern): Ch 2 (counts as 1 dc), dc in next st. Dc in next 3 sts, fpdc around the dc 2 rows below (from Row 1) of the next st. Repeat from * to * across, ending with dc in the last 2 sts. Turn. (This creates the first “bump” of the leaf by pulling the fpdc up from two rows below.)
Row 4 (WS): Ch 1, sc in each st across. Turn.
Row 5 (RS – Shaping the Leaf): Ch 2 (counts as 1 dc), dc in next st. Fpdc around the fpdc 2 rows below (from Row 3), dc in next 3 sts. Repeat from * to * across, ending with fpdc around the fpdc 2 rows below, dc in the last 2 sts. Turn. (You are now building the relief stitches, staggering them to form the leaf shape.)
Row 6 (WS): Ch 1, sc in each st across. Turn.
Row 7 (RS – Completing the Leaf Base): Ch 2 (counts as 1 dc). Dc in next 3 sts, fpdc around the fpdc 2 rows below. Repeat from * to * across, ending with dc in the last 4 sts. Turn. (The fpdc will align above previous fpdc stitches, creating a vertical line for the leaf.)
Repeat Rows 4-7 until your square reaches the desired height. Each repeat of Rows 4-7 will complete another “leaf” segment. For a 12-inch square, you might need 6-8 repeats of this 4-row sequence, or until your piece measures almost 12 inches. Finish on a Row 2 or 4 (an sc row) to provide a flat edge for the border.
Final Row (Optional, for a cleaner edge): Ch 1, sc in each st across. Fasten off.
Creating a Square Shape (If your pattern results in a rectangle or you want to expand):
If your chosen leaf stitch pattern primarily creates a textured fabric rather than a defined square, you will need to add a border to shape it.
Border:
The border is essential for creating a crisp square shape and for providing a sturdy edge for seaming.
Round 1: Join yarn to any corner with a sl st. Ch 1, sc evenly around the entire square.
- Sides: Work 1 sc into the side of each dc row, and 1 sc into the side of each sc row. Aim for an even number of stitches along the sides.
- Corners: Work (sc, ch 2, sc) in each corner. Join with sl st to first sc.
Round 2: Ch 3 (counts as 1 dc). Dc in each sc around, working (2 dc, ch 2, 2 dc) in each ch-2 corner space. Join with sl st to top of starting ch-3.

Round 3 (Optional – for a larger, more defined square): Ch 3, dc in each dc around, working (2 dc, ch 2, 2 dc) in each ch-2 corner space. Join with sl st to top of starting ch-3.
You can continue adding dc rounds until your square reaches the desired dimension (e.g., 12×12 inches). Ensure your stitch count for each side of the square (between corners) is equal.
Finishing the Square:
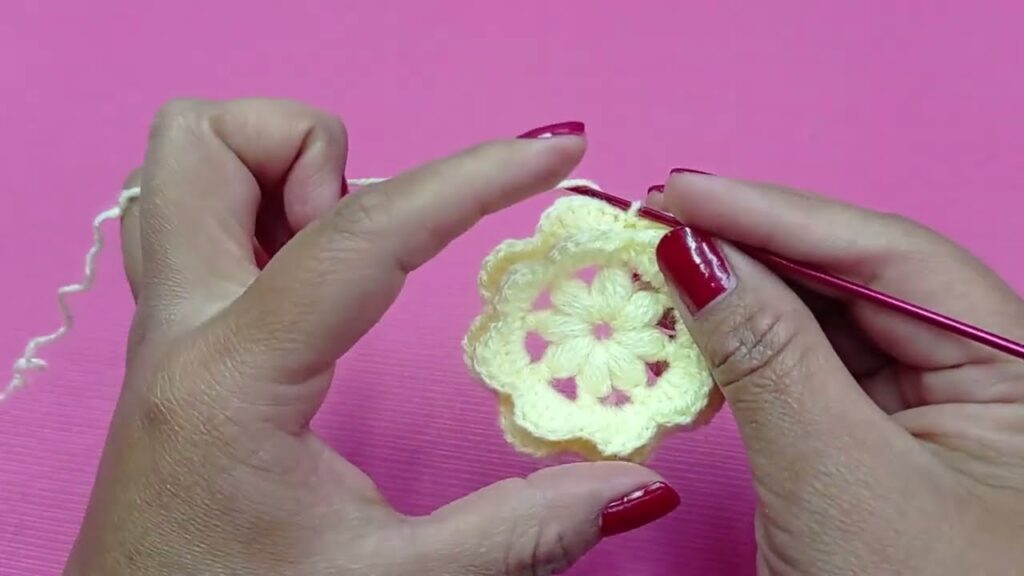
- Weave in all ends: Use your tapestry needle to neatly weave in all loose yarn tails. This is crucial for a professional finish and durability.
- Blocking (Highly Recommended): Blocking helps to open up the stitches, define the leaf pattern, and ensure your square is truly square.
- Wet Blocking: Immerse the square in lukewarm water for about 15-20 minutes. Gently squeeze out excess water (do not wring). Lay the square flat on a blocking mat or towel, shaping it to the desired dimensions, and pin it in place. Let it air dry completely.
- Steam Blocking: Pin the dry square to shape. Hold a steam iron a few inches above the crochet, releasing steam. Do not touch the iron directly to the yarn. Allow to cool and dry.
Assembling Your Cushion Cover:
Once you have crocheted the desired number of squares (usually two for a single cushion, or more for a patchwork design), you can assemble your cushion cover.
Method 1: Sewing Squares Together
- Crochet two identical squares (front and back of the cushion).
- Place the two squares with wrong sides together.
- Seaming:
- Single Crochet Seam: Starting at one corner, insert your hook through both loops of the corresponding stitches on both squares. Ch 1, then sc through both layers all the way around three sides of the square. This creates a visible, raised seam.
- Slip Stitch Seam: Similar to sc seam, but use sl st for a flatter seam.
- Mattress Stitch (Invisible Seam): Use a tapestry needle and a length of yarn. With right sides facing up, align the edges. Work your needle under the horizontal bar between stitches on one square, then the corresponding bar on the other square, pulling snugly. This creates an almost invisible seam.
- Insert Cushion Form: Once three sides are seamed, insert your cushion form.
- Close the Fourth Side: Continue your chosen seaming method to close the fourth side, encasing the cushion form.
Method 2: Creating a Cushion Cover with an Opening (for removable cover)
This is ideal for covers that need to be washed.
- Crochet two identical squares.
- Seam Three Sides: Seam three sides of the squares together as described above, leaving one side completely open.
- Adding a Zipper (Advanced):
- Turn the cushion cover inside out.
- Pin the zipper to the opening edges, ensuring it’s centered and straight.
- Hand-sew or machine-sew the zipper in place.
- Turn right side out and insert cushion form.
- Button/Tie Closure (Simpler):
- Instead of seaming the fourth side, work a few rows of sc or hdc along the opening edges of both squares to create button bands.
- On one band, create buttonholes by chaining spaces in a row (e.g., ch 2, sk 2 sts).
- Sew buttons onto the opposite band.
- Alternatively, create two long ties from chains or single crochet strips at the corners of the opening to tie the cover closed.
Care of Your Crocheted Cushion Cover:
- Yarn Dependent: Care instructions will vary based on your yarn. Cotton is often machine washable on a gentle cycle and can be air-dried flat. Acrylic is generally machine washable and dryable on low heat. Always refer to your yarn label.
- Handwashing (Recommended for delicate stitches): Gently handwash in cool water with a mild detergent. Rinse thoroughly, gently squeeze out excess water (do not wring), and lay flat to dry.

Conclusion:
Crocheting a cushion square in the relief leaf stitch is a rewarding project that allows you to create truly unique and tactile home decor. The raised texture of the leaves adds a sophisticated dimension that store-bought cushions often lack. With patience and attention to detail, you’ll soon have beautiful, handcrafted cushions that bring a touch of nature and comfort to your living space. Don’t be afraid to experiment with different yarn colors and even varying the sizes of your squares to create a truly personalized set!
Video tutorial:


