
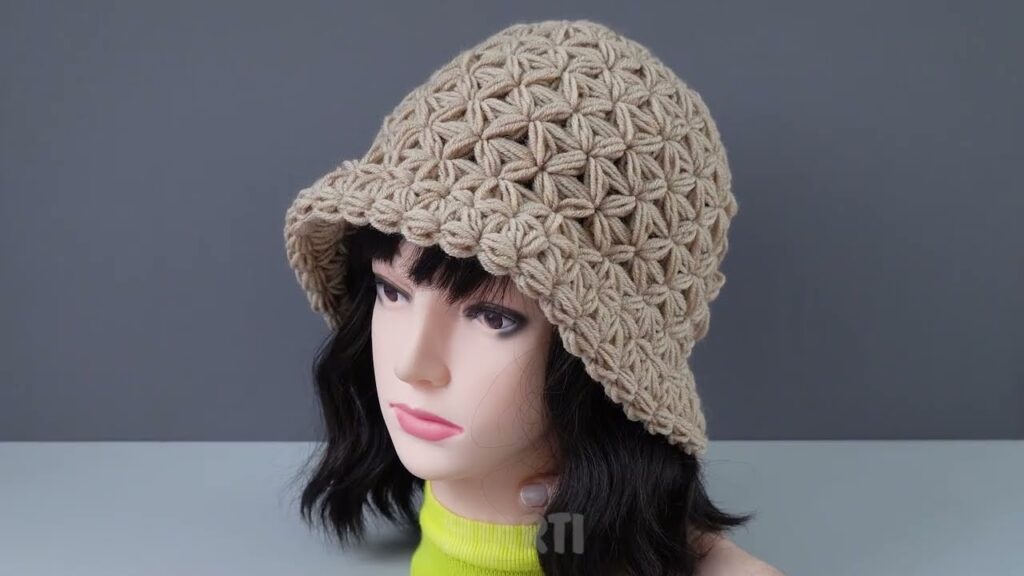
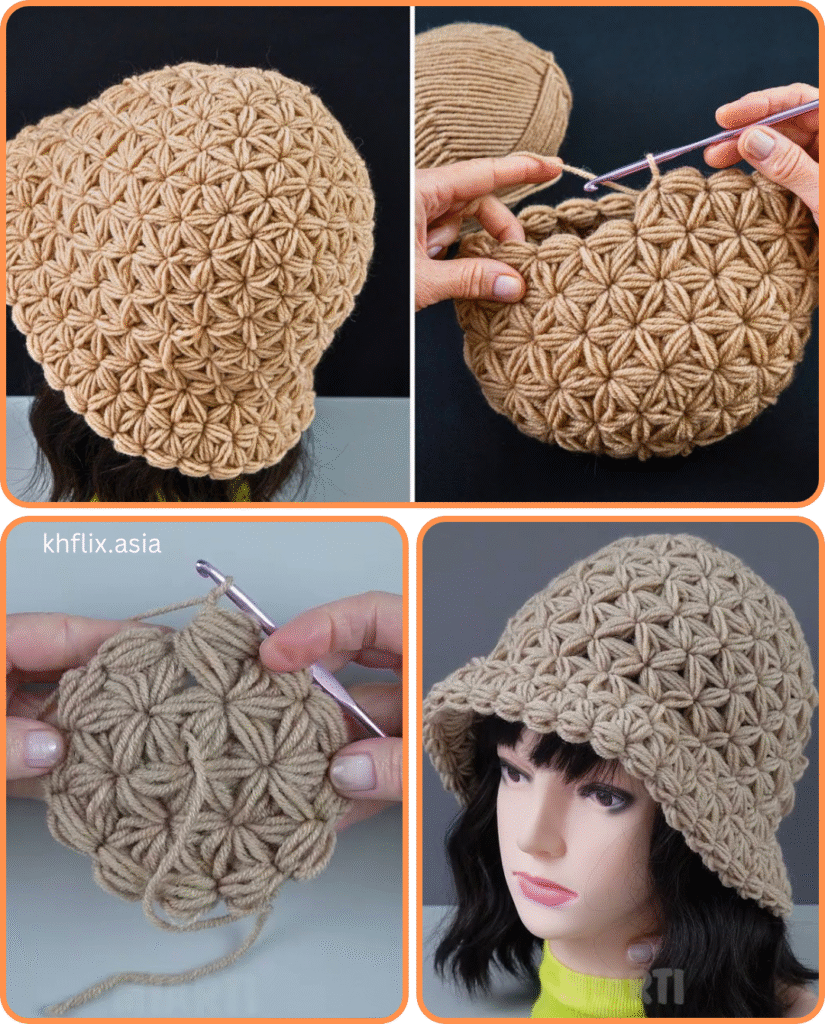
The crochet bucket hat has made a major comeback—and for good reason. It’s trendy, practical, and surprisingly simple to make, even for beginner crocheters. Whether you’re crafting one for summer sunshine or winter warmth, this easy and beautiful bucket hat pattern is a perfect weekend project that adds handmade flair to any outfit.
In this guide, you’ll learn how to crochet a basic bucket hat using simple stitches and easy-to-follow steps. Let’s dive in!

🧵 What You’ll Need
Materials:
- Worsted weight yarn (#4) – Cotton for summer, acrylic or wool blend for winter
- Crochet hook size H/5.0mm or I/5.5mm
- Scissors
- Yarn needle for weaving in ends
- Stitch marker (optional but helpful)
Optional:
- Decorative patch, applique, or embroidery for customization
📏 Sizing Information
This pattern is written for an average adult head size:
- Hat Circumference: ~21–23 inches (53–58 cm)
- Hat Height: ~7.5 inches (19 cm)
- Brim Width: ~2 inches (5 cm)
You can adjust the number of rounds for a smaller or larger size.
🪡 Stitches Used (US Terminology)
- Magic ring (or chain to start)
- Chain (ch)
- Slip stitch (sl st)
- Single crochet (sc)
- Half double crochet (hdc) – optional
- Double crochet (dc)
🧶 Easy & Beautiful Crochet Bucket Hat Pattern
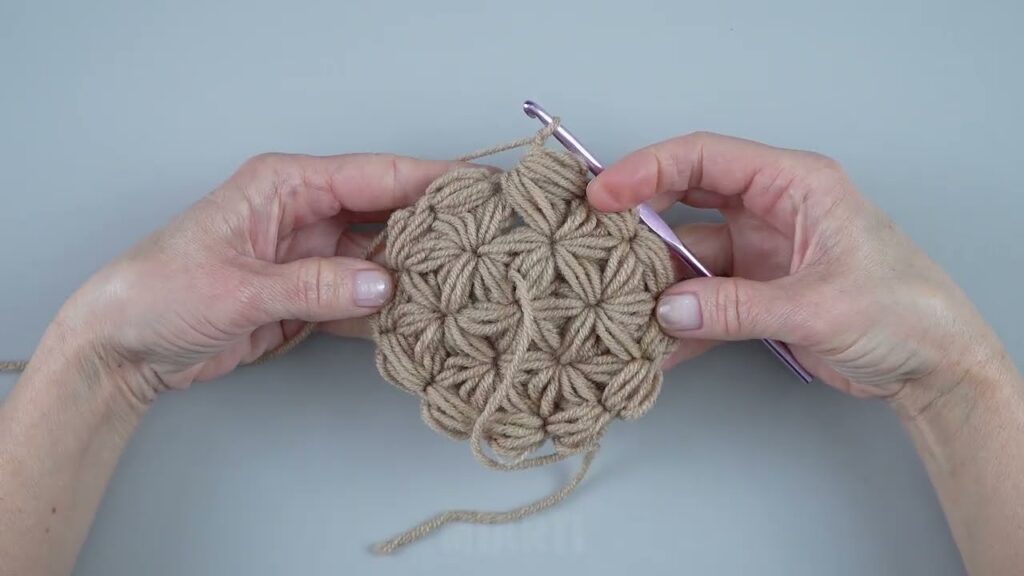
🌀 Crown of the Hat
Round 1: Start with a magic ring. Ch 2 (does not count as a stitch). Make 12 dc into the ring. Join with a sl st to the first dc.
(12 stitches)
Round 2: Ch 2. Make 2 dc in each stitch around. Join.
(24 stitches)
Round 3: Ch 2. (1 dc in next stitch, 2 dc in next) repeat around. Join.
(36 stitches)
Round 4: Ch 2. (1 dc in next 2 sts, 2 dc in next) repeat around. Join.
(48 stitches)
Round 5: Ch 2. (1 dc in next 3 sts, 2 dc in next) repeat around. Join.
(60 stitches)
If you need a larger crown for bigger head sizes, continue increasing using the same pattern logic.
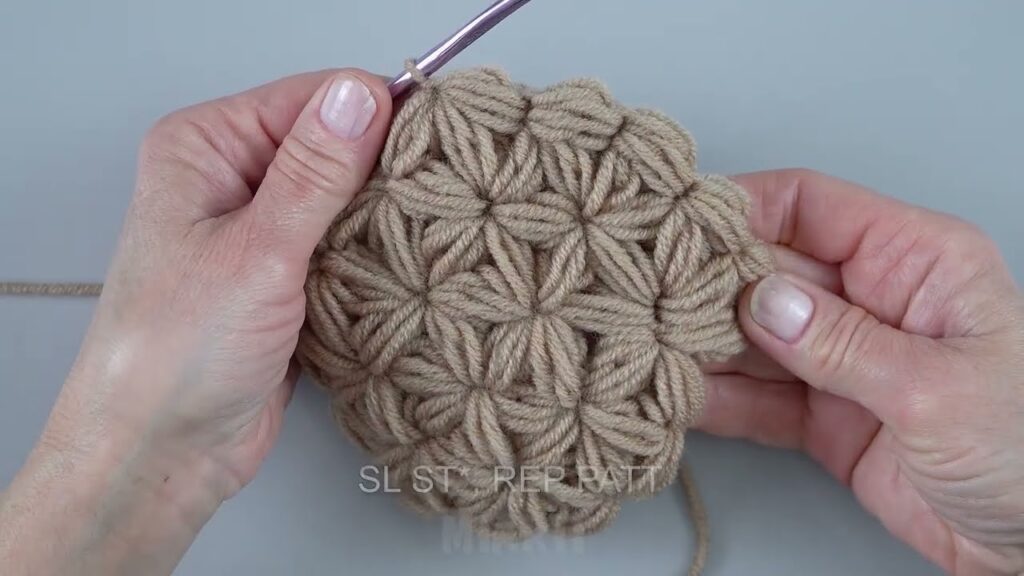
🧢 Body of the Hat
Rounds 6–12: Ch 2. Make 1 dc in each stitch around. Join with sl st.
Repeat for a total of 7 rounds, or until the body reaches ~5.5–6 inches in height.
If you want a slouchier fit, add an extra round or two.
👒 Brim of the Hat
Switch to single crochet (sc) for a firmer brim:
Round 13: (1 sc in next 2 sts, 2 sc in next) repeat around. Join.
Round 14–15: 1 sc in each stitch around. Join.
Optional: Add another increase row to make a wider brim, or alternate with hdc for a softer edge.
✨ Customization Ideas
- Color blocking: Change yarn color every few rows for a bold, trendy look.
- Add stripes: Alternate two or three colors in a pattern.
- Edge detailing: Finish the brim with a round of reverse single crochet (crab stitch) for a clean, twisted edge.
- Seasonal versions: Use cotton yarn for summer, bulky yarn for winter warmth.
🧡 Tips for Success
- Use a stitch marker to keep track of rounds, especially in the crown.
- Measure as you go: Check fit against your head (or recipient’s) after the body section.
- Block your hat gently if needed to shape it nicely.
🎁 A Perfect Handmade Gift
A crochet bucket hat is not just a stylish accessory—it’s also a thoughtful, personal gift. Whether you’re making it for a friend’s birthday, a craft market, or your own wardrobe, this hat combines practicality with personality.
🧶 Conclusion
With just a hook, some yarn, and a bit of time, you can create a beautiful and functional crochet bucket hat that suits any style or season. This beginner-friendly pattern offers endless opportunities for customization and is the perfect balance of easy crafting and wearable art. So grab your yarn, find a cozy spot, and enjoy making a hat that’s uniquely yours!
Video tutorial:


