
Crocheting your own winter hat is a fun, budget-friendly, and creative way to stay warm during the colder months. Whether you’re a complete beginner or someone looking for a quick and satisfying project, this step-by-step guide will walk you through making a cozy crochet hat using simple stitches and basic materials.
🧶 Materials You’ll Need
Before you begin, gather the following supplies:
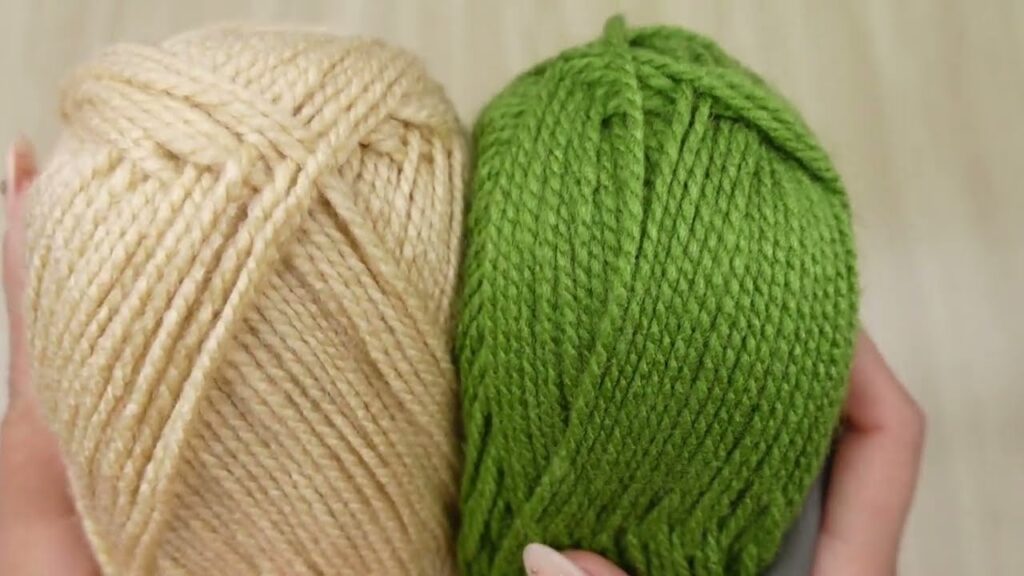
- Yarn: Choose a medium weight (worsted) yarn – acrylic or wool blends work great for warmth and durability. One skein (around 200 yards) is usually enough for one adult-sized hat.
- Crochet Hook: Use a 5.5 mm (I-9) crochet hook (check your yarn label for recommended hook size).
- Yarn Needle: For weaving in the ends.
- Scissors
- Measuring Tape (optional but helpful)
🧵 Basic Stitches You Should Know
If you’re new to crochet, these are the main stitches you’ll need:
- Slip Knot – to start your work
- Chain (ch) – the foundation of your project
- Single Crochet (sc) – tight, compact stitch
- Half Double Crochet (hdc) – a good balance of height and stretch
- Slip Stitch (sl st) – used to join rounds
🧤 Step-by-Step Instructions to Crochet a Winter Hat
Step 1: Start with a Magic Ring (or Adjustable Loop)
This method creates a snug top with no hole.
- Make a magic ring.
- Chain 2 (counts as your first half double crochet).
- Make 9 hdc into the ring.
- Pull the ring closed and slip stitch to the top of the first hdc to join.
🧵 You now have 10 stitches in the round.
Step 2: Increase the Crown
Continue working in rounds to form the top (crown) of the hat.
Round 2:
Ch 2. 2 hdc in each stitch around. Join with sl st. (20 stitches)
Round 3:
Ch 2. 1 hdc in next st, 2 hdc in next st. Repeat around. Join. (30 stitches)
Round 4:
Ch 2. 1 hdc in next 2 sts, 2 hdc in next st. Repeat around. Join. (40 stitches)
Round 5:
Ch 2. 1 hdc in next 3 sts, 2 hdc in next st. Repeat around. Join. (50 stitches)
🔁 Keep increasing in this pattern until the crown is approximately 6.5 inches in diameter for an adult hat.
Step 3: Build the Body of the Hat
Once the crown is the right size:
- Ch 2, then work 1 hdc in each stitch around.
- Join with a sl st at the end of each round.
- Repeat this round until the hat measures around 7–8 inches from the center of the crown to the bottom edge.
🧣 This creates the main body of the hat.
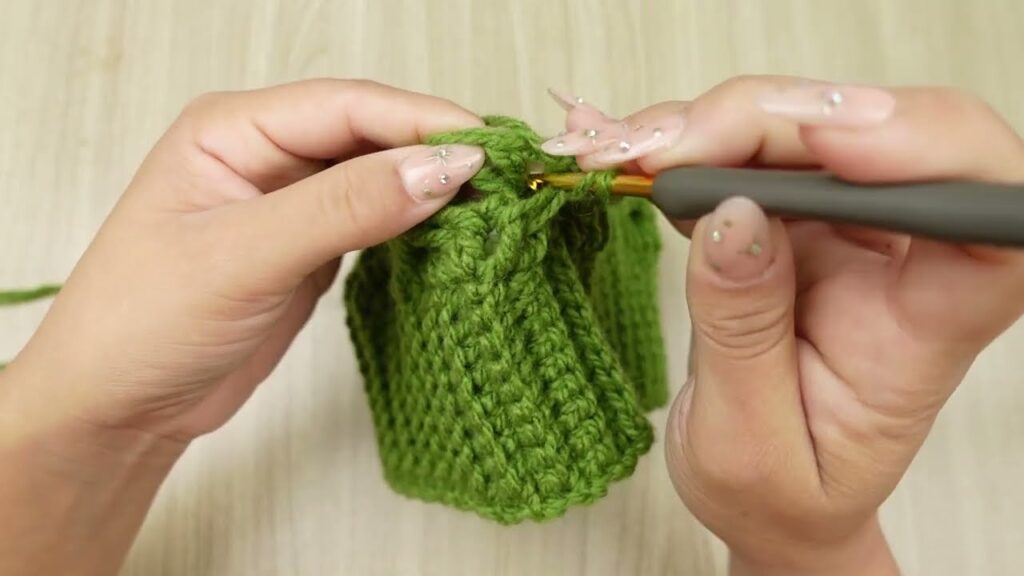
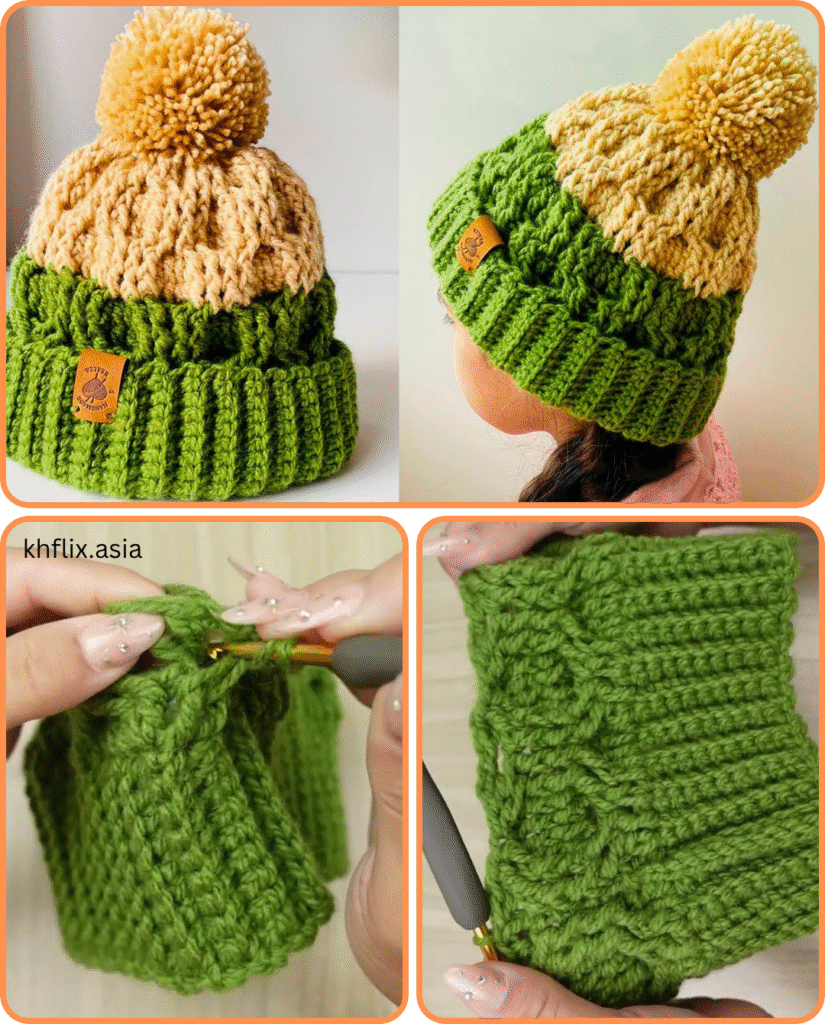
Step 4: Add a Ribbed Brim (Optional but Stylish)
Switch to single crochet for a tighter edge.
- Ch 1, sc in each stitch around.
- Repeat for 3–4 rows, depending on your desired brim width.
- Fasten off and weave in the yarn tails with a yarn needle.
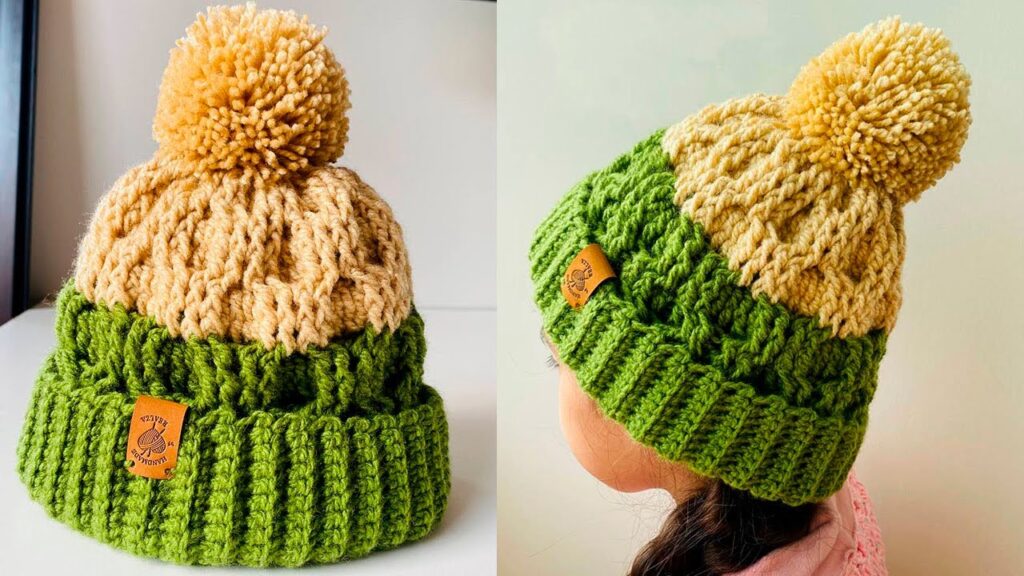
Step 5: Add a Pom-Pom (Optional)
Want to make your hat extra cute?
- Use leftover yarn and wrap it around your fingers or a pom-pom maker.
- Tie tightly in the center and cut the loops.
- Trim to shape and sew securely to the top of the hat.
👒 Size Adjustments
- Kids: Stop increasing when crown is ~5 inches in diameter.
- Teens/Small Adults: 6 inches.
- Large Adults: 6.5 to 7 inches.
To adjust length, add or subtract rows in the body before starting the brim.
❄️ Tips for Success
- Use stitch markers to mark your rounds if you struggle to keep track.
- Practice your tension — too tight makes a stiff hat; too loose won’t hold shape.
- Choose yarn colors that match your winter wardrobe!
🎁 Great Gift Idea
These hats make excellent gifts for holidays, birthdays, or donation projects. You can customize them with buttons, embroidery, or tags for a personal touch.
Video tutorial:
🧶 Final Thoughts
Making your own crochet winter hat is satisfying and surprisingly easy once you learn the basics. With a little time and practice, you’ll have a warm, handmade accessory that looks great and keeps you cozy.
So grab your yarn, a cup of tea, and let your creativity flow—your perfect winter hat is just a few stitches away!


