Crocheting your first hat is an exciting and rewarding project. Whether you’re new to crochet or looking for a simple, stylish accessory, this step-by-step guide will walk you through creating a cozy, customizable hat using basic stitches and techniques.
🧵 Materials You’ll Need
Before you begin, gather the following supplies:
- Yarn: Choose a soft, medium-weight yarn (worsted weight, #4). Acrylic or cotton blends are excellent choices for beginners.
- Crochet Hook: Select a hook size that matches your yarn’s recommended gauge. For worsted weight yarn, a 5.5mm (I-9) hook is commonly used.
- Tapestry Needle: For weaving in ends.
- Scissors: To cut yarn.
- Stitch Marker: Optional, but helpful for keeping track of rounds.
👒 Basic Crochet Hat Pattern
Step 1: Create a Magic Ring
Start by making a magic ring (also known as a magic circle). This technique creates a tight center, ideal for hats. If you’re unfamiliar with the magic ring, you can substitute it with a chain of 4 stitches, joined with a slip stitch to form a loop.
Step 2: Round 1 – Establish the Base
Ch 2 (this does not count as a stitch). Work 12 double crochets (dc) into the magic ring. Join with a slip stitch to the top of the first dc. (12 dc)

Step 3: Round 2 – Increase
Ch 2 (does not count as a stitch). 2 dc in each st around. Join with a slip stitch to the top of the first dc. (24 dc)
Step 4: Round 3 – Increase
Ch 2. 1 dc in the next st, 2 dc in the next st. Repeat around. Join with a slip stitch. (36 dc)
Step 5: Round 4 – Increase
Ch 2. 1 dc in the next 2 sts, 2 dc in the next st. Repeat around. Join with a slip stitch. (48 dc)
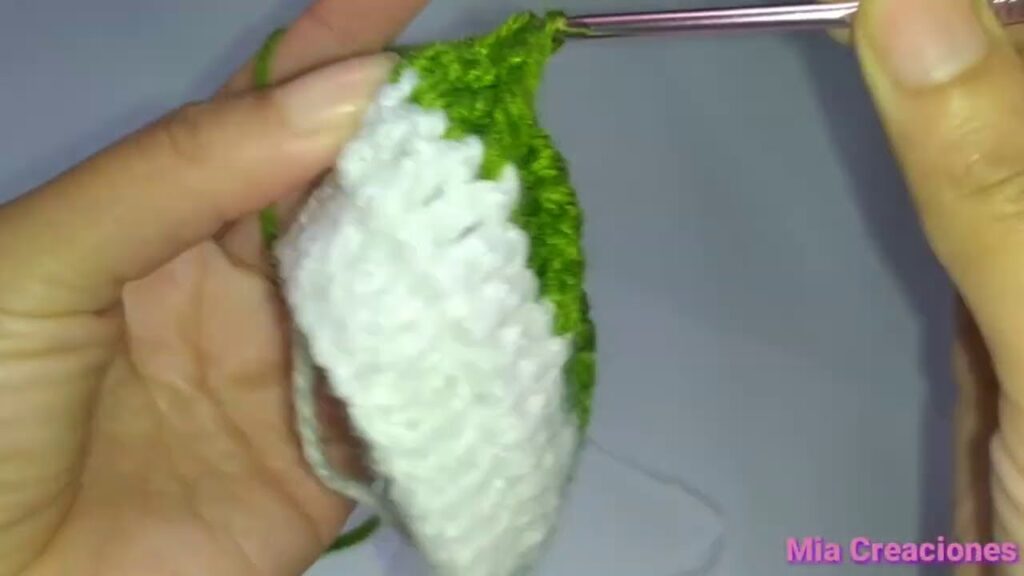
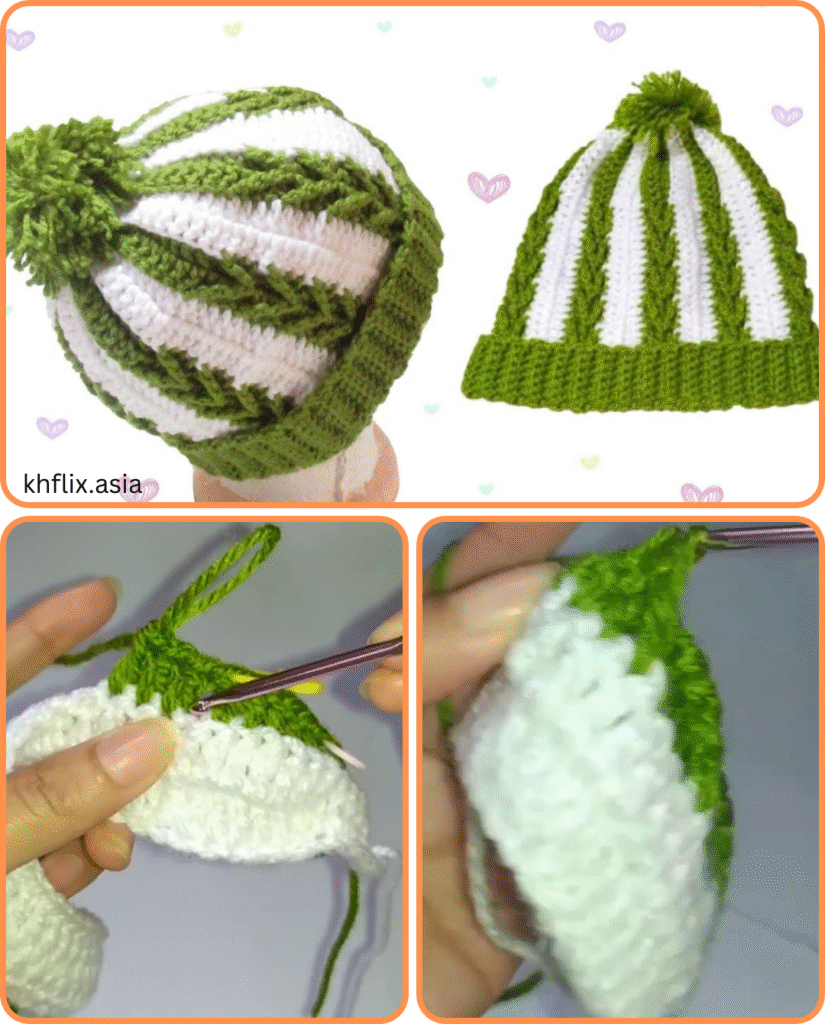
Step 6: Rounds 5–10 – Body of the Hat
Ch 2. Work 1 dc in each st around. Join with a slip stitch. Repeat for 6 rounds. (48 dc per round)
Step 7: Round 11 – Finish the Hat
Ch 1. Work 1 single crochet (sc) in each st around. Join with a slip stitch. (48 sc)
Step 8: Fasten Off
Cut the yarn, leaving a long tail. Use a tapestry needle to weave in the end securely.
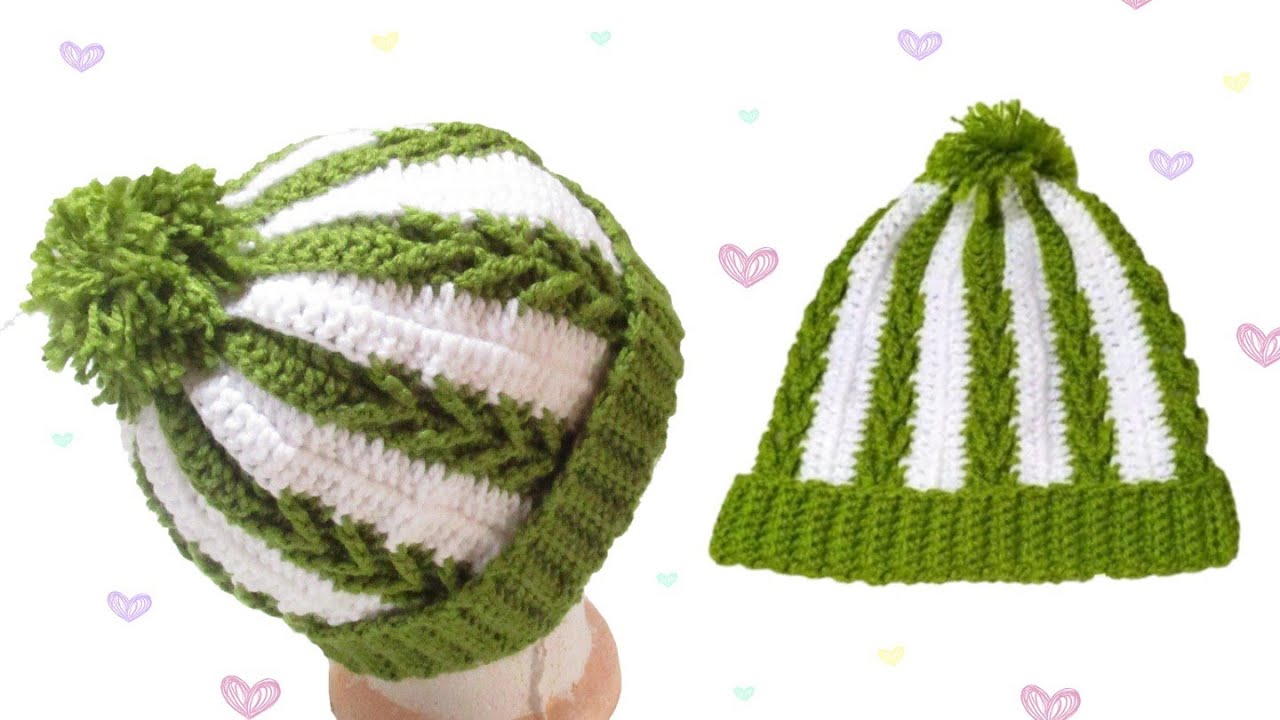
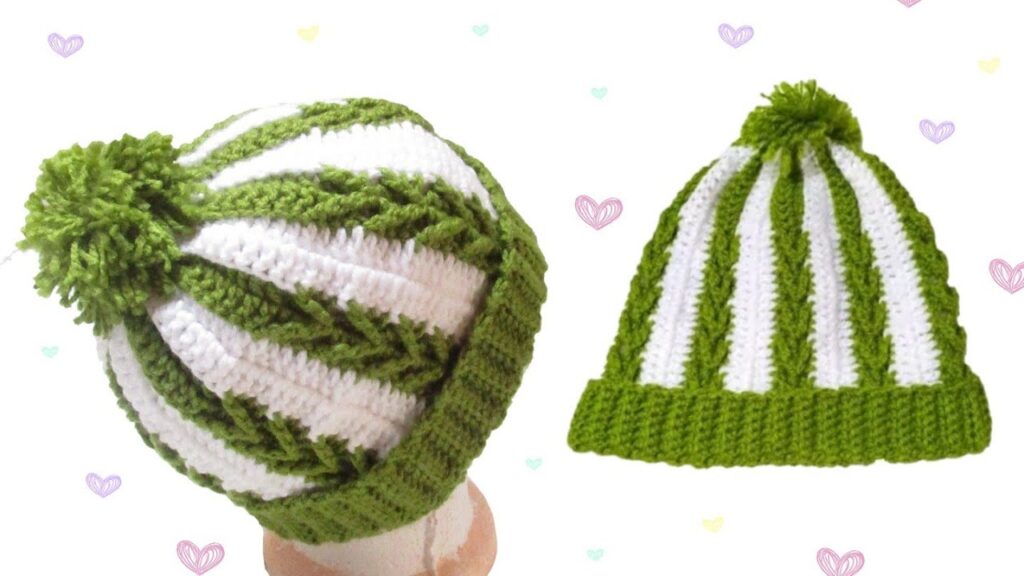
🎨 Customization Ideas
- Colors: Experiment with different yarn colors for the brim, body, and top of the hat to create a unique design.
- Embellishments: Add a pom-pom, crochet flowers, or buttons to personalize your hat.
- Textures: Incorporate different stitches like half double crochet (hdc) or front post double crochet (FPDC) for varied textures.
🧶 Tips for Success
- Gauge: Always check your gauge to ensure the hat will fit properly.
- Soft Yarn: Opt for soft, baby-friendly yarns to ensure comfort.
- Secure Fastenings: Ensure any embellishments are securely attached to prevent choking hazards.
Video tutorial:
Happy crocheting! 🧶👒


