
The granny square is a timeless classic, and a handmade square is a true timeless treasure. The “Starlight Medallion” Granny Square is a fantastic project for any crocheter, featuring a simple, beginner-friendly design that is both stylish and incredibly functional. This detailed tutorial will guide you through creating a classic motif that is a fantastic way to use up your scrap yarn and express your unique style.

This project is an excellent choice for a beginner looking to master a fundamental crochet skill or for an experienced crocheter wanting a fast and fun project. The squares can be joined to create a beautiful blanket, a stylish bag, a cozy scarf, or even a fun hat.
Why Crochet the Starlight Medallion Square?
- Iconic & Versatile: The granny square is a classic motif that never goes out of style, and the finished square can be a perfect addition to any project.
- Great for Scrap Yarn: This project is a fantastic way to use up small amounts of leftover yarn from other projects.
- Skill Building: You’ll master the art of crocheting a classic granny square and learn how to make it as large as you want.
- Customizable: Easily change the size, colors, and number of rounds to create a square that is a perfect fit for you.
- Unique & Personal: A handmade square is a statement piece that is both fashionable and personal.
1. Planning Your Square: Size & Materials
- Finished Size: The size is completely customizable and depends on the amount of yarn you have. A versatile 4×4 inch (10×10 cm) square is a great starting point.
- Yarn Choice: Choose a yarn that is soft, gentle on the skin, and machine-washable.
- Fiber: A sturdy, medium-weight yarn like Worsted Weight (#4) in Acrylic or Cotton is a great choice.
- Color: You can use a single color for a minimalist look or use multiple colors for a vibrant, patchwork effect.
- Quantity: You will need approximately 10-15 yards (9-14 meters) of yarn per square.
2. Materials You’ll Need
- Yarn: Your chosen quantity of Worsted Weight (#4) yarn.
- Crochet Hook: 4.0 mm (G-6 US) or a size that gives you a dense but flexible fabric with your yarn.
- Scissors: For cutting yarn.
- Yarn Needle (Tapestry Needle): For weaving in ends.
- Stitch Markers (Optional): To mark the corners.
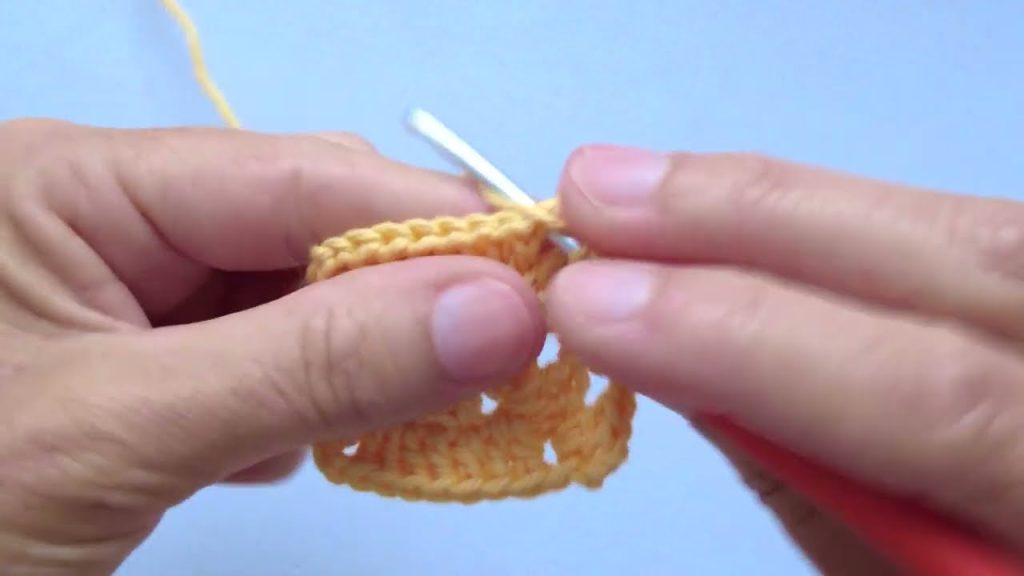
3. Essential Crochet Stitches & Techniques
- Slip Knot
- Chain (ch)
- Slip Stitch (sl st): For joining and neatening.
- Double Crochet (dc)
- Granny Cluster: A group of 3 dc stitches worked into the same space.
- Working in the Round: The square is worked in continuous rounds from the center out.
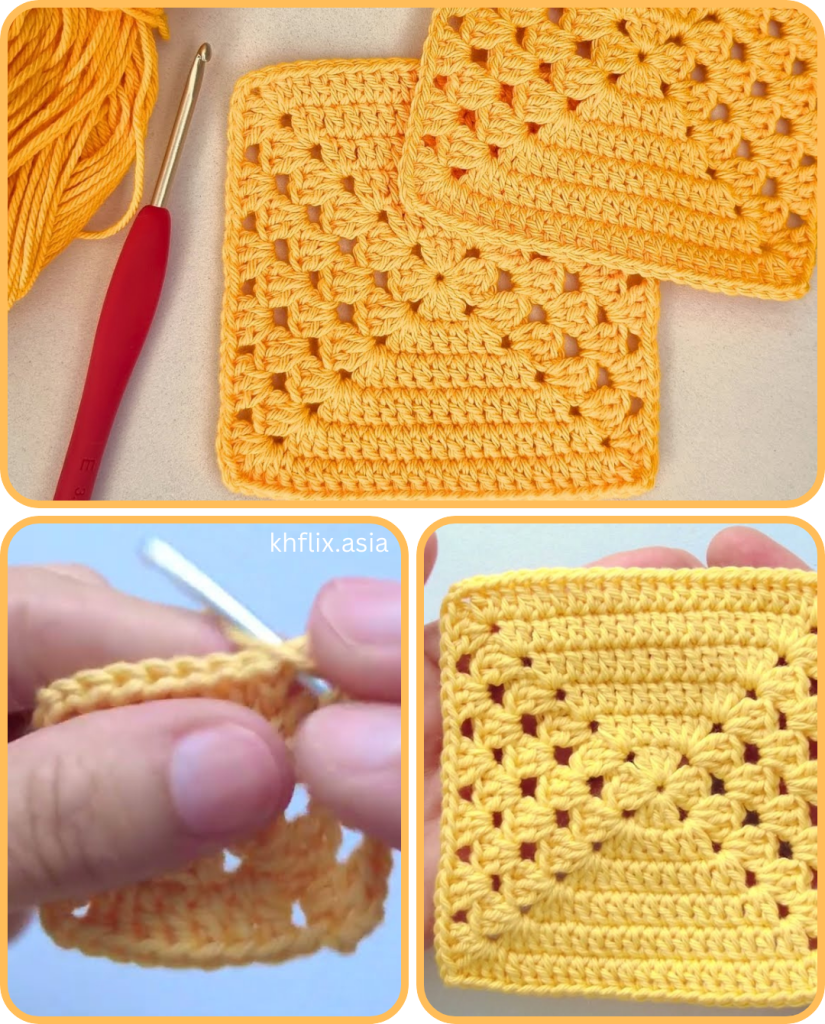
4. Let’s Crochet the Starlight Medallion Granny Square!
The square is made from a single motif that grows from the center out until it reaches the desired size.
Part 1: The Granny Square
- Start with a Magic Ring (or Ch 4, sl st to first ch to form a ring).
- Round 1: Ch 3 (counts as 1 dc). Work 2 dc into the ring. Ch 2, work 3 dc into the ring. Repeat from * to * two more times. Ch 2, join with a sl st to the top of the beginning Ch 3.
- [4 groups of 3 dc]
- Round 2: Sl st into the next two stitches and into the first ch-2 space. Ch 3 (counts as 1 dc), work 2 dc into the same ch-2 space. Ch 1, work a Granny Cluster (3 dc) into the next space. Ch 2, work a Granny Cluster into the next corner space. Repeat from * to * two more times. Ch 1, work a Granny Cluster into the last space, Ch 2, join with a sl st to the top of the beginning Ch 3.
- Round 3: Sl st into the next two stitches and into the first ch-2 space. Ch 3 (counts as 1 dc), work 2 dc into the same ch-2 space. Ch 1, work a Granny Cluster into the next space. Ch 2, work a Granny Cluster into the next corner space. Repeat from * to * two more times. Ch 1, work a Granny Cluster into the last space, Ch 2, join with a sl st to the top of the beginning Ch 3.
- Repeat Round 3: Continue repeating this round until the square reaches your desired size.
- You can change colors with each round for a striped effect or work in one solid color.
Step 5: Finishing Touches
- Once your square reaches the desired size, fasten off and weave in all ends securely.
- Blocking: Blocking is optional but highly recommended. It will help to even out the stitches and give your square a professional, finished look. Gently wet or steam the finished piece and lay it flat to dry.
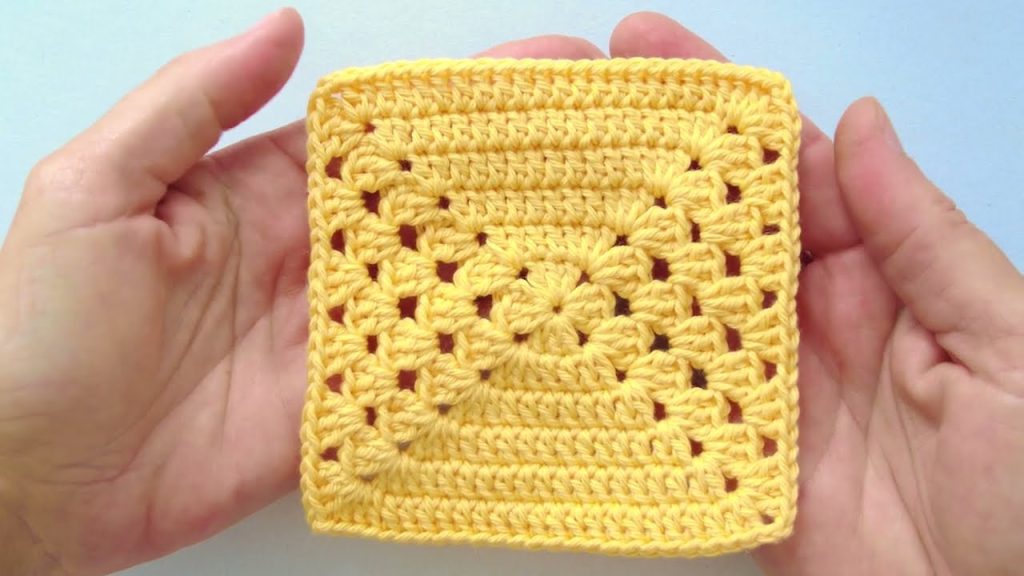
Enjoy your beautiful, handmade “Starlight Medallion” Granny Square. It’s a labor of love that is a perfect addition to your next project!
Video tutorial:


