
Creating a baby yoke is one of the most rewarding elements of crocheting baby garments. Whether you’re crafting a cardigan, romper, or dress, the yoke is the foundational piece that sets the tone for the fit and style of the entire outfit. In this comprehensive guide, we’ll explore how to crochet a baby yoke from scratch, different methods and shapes, important sizing tips, stitch choices, and how to adapt your yoke for various baby garments.
What Is a Yoke?
A yoke is the upper part of a garment that fits around the neck and shoulders. In crochet baby clothing, yokes are particularly important because they provide both structure and aesthetics. The rest of the garment — be it sleeves, bodice, or skirt — is worked from the yoke down, often in a top-down construction.
Why Make a Yoke First?
- Better Fit: The yoke determines the fit of the neckline and shoulders.
- Top-Down Construction: It allows for seamless crochet work, minimizing sewing.
- Customizable: You can easily adapt the body length or sleeve length once the yoke is complete.
- Versatile: A well-designed yoke can be used for dresses, rompers, or cardigans with minimal alterations.
Materials You’ll Need
- Yarn: Choose a baby-friendly, soft yarn like cotton, bamboo, or acrylic blends.
- Hook: Use the recommended size for your yarn (usually between 3.0 mm and 4.5 mm for baby garments).
- Stitch Markers: To mark the corners of your yoke.
- Measuring Tape: To ensure proper sizing.
- Tapestry Needle: For weaving in ends.
Basic Construction Methods for a Baby Yoke
There are three primary methods to construct a crochet yoke:
1. Circular Yoke (Round Yoke)
- Shape: A smooth, rounded shape.
- Best for: Dresses and seamless cardigans.
- Construction: Increases are spread evenly around each round.
- Pros: Elegant and symmetrical.
- Cons: Can sometimes lack shoulder definition.
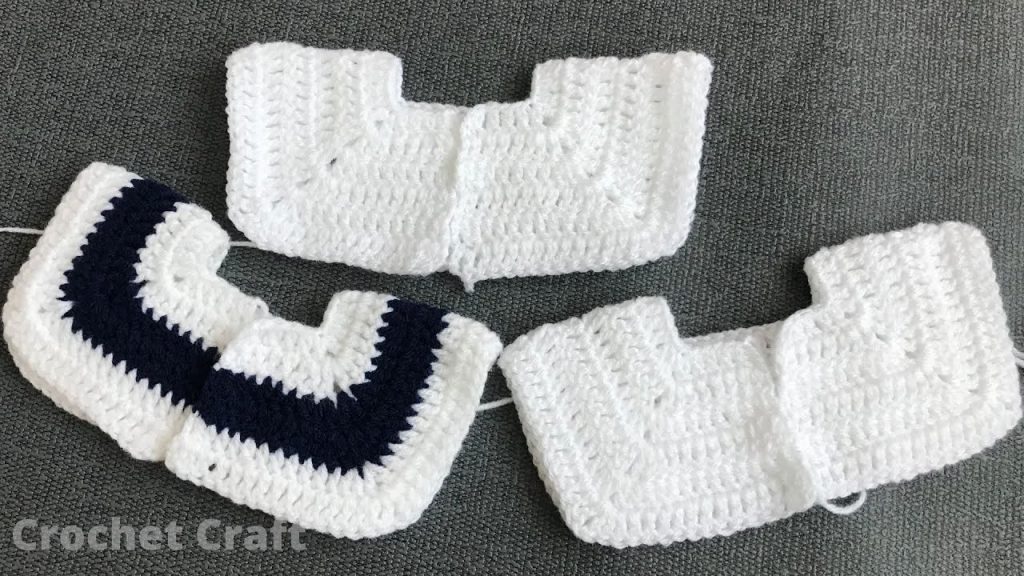
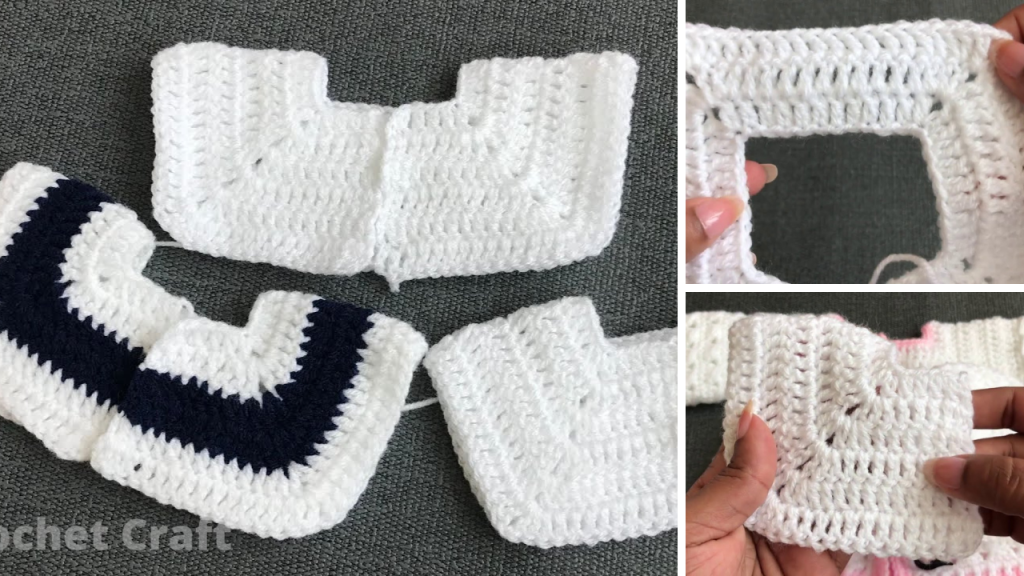
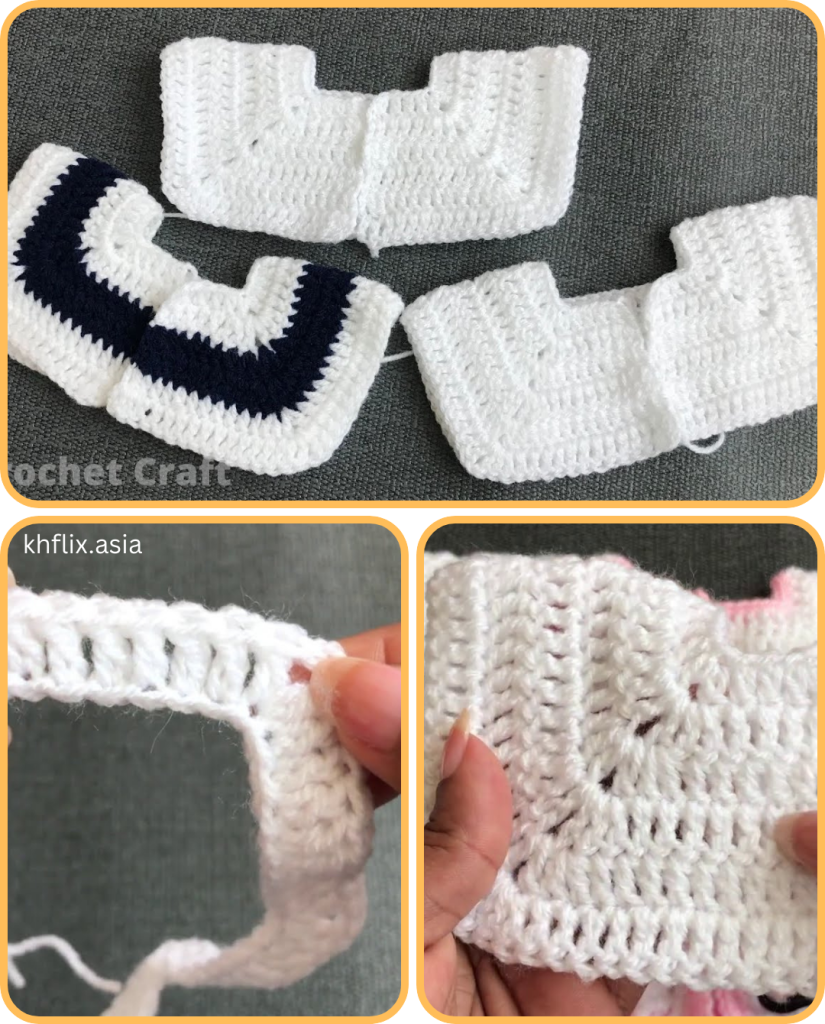
2. Square or Raglan Yoke
- Shape: Square with defined “corners” at the shoulders.
- Best for: Cardigans, rompers, and dresses.
- Construction: Increases at four points — usually the front/back and each sleeve.
- Pros: More tailored fit.
- Cons: Slightly more math involved.
3. Rectangular Yoke (for Cardigans or Buttoned Rompers)
- Shape: Rectangle with front opening.
- Best for: Cardigans or button-up rompers.
- Construction: Similar to raglan but with a split front.
- Pros: Easy to customize and add buttons.
- Cons: May require extra shaping.
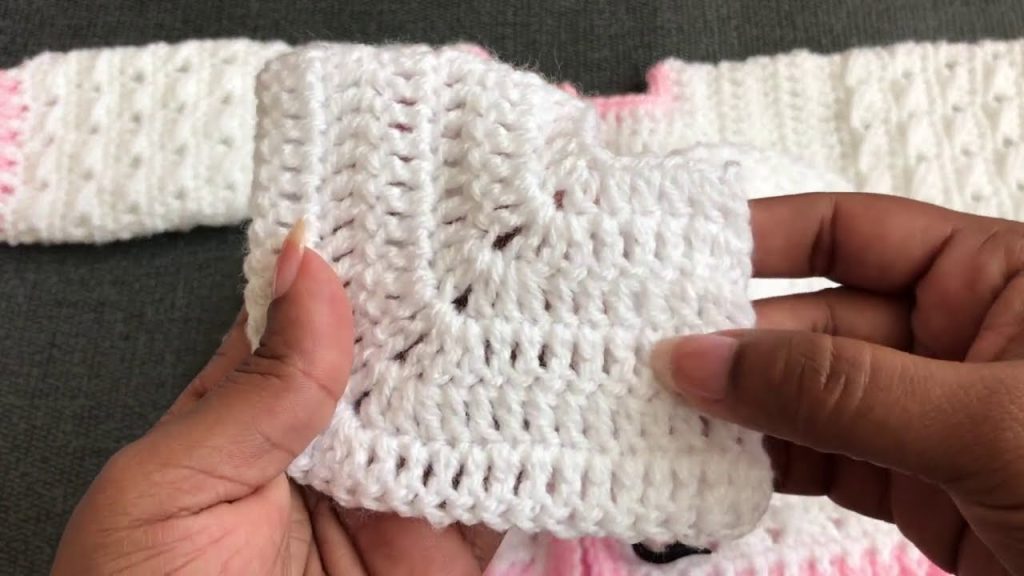
How to Crochet a Basic Square (Raglan) Yoke: Step-by-Step Tutorial
We’ll walk through the process for a top-down raglan yoke suitable for a baby aged 3–6 months. You can adjust your stitch counts for larger or smaller sizes.
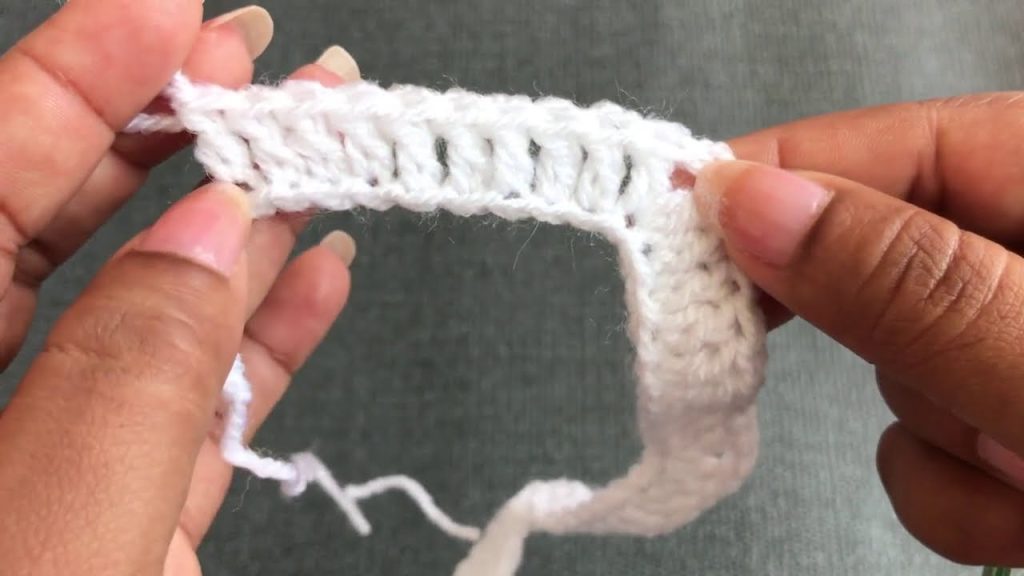
Step 1: Foundation Chain
Start with a foundation chain that forms the neckline. For example:
- Ch 52 for a 3–6 month size.
Divide the chain into parts:
- Back: 12 stitches
- Sleeves: 8 stitches each
- Fronts: 12 stitches each
- Place a stitch marker after each section to mark the increase points (i.e., after 12, 20, 28, and 40).
Step 2: Row 1 – Setup Row (Right Side)
Ch 2 (counts as first dc), dc in each chain across, working 2 dc, ch 1, 2 dc in each marked corner. This is your increase.
Example pattern:
Ch 52.
Row 1: Dc in 3rd ch from hook and across, placing (2 dc, ch 1, 2 dc) in the 13th, 21st, 29th, and 41st chains.
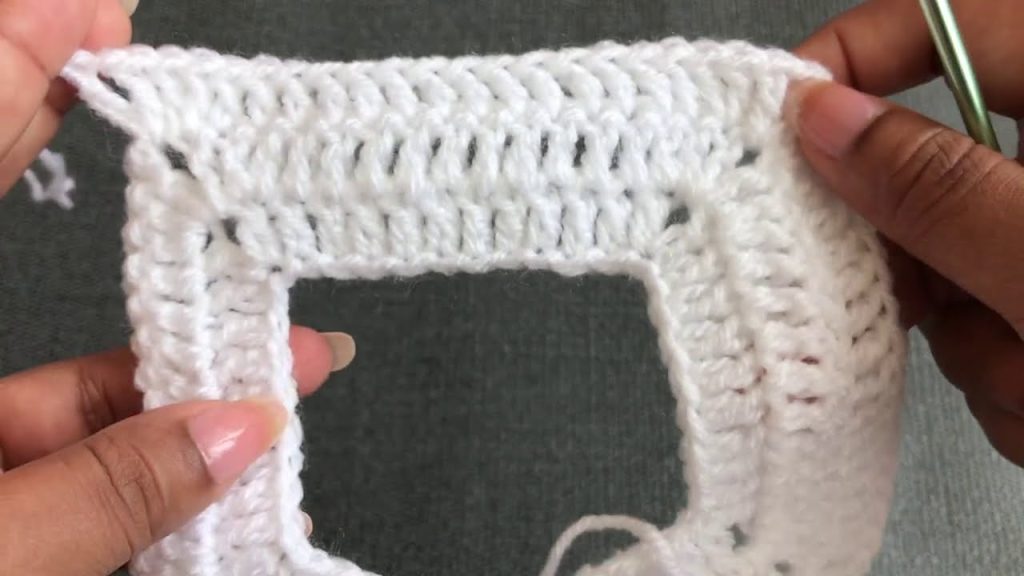
Step 3: Rows 2 to 8 – Continue Yoke Increases
Repeat this process:
- Ch 2, dc in each st across
- In each ch-1 corner space, place (2 dc, ch 1, 2 dc)
You will gradually see the yoke forming a square. Continue until your yoke measures approximately:
- 3.5 – 4.5 inches deep for 0–6 months
- Adjust based on desired fit and baby size.
Checking Fit and Size
Measure the yoke around the neckline and chest. You want the yoke to:
- Fit snugly at the neck (not tight)
- Extend just under the armpits to where sleeves will begin
Use this size chart for reference (approximate chest sizes):
| Age | Chest Circumference |
|---|---|
| Newborn | 14–15 in (36–38 cm) |
| 3 months | 16 in (40 cm) |
| 6 months | 17 in (43 cm) |
| 12 months | 18 in (46 cm) |
Adapting the Yoke for Different Garments
Once your yoke is complete, you can branch into different baby clothing styles.
1. Cardigan
- Stop at desired yoke depth.
- Separate sleeve stitches (put on stitch holders).
- Continue working body in rows (not rounds) to create the cardigan opening.
- Add button band or border.
2. Dress
- After separating for sleeves, continue working the body in the round.
- Use decorative stitches (shells, V-stitch, lace) to add flair.
- Increase gradually for a flared skirt.
3. Romper
- After the yoke, separate for sleeves and work body in the round or split for pant legs.
- Add buttonholes or snaps at the crotch for diaper access.
- Use ribbing at legs and cuffs for a secure fit.
Popular Stitches for Baby Yokes
- Double Crochet (dc): Great for faster work and light texture.
- Half Double Crochet (hdc): Denser and warmer.
- Shell Stitch: Adds feminine flair to dresses.
- Granny Stitch: Classic and breathable for warm-weather garments.
- V-Stitch: Perfect for lacy and elegant looks.
Tips for Success
- Always swatch! Gauge is essential for proper fit.
- Use stitch markers generously to keep track of increase points.
- Try on the yoke (or measure against a baby garment) before continuing.
- Block your yoke if necessary for a clean finish.
- Consider closures early — where will buttons, snaps, or ties go?
Simple Baby Yoke Pattern (0–3 Months Example)
Here’s a sample round yoke pattern you can try:
Yarn: DK weight baby yarn
Hook: 4.0 mm

Ch 52. Join to form a ring (for pullover) or work flat (for cardigan).

Row 1: Ch 2, dc in each st across, placing (2 dc, ch 1, 2 dc) at 4 increase points (as described above).

Rows 2–8: Repeat Row 1, working dc in each stitch and (2 dc, ch 1, 2 dc) in each ch-1 corner space.

At Row 8, divide for sleeves:
- Join front and back panels under sleeves.
- Continue in rounds or rows for your chosen garment.
Conclusion
Crocheting a baby yoke is a fun and highly customizable part of creating baby garments. Once you master the basic yoke — be it round or square — you open the door to countless design possibilities. With the right yarn, a bit of planning, and an understanding of structure, you can create beautiful heirloom-quality cardigans, dresses, and rompers that are as functional as they are adorable.
Video tutorial:


