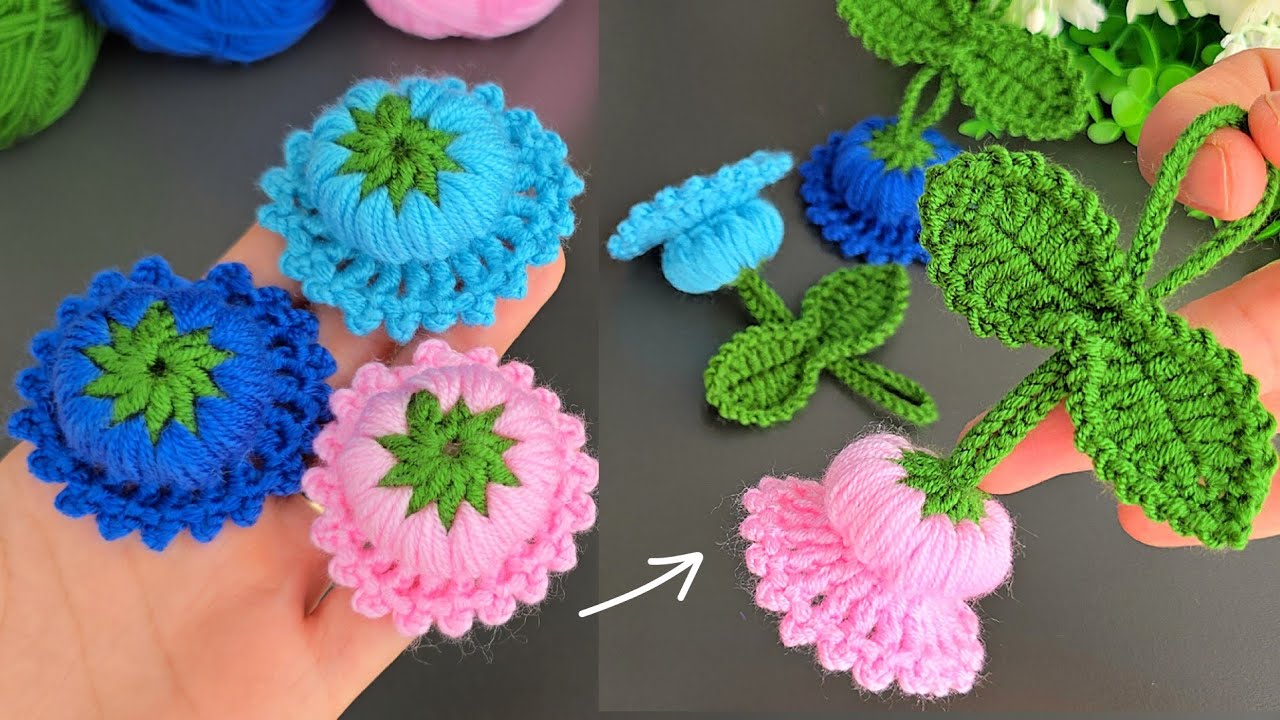
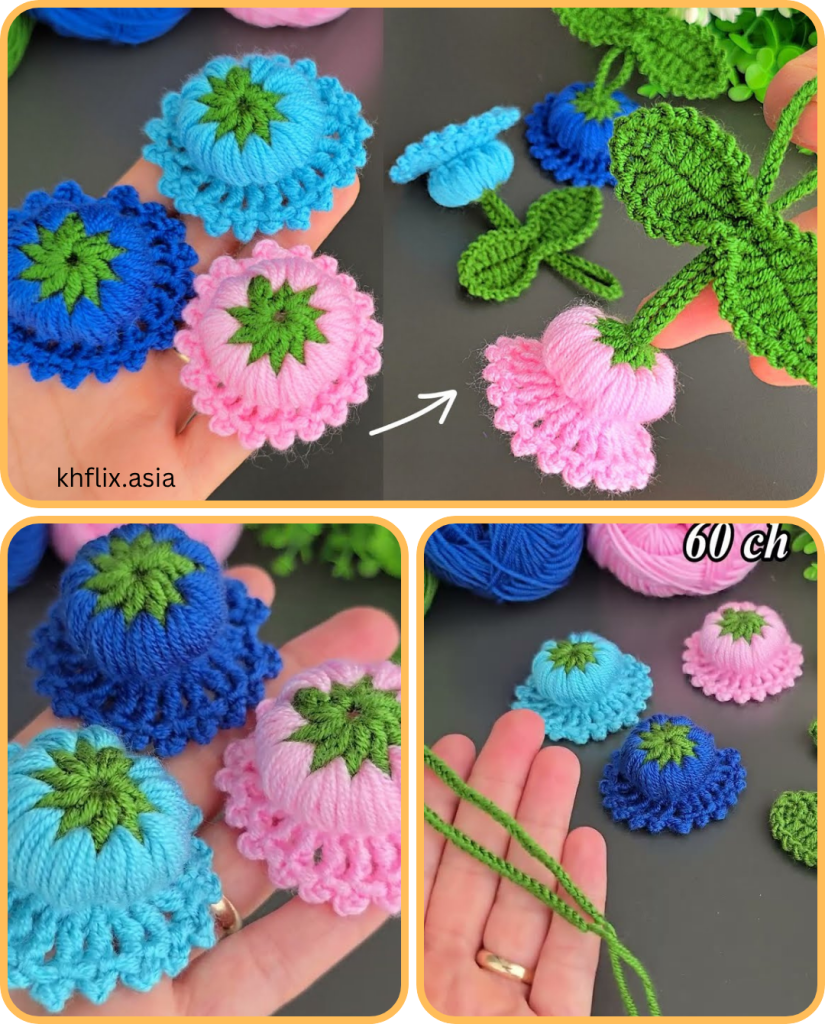
Hello, fellow makers! Are you looking for a quick and delightful project that can add a touch of handmade charm to your keys, bag, or backpack? Look no further! This Blossom Keychain pattern is a fantastic project for a sturdy and chic crocheted flower. With its simple construction and beautiful textured stitch, it’s perfect for a day at the beach, a trip to the market, or just for adding a touch of handmade style to your everyday look.
The magic of this flower lies in its unique “cross double crochet” stitch, which gives it a tight, woven-like texture that’s both durable and visually appealing. We’ll build the bag from the bottom up, with a firm base and a comfortable, seamless body. Let’s grab our materials and get started on your new favorite tote!

Why You’ll Love Crocheting This Flower:
- Quick and Easy: The flower works up in a matter of minutes, making it a great project for beginners or anyone looking for a quick and satisfying make.
- Versatile: The finished flower can be used as a keychain, bag charm, or even as a decorative applique.
- Customizable: Easily adjust the size by changing the yarn weight or hook size.
- Practical: A great way to use up small amounts of leftover yarn.
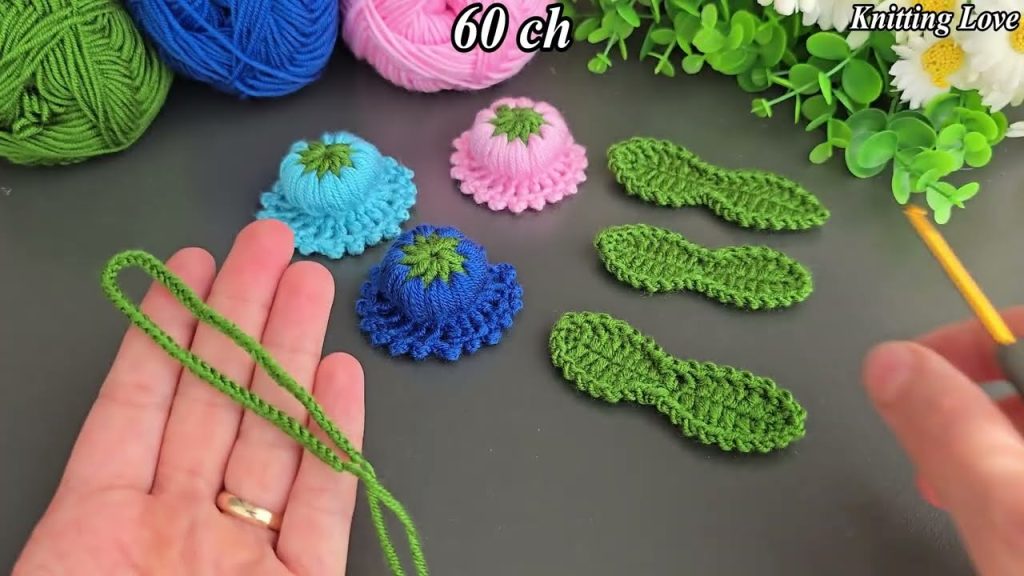
What You’ll Need:
- Yarn: Green and blue yarn in a light worsted or DK weight.
- Crochet Hook: A 2.75mm hook, or the size recommended for your yarn.
- Yarn Needle (Tapestry Needle): For weaving in ends.
- Scissors:
- Keychain Ring: To attach your finished flower.
Essential Crochet Abbreviations:
- ch: chain
- sl st: slip stitch
- sc: single crochet
- hdc: half double crochet
- dc: double crochet
- tr: treble crochet
- st(s): stitch(es)
- FO: fasten off
The Pattern: The Blossom Keychain
This pattern is worked by first creating the flower, then the leaves, and finally assembling the two pieces together.
Part 1: The Flower
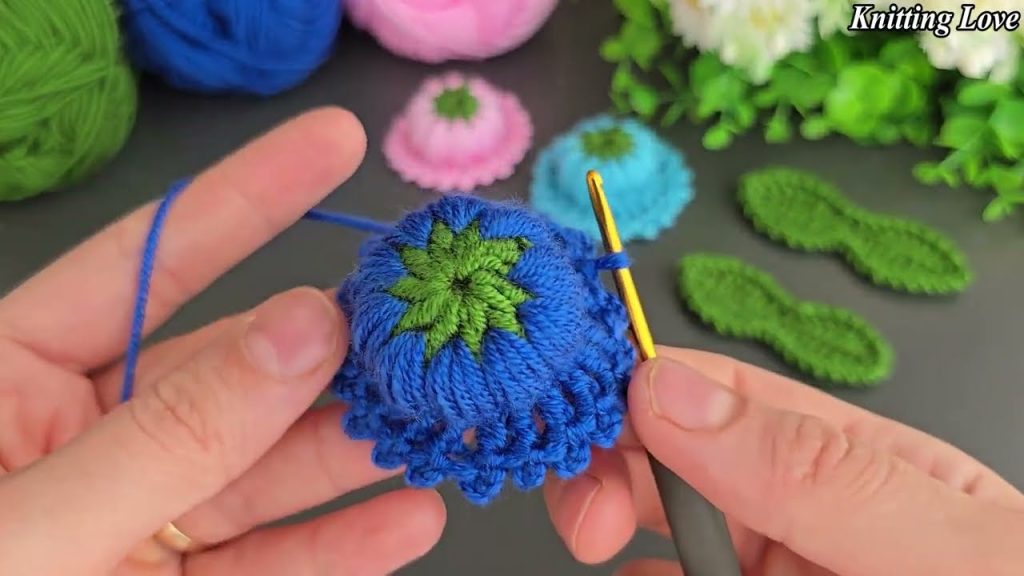
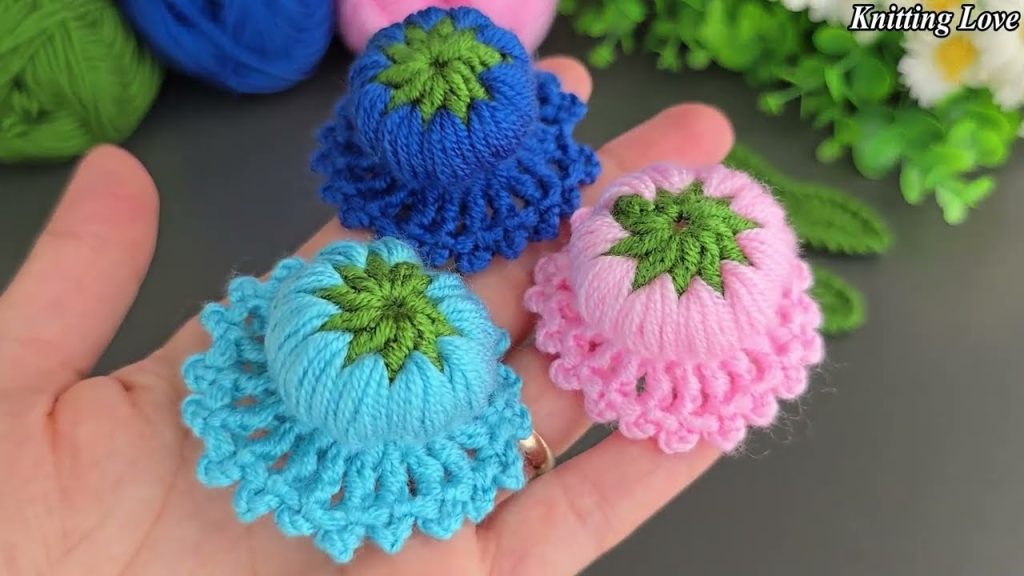
- Flower Base (Green Yarn):
- Start with a magic ring.
- Ch 3 (counts as first tr).
- Work 10
trinto the ring. - Join the last stitch to the first with a
sl st. - FO green yarn, leaving a tail for weaving in.
- Petals (Blue Yarn):
- Attach blue yarn in any stitch from the previous round.
- For each petal: Ch 1, and then make 5 loops in the same stitch.
- Work through the loops to form the petal shape.
- Repeat this process to create a total of 10 petals around the green center.
- FO blue yarn, leaving a tail to weave in.
Part 2: The Leaves
- First Leaf (Green Yarn):
- Ch 18.
- Follow a specific pattern of
sc,hdc, anddcon both sides of the chain to form the leaf shape. - FO green yarn, leaving a tail for weaving in.
- Second Leaf (Green Yarn):
- Repeat the process for the first leaf to create a second one.
Part 3: Assembly
- Attach the Leaves:
- Use your yarn needle to attach the two leaves to the back of the flower.
- Position the leaves opposite each other to balance the design.
- Attach the Keychain Ring:
- Attach the keychain ring to the top of the assembled flower and leaves.
- Weave in all ends to finish.
- Enjoy your new keychain!
Video tutorial:


