
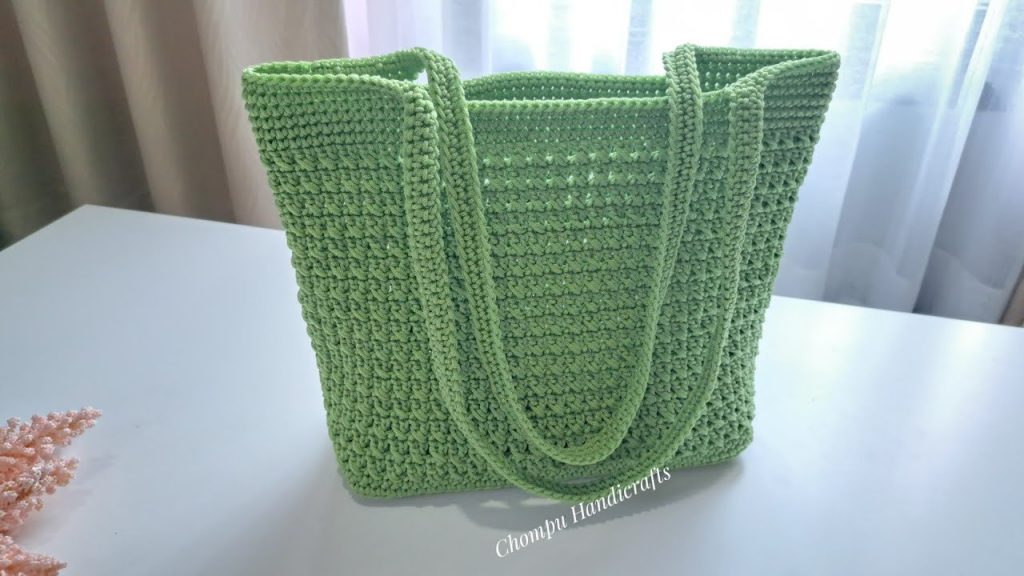
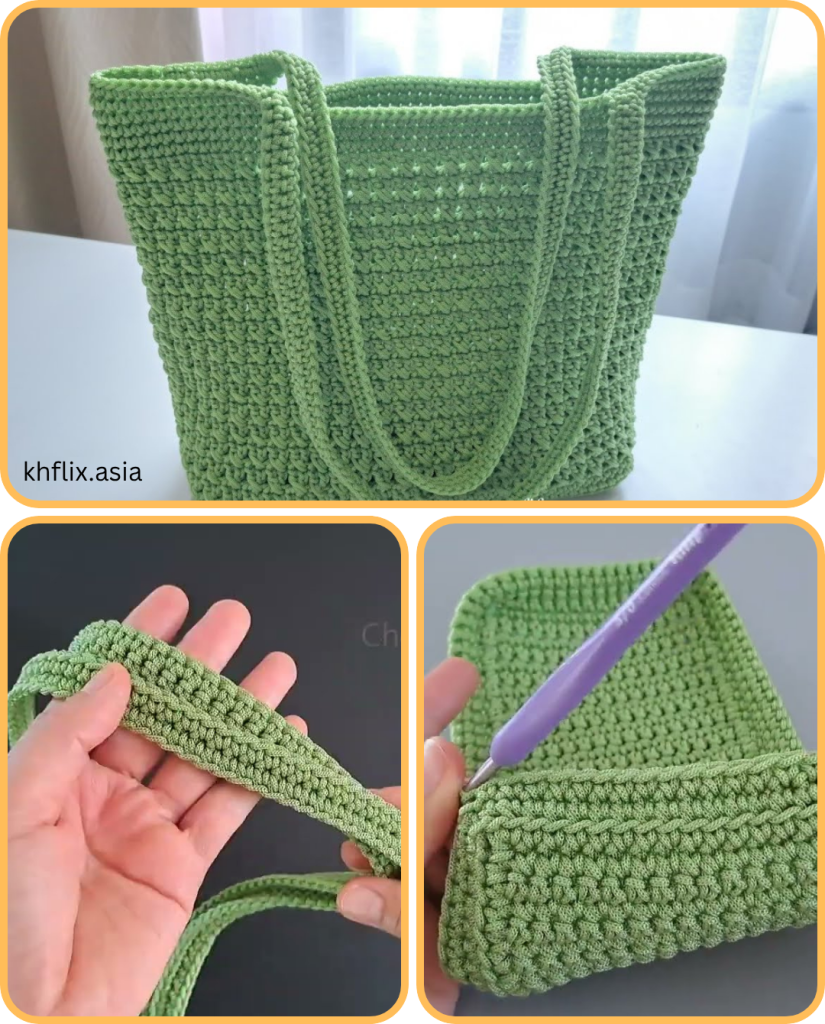
Hello, fellow makers! Are you looking for the perfect accessory to carry all your essentials this season? Something stylish, durable, and completely handmade by you? Look no further! This Seaside Tote pattern is a fantastic project for a sturdy and chic crocheted bag. With its simple construction and beautiful textured stitch, it’s perfect for a day at the beach, a trip to the market, or just for adding a touch of handmade style to your everyday look.
The magic of this bag lies in its unique “cross double crochet” stitch, which gives it a tight, woven-like texture that’s both durable and visually appealing. We’ll build the bag from the bottom up, with a firm base and a comfortable, seamless body. Let’s grab our materials and get started on your new favorite tote!
Why You’ll Love Crocheting This Tote:
- Durable and Sturdy: The pattern uses a strong material and dense stitches, making it perfect for carrying heavier items.
- Unique Texture: The “cross double crochet” stitch creates a beautiful, eye-catching texture that sets this bag apart.
- Beginner-Friendly: The steps are straightforward, and the main body is a simple repeat of a single row.
- Customizable: Easily adjust the size by changing the starting chain or the number of rows.
- Practical: A great carry-all for a variety of uses, from shopping to a day out.
What You’ll Need:
- Yarn: Polypropylene rope (2.0mm, 320g) or a similar strong, durable yarn. A single ball should be enough to complete the project.
- Crochet Hook: A 2.5mm hook, or the size recommended for your yarn.
- Yarn Needle (Tapestry Needle): For weaving in ends.
- Scissors:
- Stitch Markers: To mark the start of rounds and handle placement.
Essential Crochet Abbreviations:
- ch: chain
- sl st: slip stitch
- sc: single crochet
- dc: double crochet
- Cross Double Crochet: dc worked in a crossed pattern (instructions below)
- st(s): stitch(es)
- sp: space
- FO: fasten off
The Pattern: The Seaside Tote
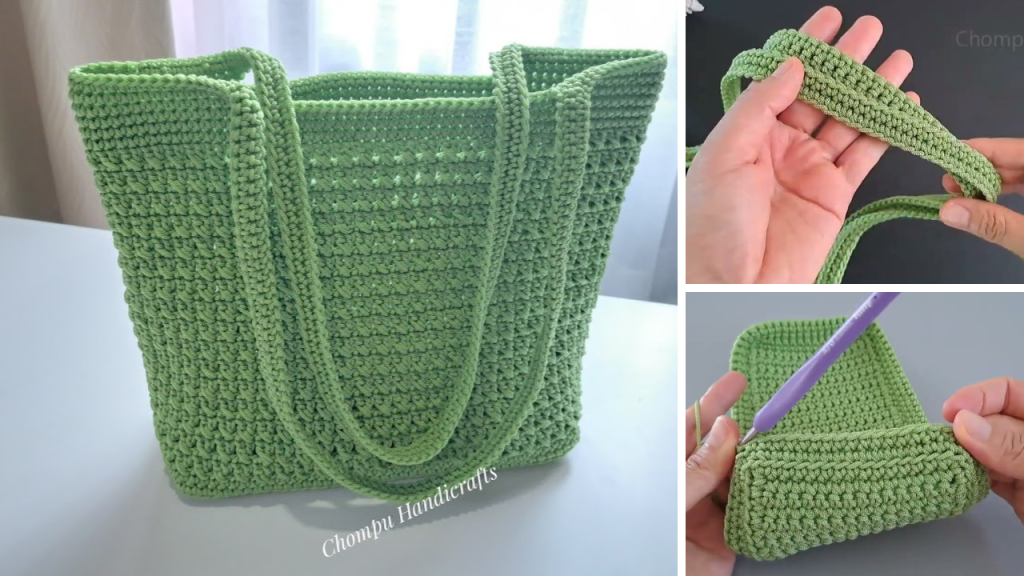
This pattern is worked by first creating a flat base, then building up the sides in the round, and finally adding the handles.
Part 1: The Base
- Starting Chain: Begin with a slip knot and chain 15 stitches.
- Rows 1-40:
- Ch 1. Sc in the second ch from hook and in each ch across. (14 sc)
- Ch 1, turn. Sc in each st across.
- Repeat this row until you have a total of 40 rows.
- This creates a rectangular piece approximately 10cm x 23cm.
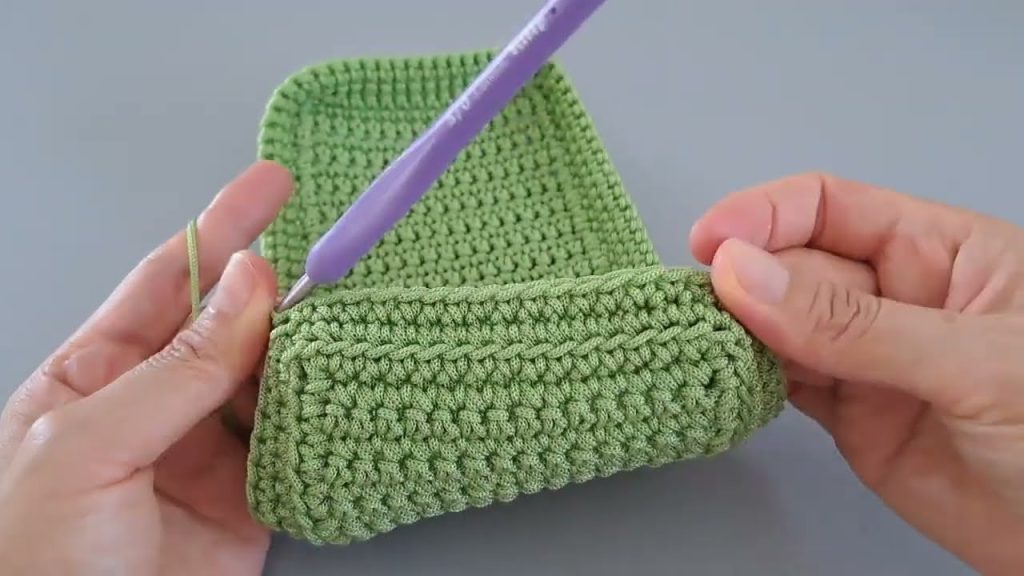
Part 2: Building the Sides
- Round 1: Now we will work in the round to start building the sides.
- Side 1: Sc evenly across the long side of the rectangle, working one sc into the end of each of the 40 rows.
- Corner 1: Place 3 sc in the corner stitch.
- Side 2: Sc across the short side of the base, working into the 14 stitches of the starting chain.
- Corner 2: Place 3 sc in the corner stitch.
- Side 3: Sc evenly across the other long side of the rectangle, working one sc into the end of each of the 40 rows.
- Corner 3: Place 3 sc in the corner stitch.
- Side 4: Sc across the last short side of the base, working into the 14 stitches of the last row.
- Corner 4: Place 3 sc in the corner stitch.
- Sl st to the first sc to join the round.
- Round 2: Ch 1. Sc in each sc around. Sl st to the first sc to join.
Part 3: The Bag Body (Cross Double Crochet)
This section creates the main body of the bag.
- Round 3 (Cross DC Row):
- Ch 2 (counts as first dc).
- Cross DC Stitch: Sk 1 st, dc in the next st. Then, go back and dc in the skipped st, crossing over the dc you just made.
- Repeat the Cross DC stitch around the entire bag.
- Join with a sl st to the top of the ch 2.
- Rounds 4-18: Repeat Round 3 for a total of 16 rows of the cross double crochet stitch.
- Rounds 19-21:
- Ch 1. Sc in each st around.
- Repeat this row for a total of 3 rows of single crochet.
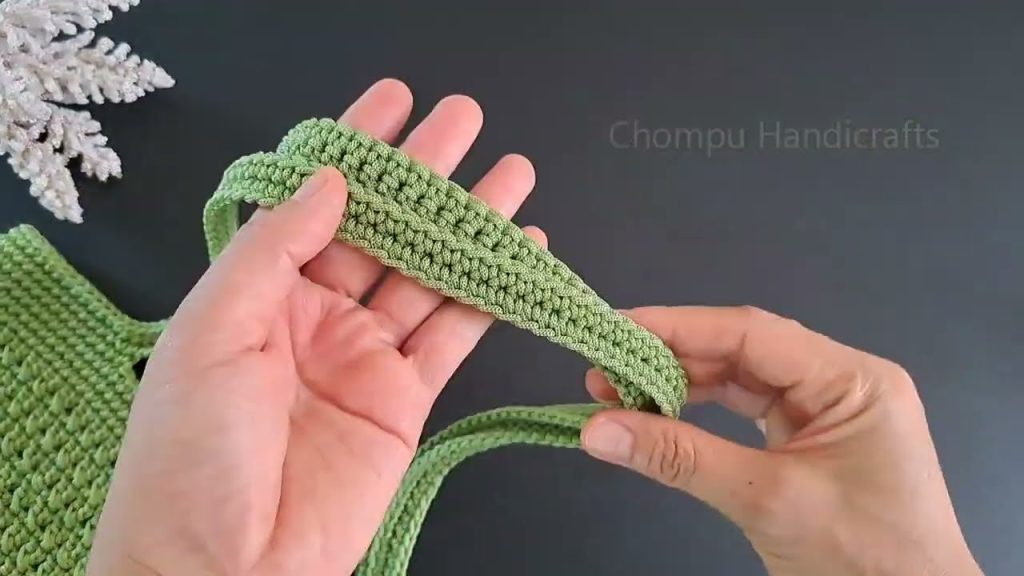
Part 4: The Handles
- Round 22 (Handle Placement):
- Ch 1. Sc in each st until you reach the placement for your first handle. Mark the placement with stitch markers.
- Chain 90 stitches for the handle.
- Sc in the st where you want the handle to attach. Sc to the next marked handle placement.
- Chain 90 stitches for the second handle.
- Sc in the st where you want the second handle to attach. Sc to the end of the round.
- Sl st to the first sc to join.
- Round 23 (Finishing Row):
- Ch 1. Sc in each sc and in each ch of the handles around the entire bag.
- Sl st to the first sc to join.
- FO, leaving a long tail for weaving in.
Part 5: Finishing
- Weave in All Ends: Use your yarn needle to weave in all loose ends securely.
- Enjoy your new tote!
Video tutorial:


