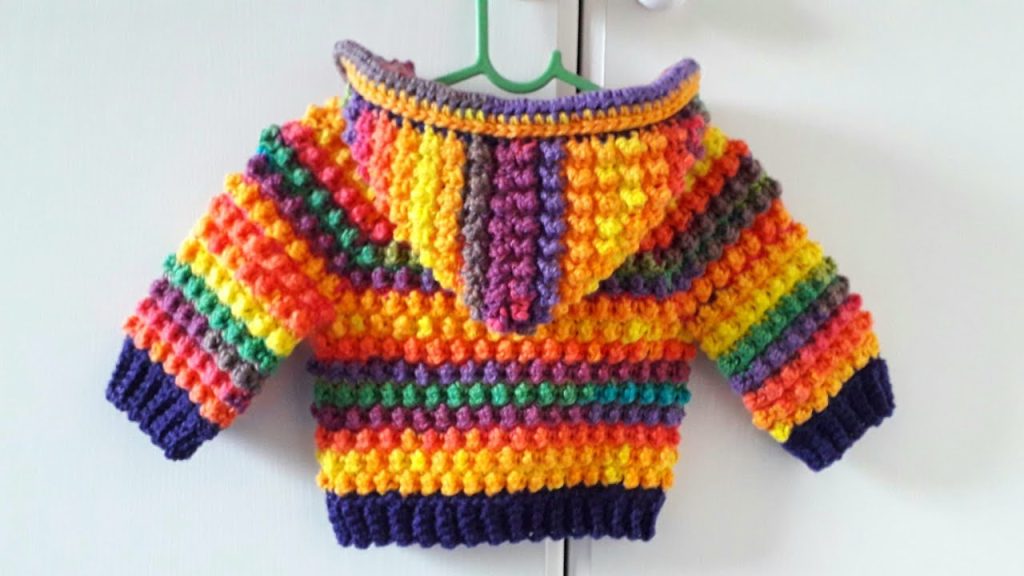
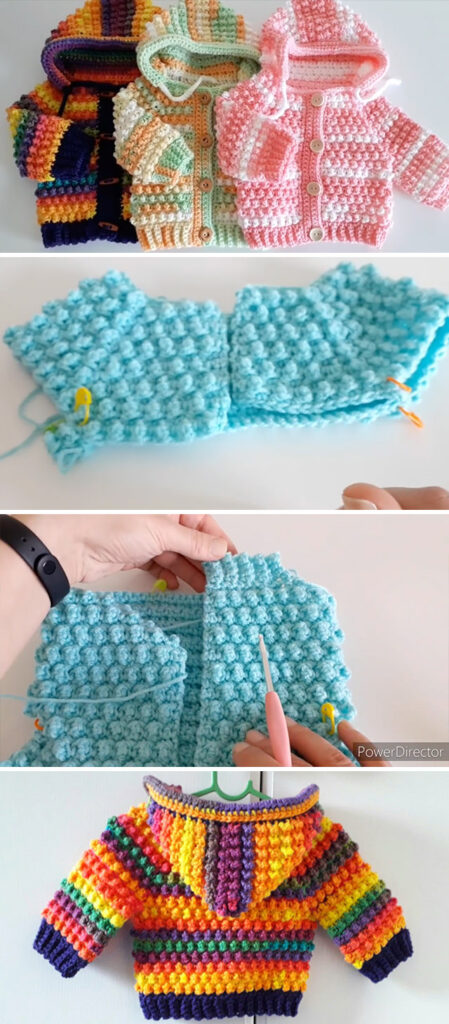
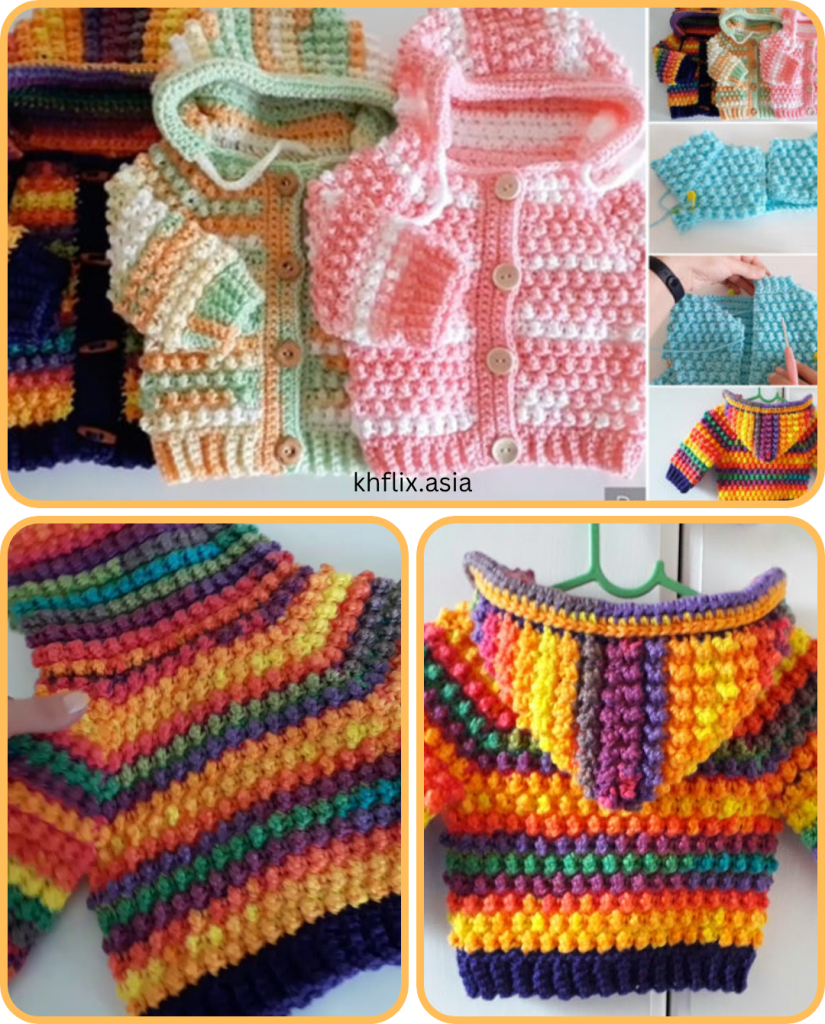
Looking for a baby project that’s both stylish and snuggly? The “Goosebumps” Baby Hoodie combines comfort with character, featuring rich texture that resembles tiny “bumps”—perfect for cooler weather and special occasions alike.
This project gets its name from the unique, raised stitch pattern that gives it a charming, textured appearance—just like goosebumps! Ideal for babies aged 0 to 24 months, this hoodie includes a comfy hood, front button closure, and ribbed cuffs for a snug fit.
This tutorial will guide you step-by-step from start to finish, and by the end, you’ll have a handmade hoodie that’s soft, warm, and irresistibly cute.
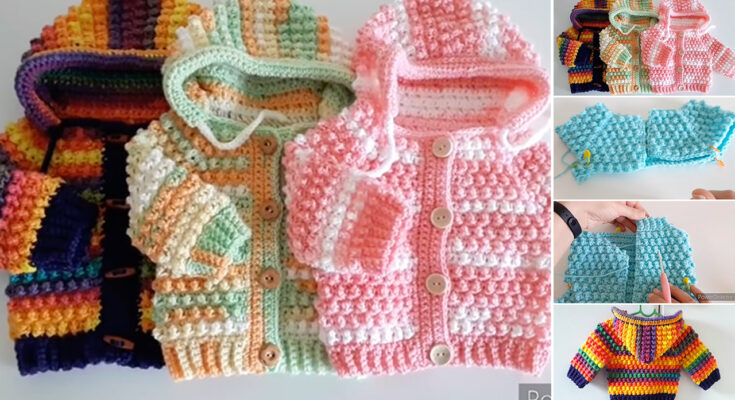
Table of Contents
- Materials and Tools
- Sizing Chart
- Stitches and Abbreviations
- Special Stitch: Goosebump Stitch (aka Puff or Bobble Variant)
- Construction Overview
- Pattern Instructions
- Back Panel
- Front Panels (Left and Right)
- Sleeves
- Hood
- Assembly
- Button Band and Edging
- Customization Ideas
- Tips for Beginners
- Washing and Care Instructions
- Conclusion
1. Materials and Tools
Yarn
- Weight: Light worsted / DK (Category 3)
- Fiber: Soft baby-safe yarn (cotton or acrylic blend)
- Yardage: 400–600 yards (depending on size)
Hook
- 4.5 mm (US 7) crochet hook
- Optional: 4.0 mm hook for ribbing
Notions
- Yarn needle
- Stitch markers
- 3–5 baby-safe buttons (depending on length)
- Scissors
- Measuring tape
- Blocking pins/mats (optional)
2. Sizing Chart (Approximate)
| Size | Age | Chest Circumference | Length | Sleeve Length |
|---|---|---|---|---|
| S | 0–6 months | 16–18” (40–45 cm) | 10” | 6” |
| M | 6–12 months | 18–20” (45–50 cm) | 11.5” | 7” |
| L | 12–24 months | 20–22” (50–55 cm) | 13” | 8” |
To customize the size, adjust the number of stitches and rows per section using the size chart as a guide.
3. Stitches and Abbreviations
All instructions use US terminology.
| Abbreviation | Stitch |
|---|---|
| ch | chain |
| sc | single crochet |
| hdc | half double crochet |
| dc | double crochet |
| sl st | slip stitch |
| st(s) | stitch(es) |
| dec | decrease |
| inc | increase (2 sts in one) |
| rep | repeat |
| RS/WS | right side / wrong side |
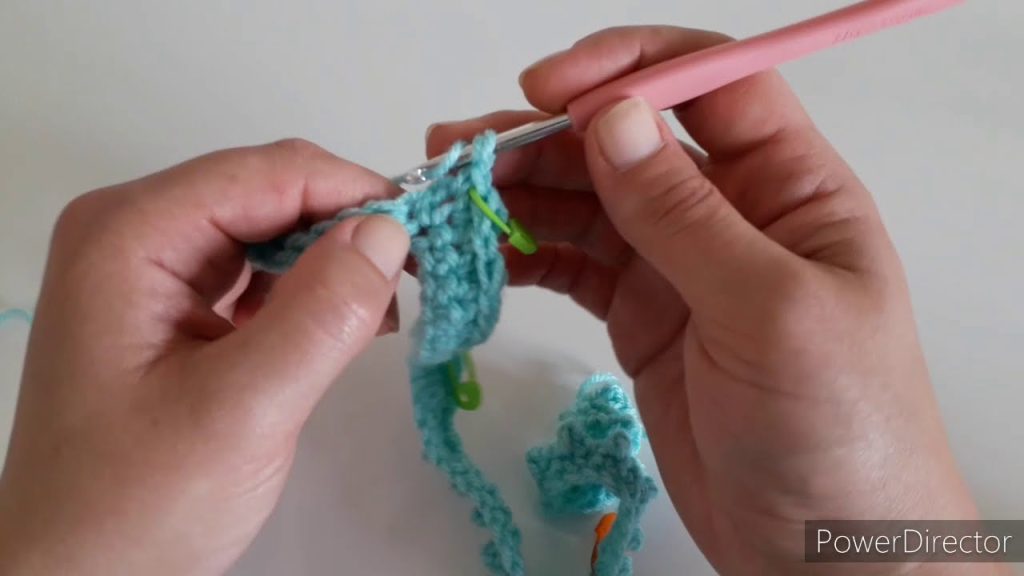
4. Special Stitch: Goosebump Stitch
This hoodie’s star feature is the Goosebump Stitch, a modified puff stitch for a rich, raised texture.
Goosebump Stitch (Puff Variant):
- Yarn over, insert hook into stitch.
- Yarn over, pull up a loop (3 loops on hook).
- Repeat step 1 two more times in the same stitch (total of 7 loops).
- Yarn over and pull through all 7 loops.
- Ch 1 to lock the puff.
You can space these puffs every 2-3 stitches in alternate rows for a quilted look.
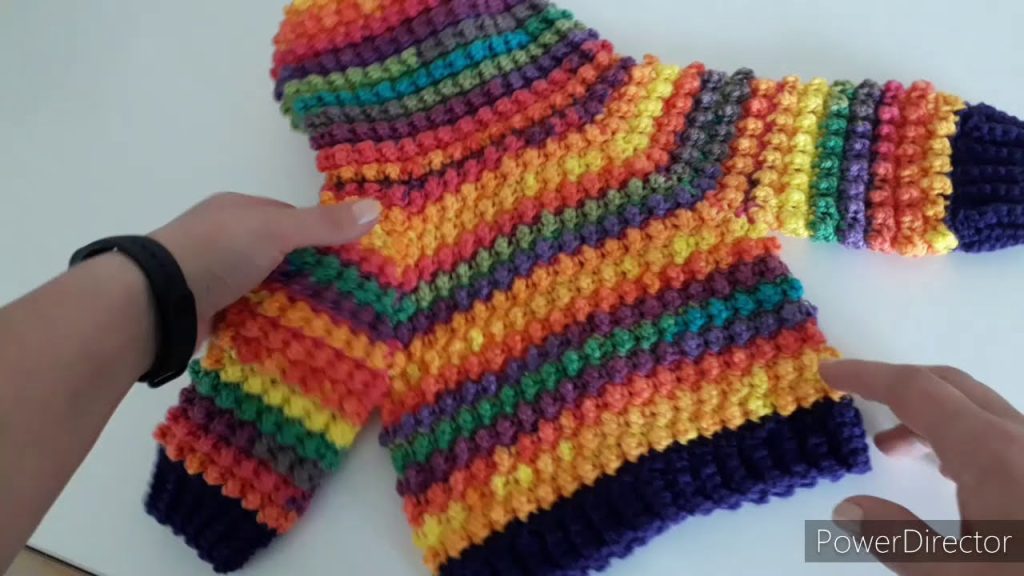
5. Construction Overview
This hoodie is worked flat in panels and then seamed together.
- Back Panel: Rectangular piece with goosebump texture.
- Front Panels (Left and Right): Shaped rectangles with button band space.
- Sleeves: Worked flat and seamed.
- Hood: Worked upward from the neckline.
- Ribbing: Bottom hem, cuffs, and button band in sc or hdc ribbing.
6. Pattern Instructions
Note: Instructions below are for 6–12 months size. Adjust stitch count for other sizes.
A. Back Panel
Row 1 (WS):
Ch 55. (or ch enough to match chest width)
Sc in 2nd ch from hook and across. (54 sc)
Ch 1, turn.
Row 2 (RS):
Sc in first st, (goosebump st in next st, sc in next 2 sts) across.
End with sc. Ch 1, turn.
Row 3:
Sc in each st across.
Ch 1, turn.
Rows 4–34:
Repeat Rows 2 and 3, alternating goosebump rows with plain sc rows.
Fasten off and weave in ends.
B. Front Panels (Make 2)
Row 1:
Ch 28. Sc in 2nd ch and across.
Ch 1, turn.
Row 2:
Sc in first st, (goosebump st, sc in next 2 sts) across.
End with sc. Ch 1, turn.
Row 3:
Sc in each st across.
Ch 1, turn.
Rows 4–28:
Repeat rows 2 and 3.
Row 29–34 (Neck shaping):
Dec 1 st at neck edge every row for shaping.
Fasten off.
C. Sleeves
Row 1:
Ch 30. Sc across.
Ch 1, turn.
Row 2:
Sc in first st, (goosebump st, sc in next 2 sts) across.
Ch 1, turn.
Row 3:
Sc across.
Rows 4–20:
Repeat Rows 2 and 3. Increase 1 stitch on each edge every 4th row for shaping.
Optional Ribbed Cuff:
Switch to smaller hook, work 5 rows of front/back post hdc.
D. Hood
Row 1:
Attach yarn at neckline.
Ch 1, sc evenly around neck to shape hood base.
Mark center stitch.
Rows 2–20:
Continue working back and forth, placing goosebump stitches in alternating rows.
At row 20, fold hood and seam the top together with sc or whip stitch.
E. Assembly
- Block all pieces if needed.
- Seam shoulders (1–2 inches).
- Attach sleeves to armholes using stitch markers for alignment, then seam.
- Seam sides and underarms.
F. Button Band & Edging
Button Band (Right Side):
- Attach yarn at bottom right corner.
- Work sc evenly up the edge.
- Ch 1, turn. Repeat for 3–4 rows.
Buttonhole Band (Left Side):
- Same as above, but on row 2 or 3, create buttonholes:
- (sc 4, ch 2, skip 2) to space buttonholes evenly.
Bottom Hem and Sleeve Cuffs:
- Optional ribbing: Ch 7, work back and forth in BLO sc to desired length, attach as you go around hem and cuffs.
Finishing:
- Weave in all ends.
- Sew on buttons.
- Block again if desired.
7. Customization Ideas
- Color blocking: Use a contrasting color for hood or sleeves.
- Animal ears: Add bear or bunny ears on top of the hood.
- Zipper option: Replace buttons with a baby-safe zipper.
- Appliqués: Crochet stars, hearts, or initials to embellish.
8. Tips for Beginners
- Practice the puff/“goosebump” stitch on a swatch before starting.
- Use stitch markers for seam alignment.
- Count stitches after every row—especially when shaping necklines.
- Don’t skip blocking—it helps even out puff stitches.
9. Washing and Care Instructions
- Washing: Cold water, gentle cycle or hand wash
- Drying: Lay flat to dry
- Ironing: Do not iron puff stitches
- Storage: Fold flat or hang on padded hanger
10. Conclusion
The Goosebumps Baby Hoodie is more than just a crochet pattern—it’s a blend of functionality, style, and love. With its snug hood, adorable bumps, and customizable features, this handmade hoodie is sure to become a favorite go-to garment for any little one.
Whether you’re crocheting for your own baby, a friend’s newborn, or preparing for a craft fair, this project offers both creativity and warmth. Happy crocheting, and don’t forget to share your finished piece with fellow makers!
Video tutorial:


