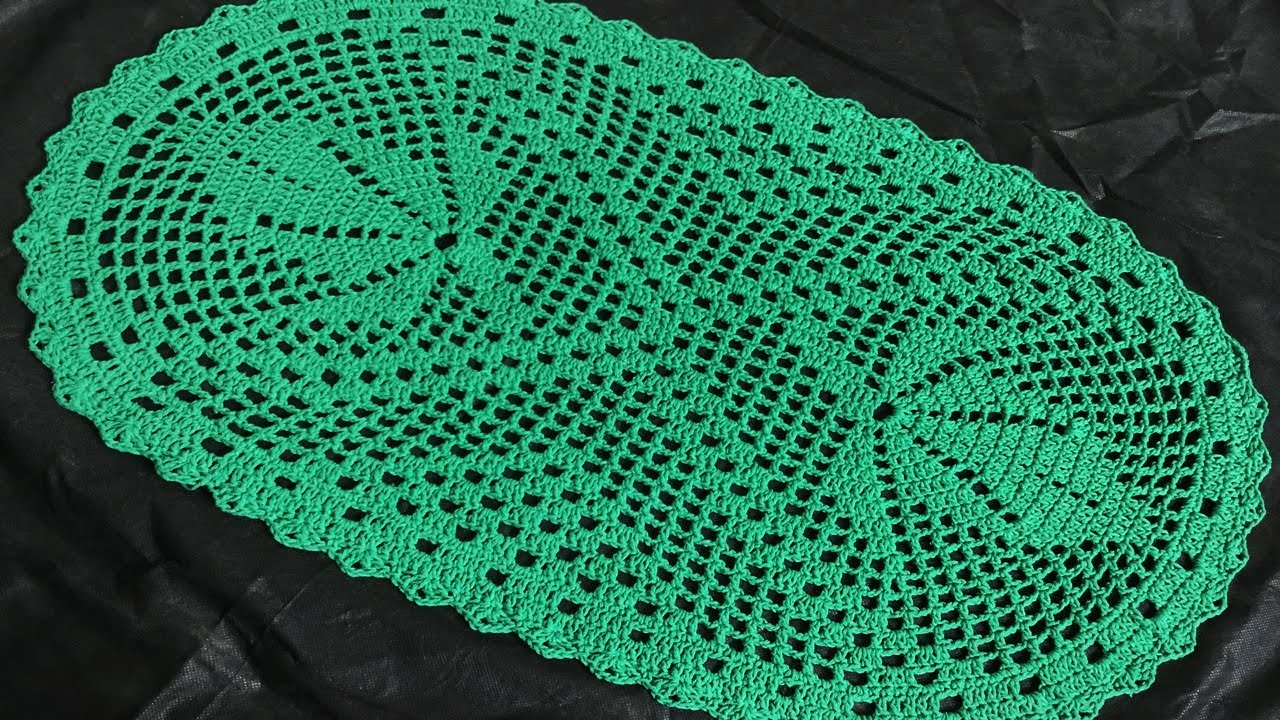
Crocheting your own rug can add a touch of personality, warmth, and comfort to any space in your home. And when the design is inspired by nature—like leaves—the result is not just a rug, but a conversation piece. This tutorial will walk you through the process of making an oval-shaped crochet rug adorned with elegant leaf motifs. Whether you’re an intermediate crocheter or an ambitious beginner, this pattern offers a satisfying challenge with stunning results.
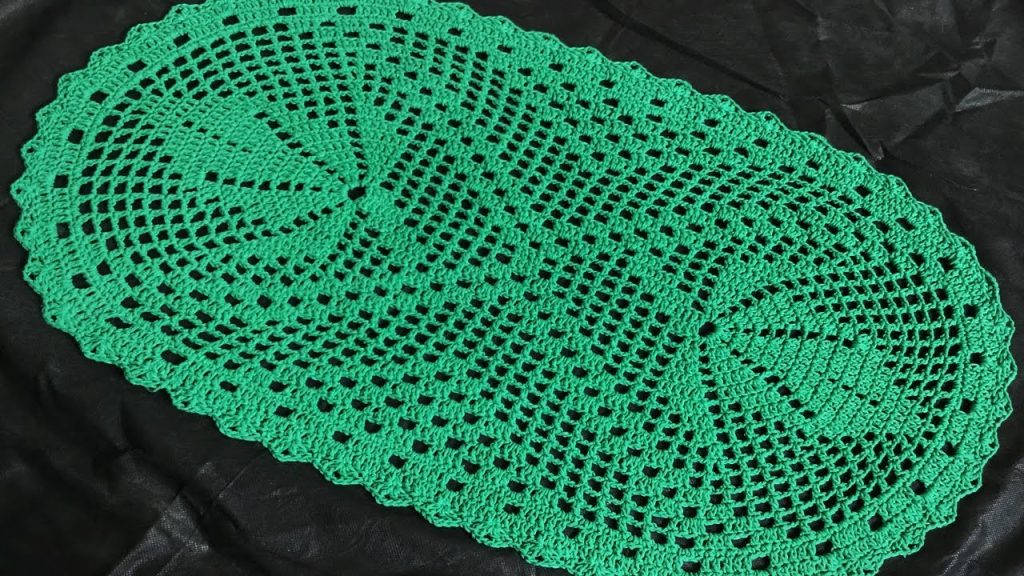
Table of Contents
- Materials & Tools
- Understanding the Pattern
- Abbreviations Used
- Gauge & Size Adjustments
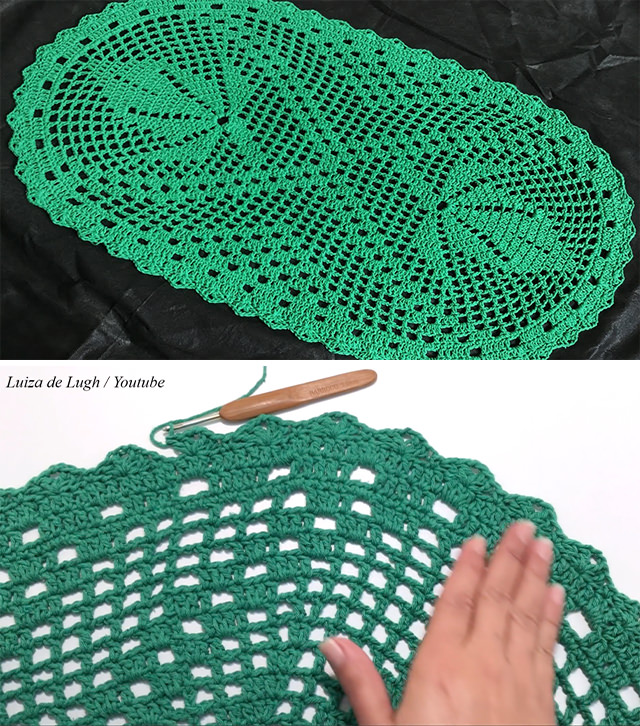
- Step-by-Step Instructions
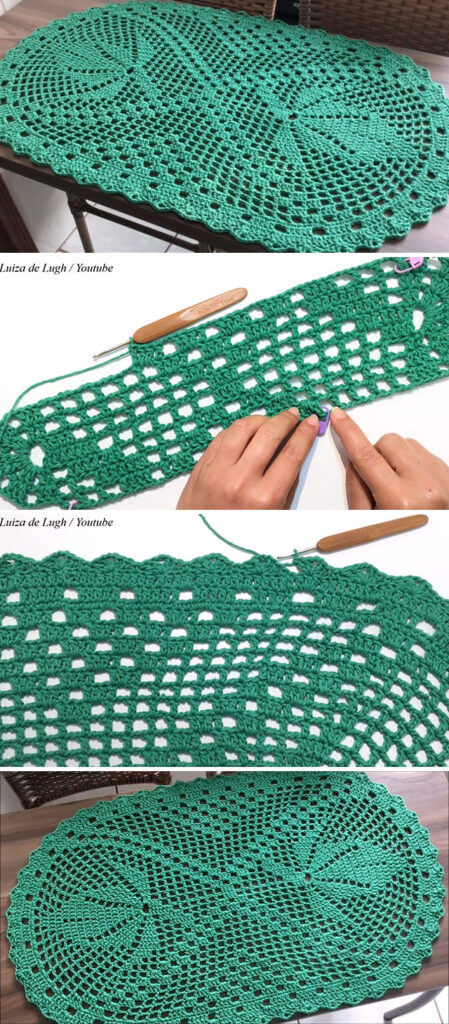
- Base Oval Foundation
- Leaf Motif Instructions
- Joining Leaves to the Base
- Border Finishing
- Customization Ideas
- Care Instructions
- Troubleshooting Common Issues
- Conclusion
1. Materials & Tools
To create a durable and beautiful rug, choose sturdy yarn and tools:
Yarn:
- Bulky cotton or T-shirt yarn (400–800 grams depending on rug size)
- Color A (Main Base): ~500g
- Color B (Leaf Motifs): ~300g
Tools:
- Crochet hook size 8 mm (L/11)
- Stitch markers
- Scissors
- Yarn needle
- Measuring tape
- Blocking mats and pins (optional)
Optional:
- Non-slip rug pad (for placing underneath)
2. Understanding the Pattern
This pattern consists of two main parts:
- The oval base – A continuous, flat oval crocheted in rounds.
- Leaf motifs – Crocheted separately and attached on top or worked into the pattern as you go, depending on the method you prefer.
Skill level: Intermediate
Techniques involved:
- Crocheting in the round
- Increasing stitches in an oval
- Creating shaped motifs (leaves)
- Joining motifs
- Surface crochet (optional for accent)
3. Abbreviations Used (US Terms)
| Abbreviation | Stitch Name |
|---|---|
| ch | chain |
| sc | single crochet |
| hdc | half double crochet |
| dc | double crochet |
| tr | treble crochet |
| sl st | slip stitch |
| st(s) | stitch(es) |
| inc | increase (2 sts in one) |
| dec | decrease (combine sts) |
4. Gauge & Size Adjustments
Gauge (for base):
4” x 4” = 10 hdc x 8 rows (not critical, but useful)
Standard Finished Size:
- Small rug: 24″ x 36″
- Medium rug: 30″ x 48″
- Large rug: 36″ x 60″
Adjust by increasing the number of rounds in the base or adding more motifs.
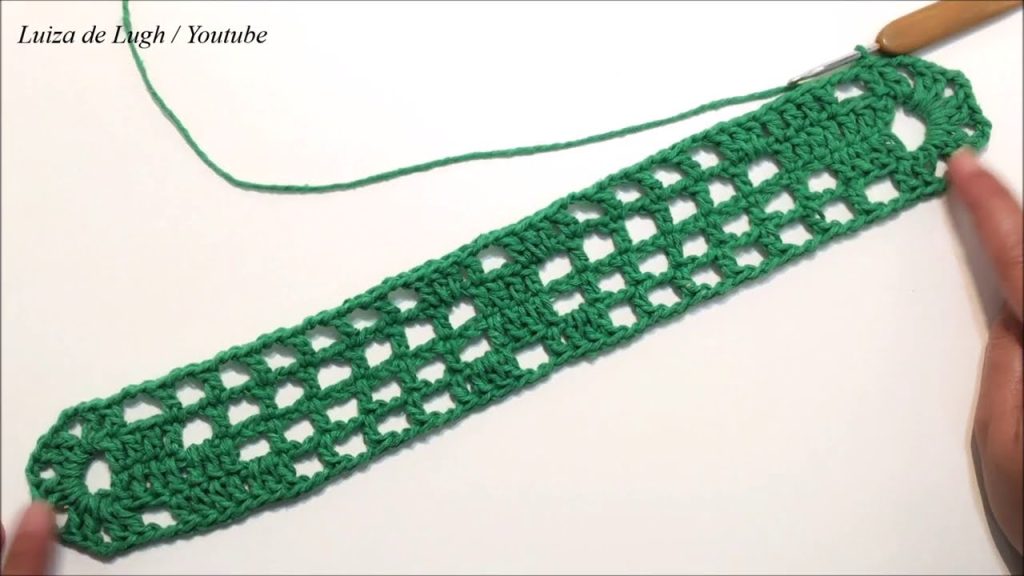
5. Step-by-Step Instructions
A. Crochet the Base Oval
Foundation Chain:
- Ch 20 (adjust length for longer rugs).
Round 1:
- In 2nd ch from hook, 2 sc (this is the first corner).
- 1 sc in next 17 ch.
- 5 sc in last ch (this forms the opposite end).
- Working on the other side of the chain, sc in next 17 sts.
- 3 sc in last st to complete the oval.
- Join with sl st to first sc.
Round 2:
- Ch 1, 2 sc in same st.
- 1 sc in next 17 sts.
- 2 sc in each of next 5 sts (rounded end).
- 1 sc in next 17 sts.
- 2 sc in next 3 sts (other rounded end).
- Join with sl st.
Round 3-10 (or more):
- Continue working in the round, increasing evenly at the rounded ends to maintain the oval shape.
- Use stitch markers at ends to mark increase points.
- Finish round with sl st to first sc.
Tip: Use hdc or dc for a more textured or taller rug.
B. Crochet the Leaf Motif
Leaf Pattern (Make 10–20, depending on design):
Round 1:
- Ch 10.
- In 2nd ch from hook: sc, hdc in next, dc in next 3, tr in next 2, dc, hdc, sc in last ch.
Round 2 (other side of chain):
- Mirror the same stitch sequence back to the beginning.
- End with sl st at base of first sc.
Optional Veins:
- Use surface crochet or embroidery to add veins.
Variation: Make different sizes (e.g., ch 6 for small leaves, ch 14 for large).
C. Join Leaf Motifs to the Base
Two Methods:
1. Sew-On Method (Post-assembly):
- Arrange leaves around the edge or in a spiral pattern.
- Use a yarn needle and matching yarn to sew them on.
- Slightly overlap for a natural look.
2. Join-As-You-Go (During final round):
- On the final base round, replace some stitches with leaf motifs.
- Attach with sl st at 2-3 points (base and sides of the leaf).
D. Border Finishing (Optional)
Add a clean edge or decorative border:
Scalloped Border:
- (Skip 1 st, 5 dc in next st, skip 1 st, sl st in next) around.
Rope Edge:
- Surface slip stitch in a contrasting color.
6. Customization Ideas
- Colors: Try gradient or ombré yarns for a soft blend.
- Motifs: Add flowers or vines alongside leaves.
- Texture: Use puff or bobble stitches inside the leaf.
- Shape: Make it a runner by elongating the foundation chain.
7. Care Instructions
- Wash: Hand wash or gentle cycle with mild detergent.
- Dry: Lay flat to dry to maintain shape.
- Storage: Roll, don’t fold, to avoid creases.
Note: T-shirt yarn may stretch, so block if needed.

8. Troubleshooting Common Issues
Rug curling:
- You may be adding too many or too few stitches at the rounded ends.
- Lay flat after every few rounds to check shape.
Leaves curling or lifting:
- Add a second row around them for stiffness.
- Use blocking to flatten.
Uneven stitches:
- Try switching hook size or adjusting tension.
9. Conclusion
Crocheting an oval rug with leaf motifs is a creative and practical way to bring natural beauty into your home. The combination of organic shapes and cozy textures makes this project both enjoyable and rewarding. Whether placed in an entryway, beside a bed, or under a coffee table, this handmade piece will carry the warmth and care you put into every stitch.
So gather your yarn, pick your favorite leaf shades, and start hooking—your stunning leaf-inspired rug awaits!
Video tutorial:


