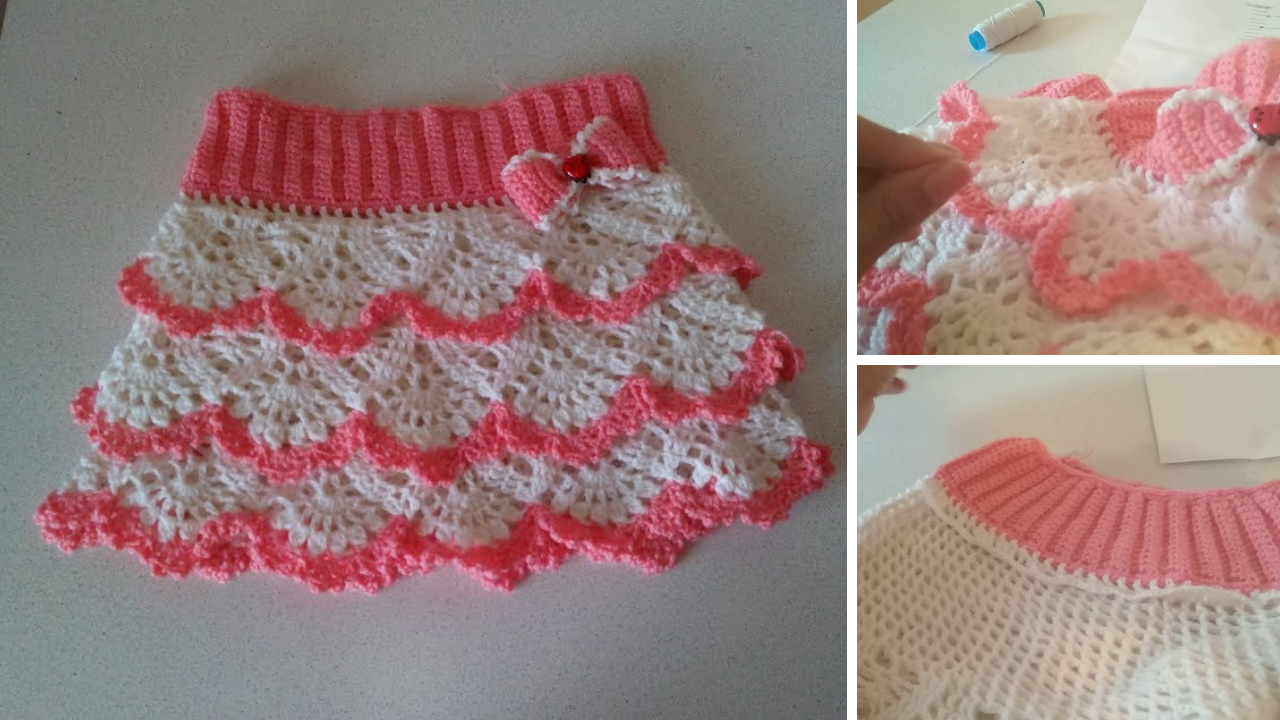
If you’re looking for a crochet project that’s fun, feminine, and perfect for twirling, a ruffled crochet skirt is a dream come true. The “ALISA” Ruffle Skirt is a charming, layered design featuring soft, flowy ruffles and a comfortable elastic waistband, making it ideal for little girls who love comfort and style.
In this guide, you’ll learn how to make the Crochet Ruffle Skirt “ALISA” with a flexible elastic waist, complete with step-by-step instructions, stitch guidance, measurements, and design tips. Suitable for confident beginners and intermediate crocheters, this project creates a lightweight, wearable skirt that’s great for spring, summer, or even special occasions.

🌸 What is the “ALISA” Ruffle Skirt?
The “ALISA” skirt is a crochet garment designed with layered ruffles, worked in tiers to create volume, movement, and a sweet girly look. The top of the skirt includes an elastic waistband, ensuring a snug, flexible fit for active children. This pattern is fully customizable for different sizes and styles.
🧷 Supplies You’ll Need
Before starting, gather your materials:
🧶 Yarn
- Weight: Sport (2) or DK (3) for a soft drape
- Fiber: Cotton blends or bamboo for summer, acrylic or merino for cooler weather
- Colors: Solid or gradient yarns look great with ruffles
- Amount: Approximately 200–400 grams depending on size and number of ruffle layers
🪡 Notions & Tools
- Crochet hook: 3.5 mm–4 mm (check yarn label)
- 1” wide elastic (length to fit waist)
- Stitch markers
- Yarn needle
- Scissors
- Measuring tape
- Safety pin (for threading elastic)

📏 Sizing & Measurements
To ensure a good fit, take the following measurements:
- Waist circumference
- Hip circumference
- Length from waist to desired hem
Example Size Chart (Approximate)
| Age | Waist | Skirt Length |
|---|---|---|
| 2–3 yrs | 19–20 in | 9–10 in |
| 4–5 yrs | 21–22 in | 11–12 in |
| 6–7 yrs | 22–23 in | 13–14 in |
| 8–10 yrs | 24–25 in | 15–16 in |
🧵 Stitches Used
This pattern uses beginner-friendly stitches with some added flair for ruffle tiers:
- ch – chain
- sl st – slip stitch
- sc – single crochet
- hdc – half double crochet
- dc – double crochet
- Shell Stitch – typically 5 dc in one stitch (used in ruffle rows)
- Back Loops Only (BLO) – for waistband flexibility
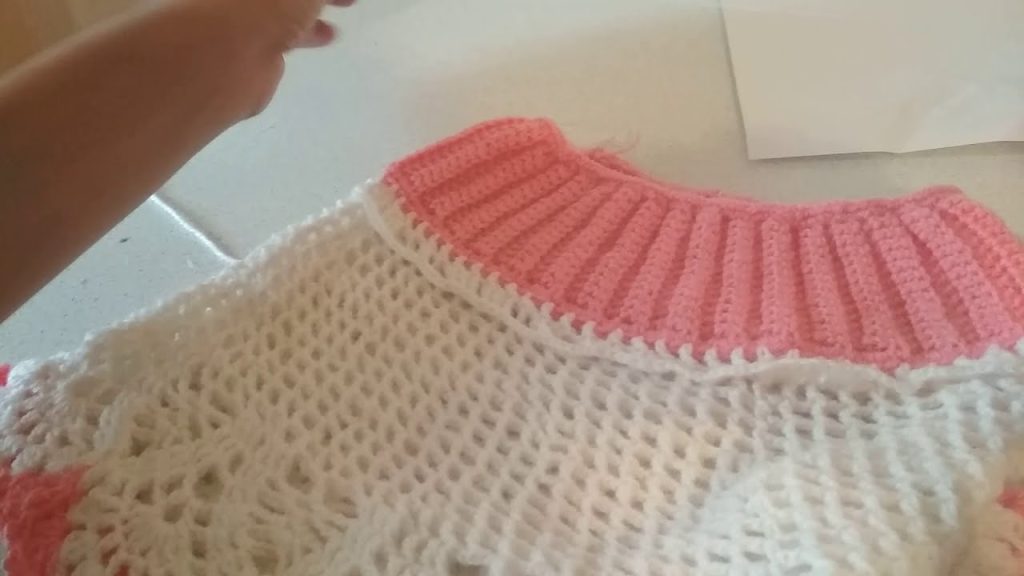
👗 Construction Overview
The skirt is worked in three parts:
- Waistband (worked flat, then joined in the round)
- Body base (foundation for ruffles)
- Ruffle layers (attached one tier at a time, typically using shell stitches)
🧶 Crochet Pattern: “ALISA” Ruffle Skirt with Elastic Waistband
Let’s begin!
🧵 Step 1: Waistband (Flat)
- Foundation Row:
Ch 10 (adjust height for desired waistband width).
Row 1: Sc in 2nd ch from hook and in each ch across. (9 sc)
Ch 1, turn. - Rows 2–(length to fit waist):
Sc in back loops only (BLO) across.
Ch 1, turn.
Repeat until strip fits snugly around the child’s waist. - Join ends:
Fold strip in half, sl st through both layers to join and form a band. - Elastic Insert:
Cut elastic to waist measurement minus 1 inch.
Thread it through the waistband tube (optional: fold band over elastic and stitch down later).
🧵 Step 2: Base Skirt Body
Now we crochet the body from the waistband downward, in the round.
- Set-Up Round:
Turn your work to begin working along the long edge of the waistband.
Sc evenly around, placing 1 sc per row end.
Join with sl st, ch 2 (does not count as stitch). - Foundation Rounds:
Dc in each st around for 2–3 rounds to create the base structure.
Increase slightly if needed (every 10–12 sts) to add gentle flare.
🧵 Step 3: Ruffle Tiers
Each ruffle tier is worked on its own foundation round, crocheted in place onto the skirt base.
You can do 2 or 3 ruffle layers, depending on skirt length and fullness desired.
⭐ First Ruffle Tier (Topmost)
- Join Yarn at the top row of dc base. You can join at the round where you’d like the ruffle to begin.
- Round 1 – Foundation Row:
Ch 3 (counts as dc), dc in same st.
Skip 1 st, 2 dc in next st around.
Join with sl st. - Round 2 – Shell Stitch Ruffle:
Sk 1 st, 5 dc in next st (shell), sk 1 st, sl st in next repeat around.
Finish off.
⭐ Second Ruffle Tier
- Go to 2nd row down from first ruffle.
- Attach yarn in the unused front loop of that row.
- Repeat Rounds 1–2 for ruffle tier.
⭐ Third Ruffle Tier (Optional)
Repeat the same process lower on the skirt body, again using front loops to maintain tiered effect.
🎀 Finishing Touches
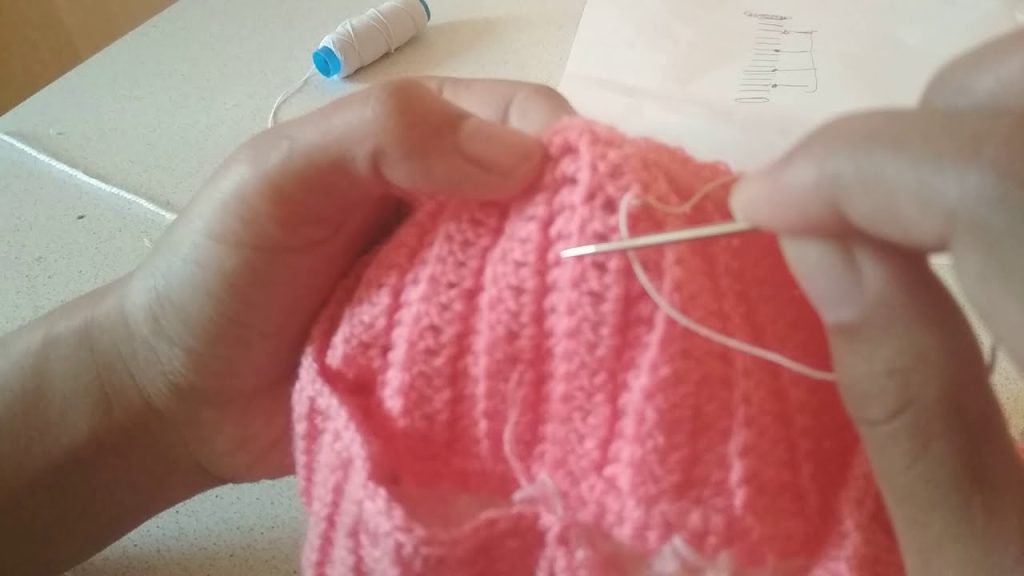
Elastic Waist Finish
If you didn’t insert the elastic earlier, now’s the time:
- Fold the waistband over the elastic.
- Stitch it down securely on the inside using whip stitch or single crochet join.
- Use a safety pin to guide elastic through the waistband channel.
- Overlap ends of elastic and sew together with strong thread.
Weave in all ends neatly.
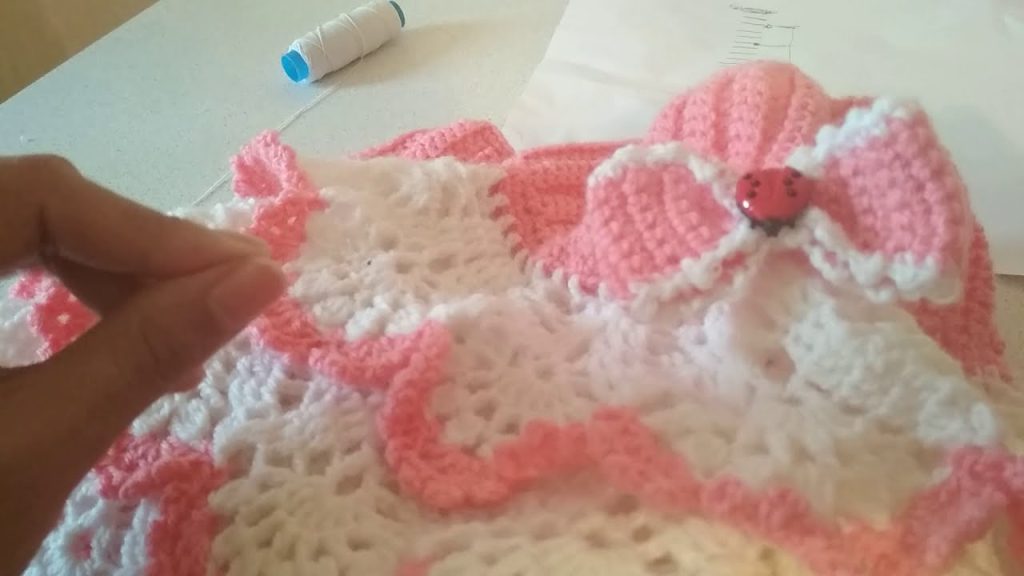
💡 Optional Customizations
- Add bows or buttons at the ruffle junctions
- Use gradient or ombre yarns for dramatic ruffle color transitions
- Mix lacy stitches with solid shells for a unique texture
- Add a drawstring as an accent over the elastic waistband
🧼 Washing Instructions
For best results:
- Hand wash or gentle machine cycle
- Use mild detergent
- Air dry flat to maintain shape
Check your yarn’s label for specific instructions.
📸 Styling Tips
- Pair the “ALISA” skirt with a solid tee or crochet top
- Great for photo shoots, birthday parties, or casual wear
- Layer with leggings or tights for colder weather
- Make matching hair bows with leftover yarn!
🧚 Final Thoughts
The “ALISA” Crochet Ruffle Skirt is a delightful, girly garment full of charm and playfulness. It’s perfect for beginner and intermediate crocheters who want to experiment with texture, ruffles, and wearable design. Once you’ve completed your first one, you’ll be inspired to try different color combinations, sizes, or add even more ruffles for extra flair.
Handmade with love and care, this skirt will surely become a favorite in any little girl’s wardrobe. 💕
Video tutorial:


