
Crocheting flowers is one of the most satisfying and creative projects for crafters of all skill levels — and roses, in particular, are a favorite among many. They’re timeless, elegant, and endlessly customizable. Whether you want to make a bouquet, embellish a hat or headband, or add a romantic touch to a scarf or bag, learning how to crochet a rose is a perfect project — especially for beginners.
In this detailed guide, we’ll walk you through everything you need to know to make your own easy crochet rose flower pattern, complete with step-by-step instructions, tips, materials list, and creative ideas on how to use your finished roses.
🌹 Why Crochet a Rose?
Crocheted roses are:
- Quick – You can finish one in 15–30 minutes.
- Simple – Basic stitches are all you need.
- Beautiful – They add elegance and charm to any project.
- Customizable – Vary the size, color, or texture with yarn changes.
Best of all, they’re perfect for using up leftover yarn scraps!
🧶 Materials You’ll Need
To begin crocheting your rose, gather the following:
- Yarn: Worsted weight or DK weight yarn (any color)
- Crochet hook: 4.0 mm (G/6) or 5.0 mm (H/8)
- Scissors
- Tapestry needle (for sewing and weaving in ends)
- Optional: Hot glue (for attaching to other objects)
💡 Tip: Use cotton or acrylic yarn for better stitch definition and structure.
📘 Stitches Used (U.S. Terms)
Here are the basic stitches you’ll need to know:
- ch – chain
- sc – single crochet
- dc – double crochet
- sl st – slip stitch
If you’re new to these stitches, they’re very beginner-friendly. You can easily find short tutorials online for each.
🧵 Easy Crochet Rose Flower Pattern – Step by Step
This rose is made from a flat strip of petals that’s rolled up and sewn into shape. Here’s how to do it:
🌸 Step 1: Foundation Chain
- Chain 51 (or any multiple of 6 + 3 for a different size rose).
🌸 Step 2: Create the Petal Base (Row 1)
- In the 4th chain from hook, work 2 dc (these will form one petal).
- Skip 2 chains, then sc in the next chain.
- Repeat: (Skip 2 ch, 3 dc in next ch, skip 2 ch, sc in next ch) until the end of the row.
You should see a slight ruffle forming. These are the petal bases.
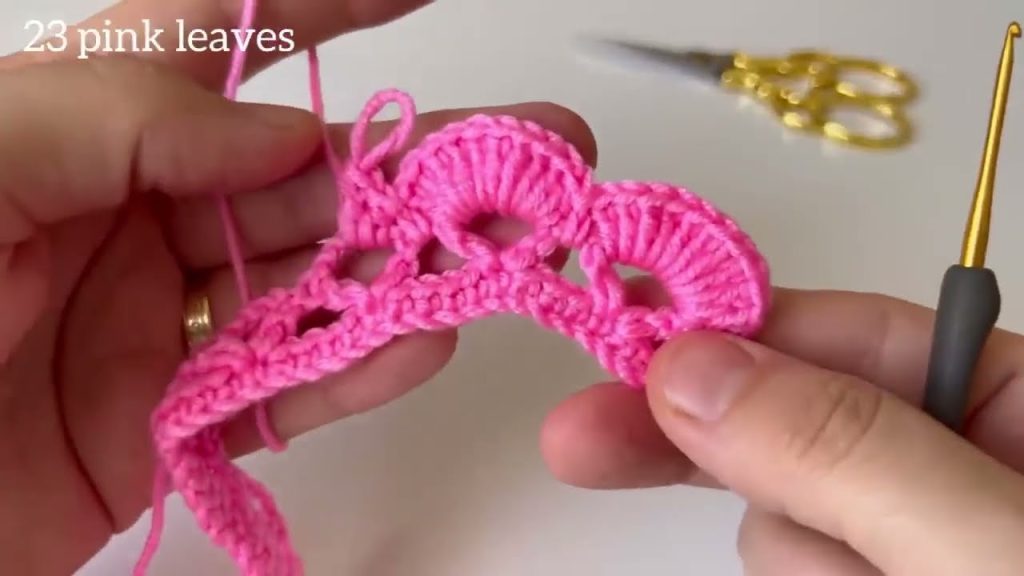
🌸 Step 3: Build the Petals (Row 2)
- Turn your work, ch 3 (counts as 1 dc).
- Into each 3-dc cluster from the previous row, work: (1 dc, 2 dc, 1 dc) into the first dc of the cluster
Sl st into the sc between petal clusters to secure
Repeat across the row.
You should now have soft, defined rose petals forming along the strip.
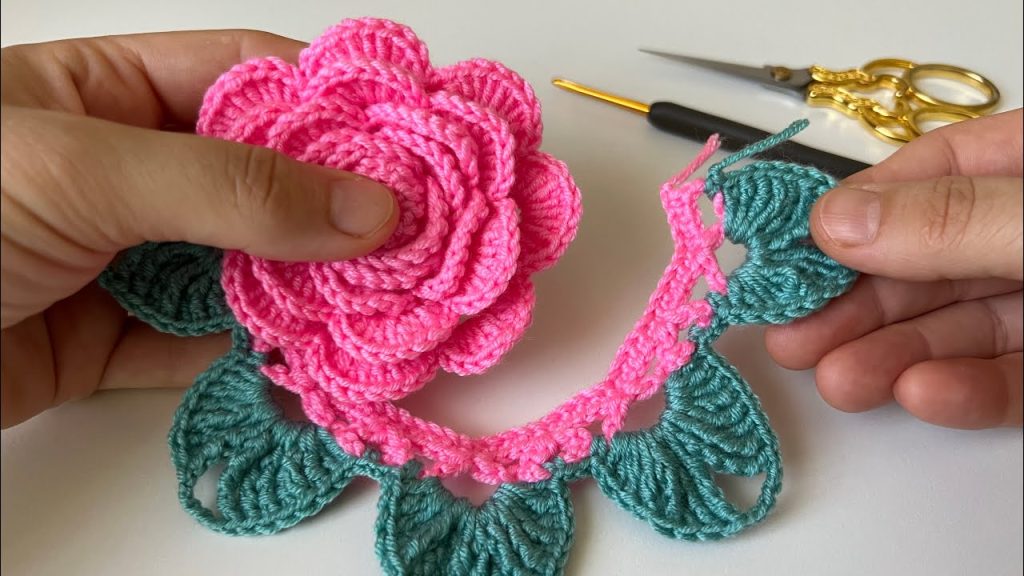
🌸 Step 4: Roll and Shape the Rose
- Start at one end of the strip and begin rolling it up tightly to form a rose shape.
- As you roll, adjust the petals outward slightly to resemble an open rose.
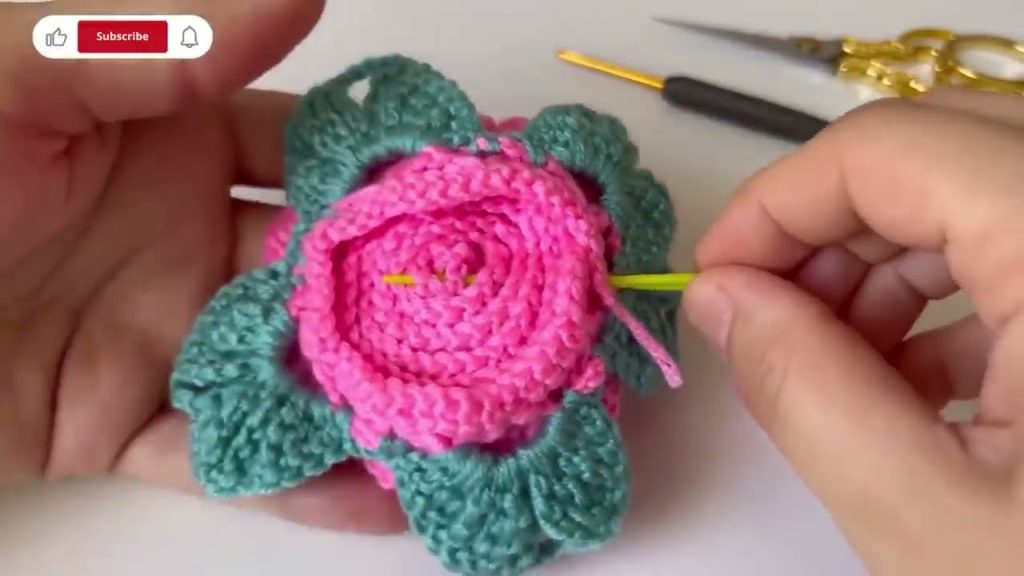
🌸 Step 5: Secure the Flower
- Once rolled, use your tapestry needle and yarn tail to sew through the layers at the base to secure the flower.
- Knot securely and weave in the end.
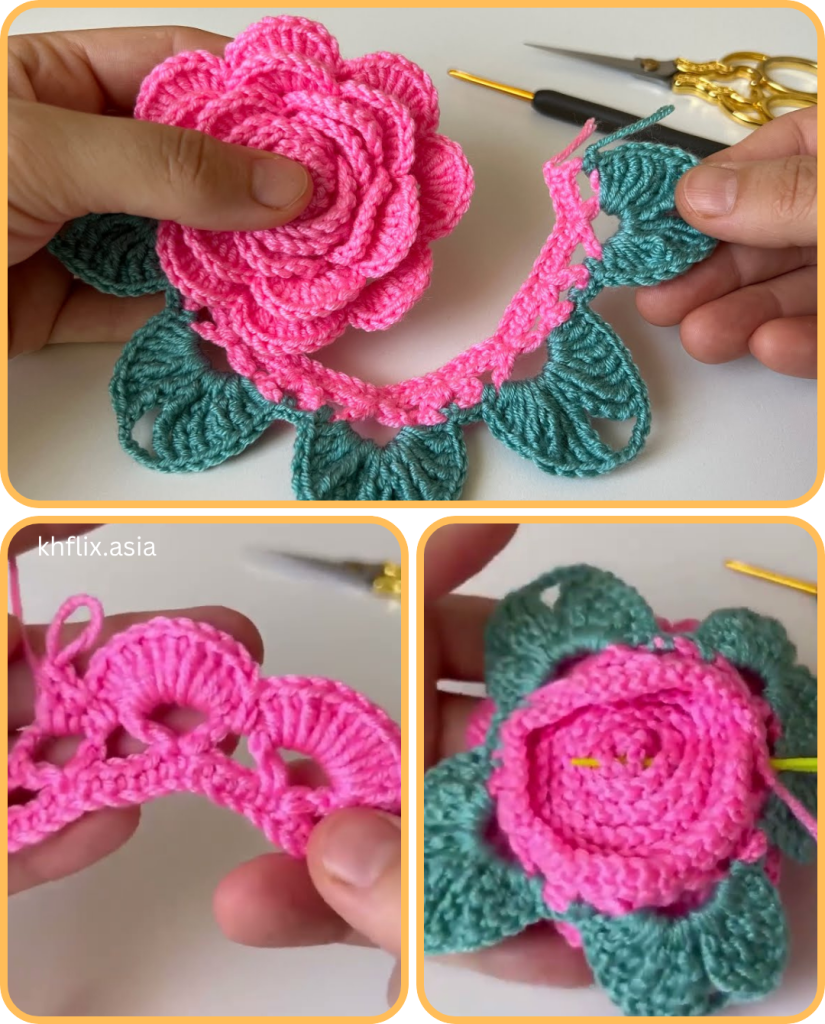
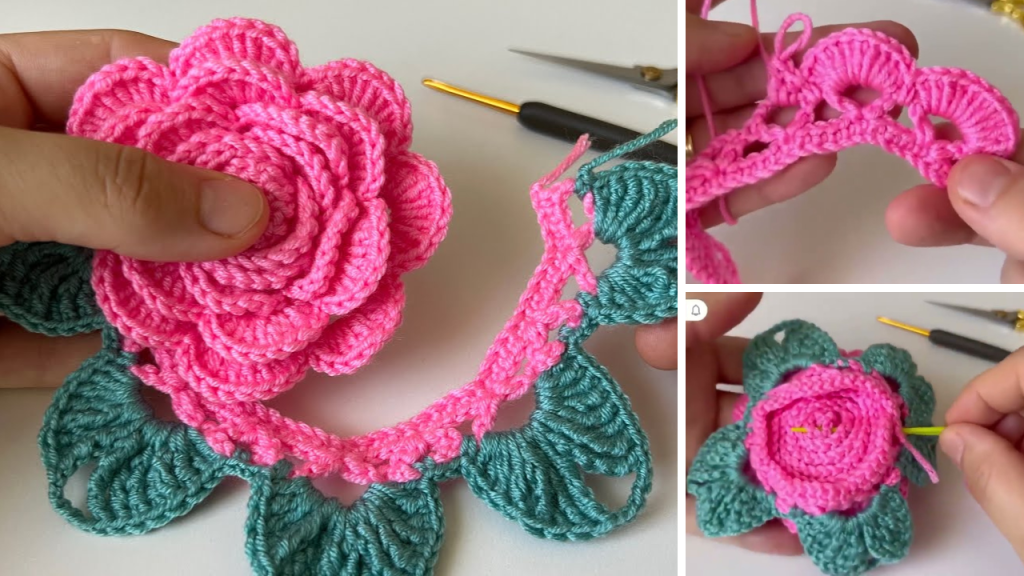
✅ Optional: Add Leaves
If you’d like to add some greenery, here’s a simple leaf pattern:
Easy Crochet Leaf:
- Ch 7
- In 2nd ch from hook: sc, then hdc, dc, dc, hdc, sc
- Ch 1, turn and work down the other side of the chain: sc, hdc, dc, dc, hdc, sc
- Fasten off and leave a tail for sewing to the rose.
Sew one or two leaves to the base of the rose using your tapestry needle.
🧠 Tips for Success
- Use stitch markers if you lose track of petal clusters.
- Try different yarn weights to create roses of varying sizes.
- Want a tighter rose? Chain fewer stitches to begin.
- Want a fuller bloom? Add more rows of petals or start with a longer chain.
🌼 Variations and Creative Uses
Here’s how you can use your finished roses:
- Headbands or hair clips
- Brooches or pins
- Bouquets or floral arrangements
- Gift toppers
- Table centerpieces
- Embellishments for hats, bags, or scarves
- Wreaths and garlands
You can also stiffen the petals with fabric starch or glue if you want the flower to hold a more defined shape.
🎨 Customize Your Rose
Want to make your rose unique? Try these ideas:
| Customization | Idea |
|---|---|
| 🌈 Color | Use variegated yarn or ombré colors for a multitone effect. |
| ✨ Texture | Try velvet yarn for a plush rose or cotton for a crisp look. |
| 💎 Embellishments | Add a bead or pearl to the center for a glam touch. |
| 🧵 Size | Adjust the starting chain (e.g. ch 33 for a mini rose). |
📎 Printable Pattern (Quick Reference)
Crochet Easy Rose

Ch 51 (or any multiple of 6 + 3)

Row 1:
In 4th ch from hook: 2 dc.
*Skip 2 ch, sc in next ch, skip 2 ch, 3 dc in next ch*; repeat from * to end.

Row 2:
Ch 3, turn.
In each 3-dc group: (1 dc, 2 dc, 1 dc) into first dc of group.
Sl st into next sc. Repeat across.

Fasten off, roll strip into rose shape, sew bottom securely.
Optional: Add leaves.
🧶 Final Thoughts
Crocheting a rose is one of the most rewarding beginner-friendly projects you can try. It’s quick, pretty, and endlessly adaptable. Once you master this easy pattern, you’ll be able to whip up bouquets of handmade blooms for every occasion. Whether for decor, fashion, or gifting, a crocheted rose is always in style.
So pick up your hook, grab your favorite yarn, and start blooming creativity with your own crochet rose garden — one petal at a time!
Video tutorial:


