Crochet shoes are a delightful blend of comfort, creativity, and practicality. Whether you’re new to the craft or an experienced crocheter looking for a fun and functional project, making your own perfect, easy, and quick crochet shoes can be both rewarding and enjoyable. These handmade shoes are perfect for lounging at home, gifting to friends, or even selling at craft fairs.
In this article, we’ll cover everything you need to know about creating the ideal pair of crochet shoes — from materials and patterns to step-by-step instructions and styling tips.
🧶 Why Crochet Shoes?
Before diving into the how-to, let’s explore why crochet shoes are such a popular DIY project:
- Cost-effective: Made with minimal materials and tools.
- Customizable: Change colors, sizes, soles, and styles.
- Beginner-friendly: Simple stitches and patterns.
- Comfortable: Soft, breathable, and perfect for indoor wear.
- Eco-friendly: Use sustainable yarn or upcycled materials.
🔧 Materials You’ll Need
To create quick and easy crochet shoes, gather the following basic supplies:
1. Yarn
- Type: Cotton or acrylic yarn works best for structure and comfort.
- Weight: Medium (Worsted/Aran) or Bulky for warmth and quicker stitching.
- Tip: Choose a soft yarn with some durability if the shoes will be worn often.
2. Crochet Hook
- Size will depend on your yarn — usually H/8 (5 mm) to J/10 (6 mm).
- Check the yarn label for hook recommendations.
3. Stitch Markers
- Optional, but useful for marking rounds or shaping points.
4. Yarn Needle
- For weaving in ends and sewing parts together.
5. Scissors
6. (Optional) Soles or Slippers Inserts
- You can crochet your own soles or buy premade rubber ones for outdoor wear.
🧵 Basic Crochet Stitches You Should Know
If you’re new to crochet, mastering these stitches will be enough to make your own shoes:
- Chain (ch)
- Slip Stitch (sl st)
- Single Crochet (sc)
- Half Double Crochet (hdc)
- Double Crochet (dc)
You’ll also need to know how to increase (inc) and decrease (dec) stitches for shaping.
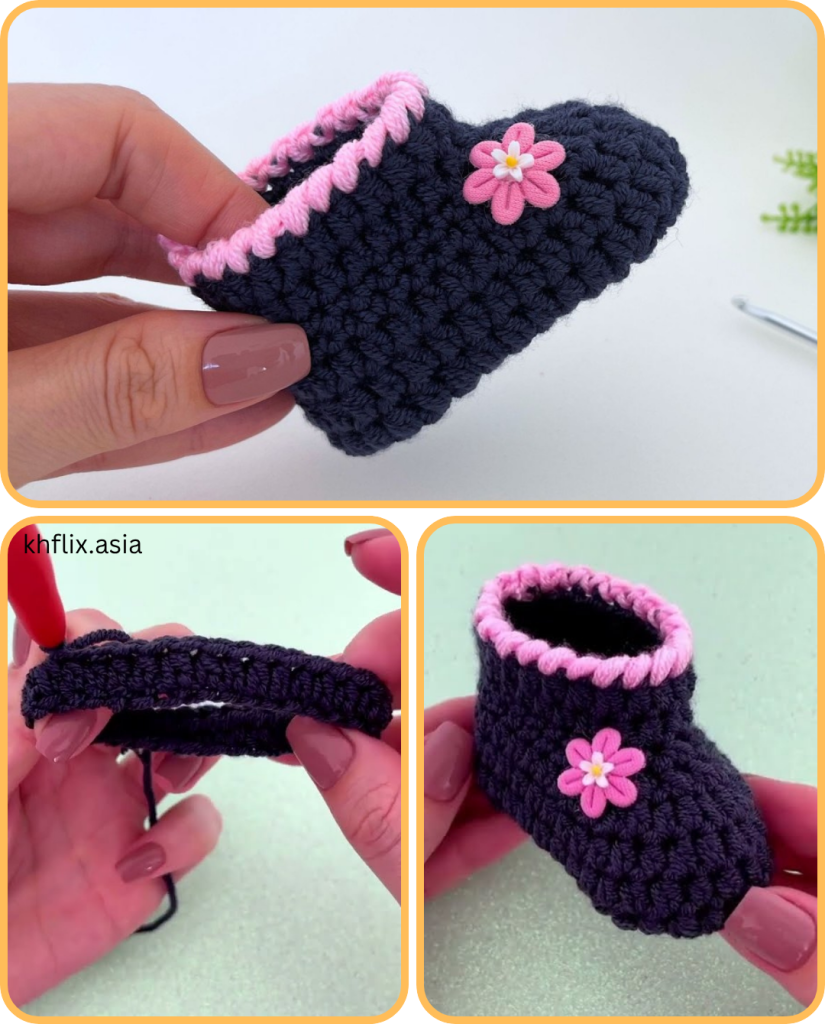
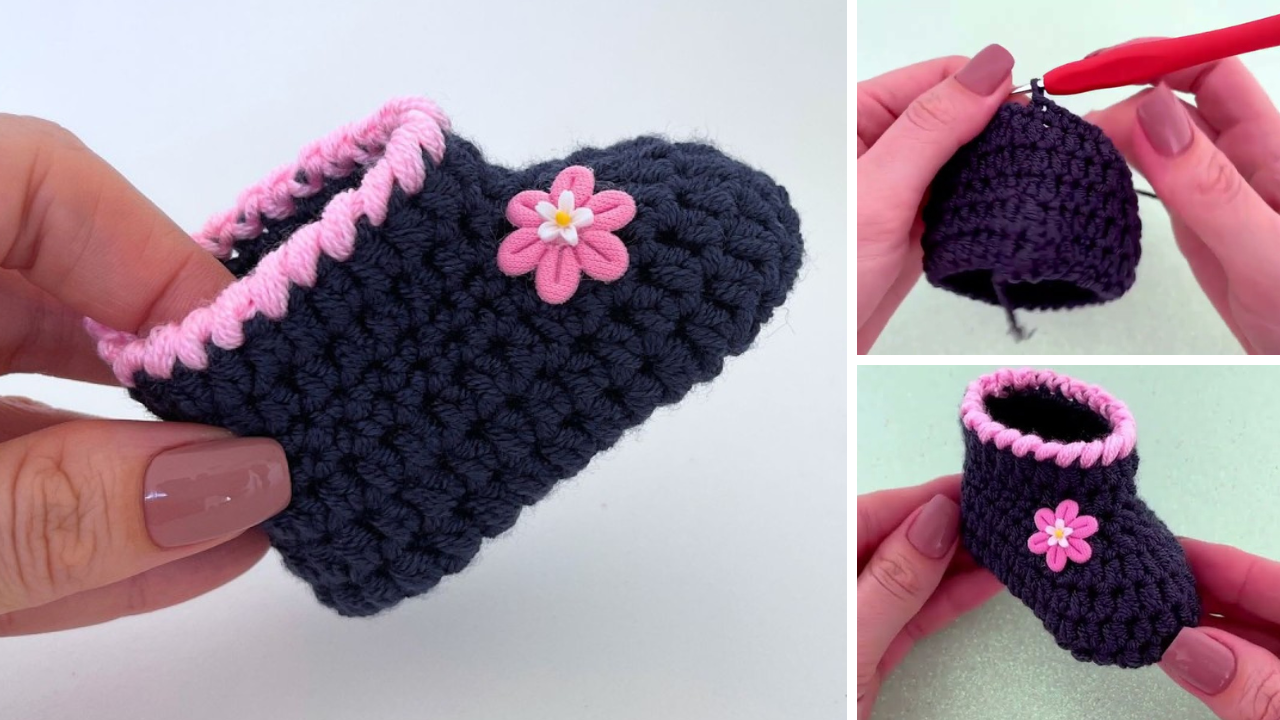
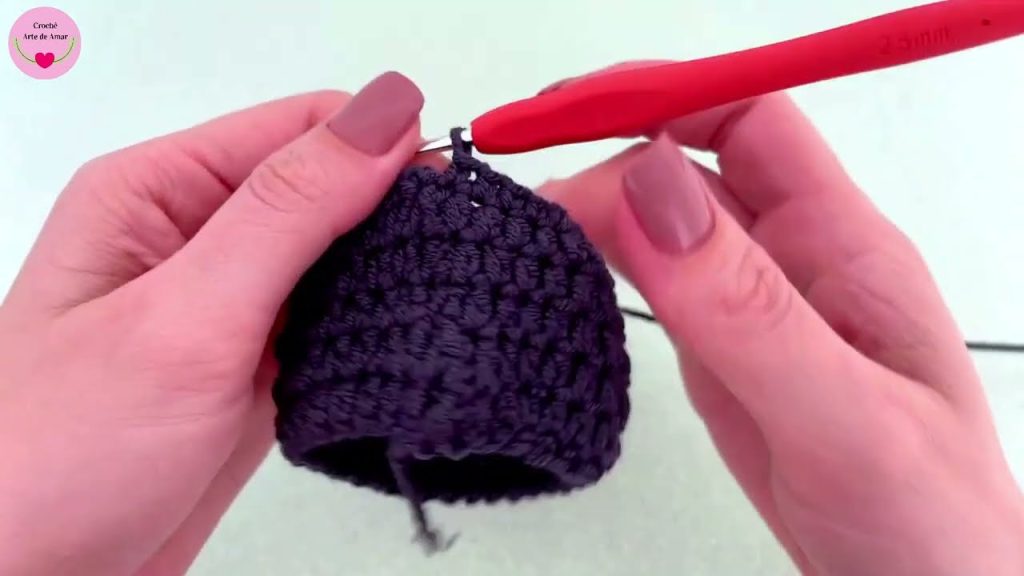
👣 Step-by-Step: Easy and Quick Crochet Shoe Pattern
This pattern is for a basic, cozy crochet slipper-style shoe in adult size (adjustable for any foot size).
Part 1: Sole
- Start with a magic ring.
- Round 1: Ch 1, make 6 sc in the ring. Join with a sl st. (6 sts)
- Round 2: 2 sc in each stitch around. (12 sts)
- Round 3: Sc in next st, 2 sc in next, repeat around. (18 sts)
- Continue increasing in this pattern until the sole is the length of your foot.
- Work even (1 sc in each st) for 2-3 rounds to build thickness.
Part 2: Upper Shoe
- Count ⅓ of the stitches at the front of the sole. These will be the toe area.
- Attach yarn and sc across this portion, working back and forth in rows (not rounds).
- Decrease at each end of row to shape the top of the shoe.
- Continue until the top covers the toes snugly.
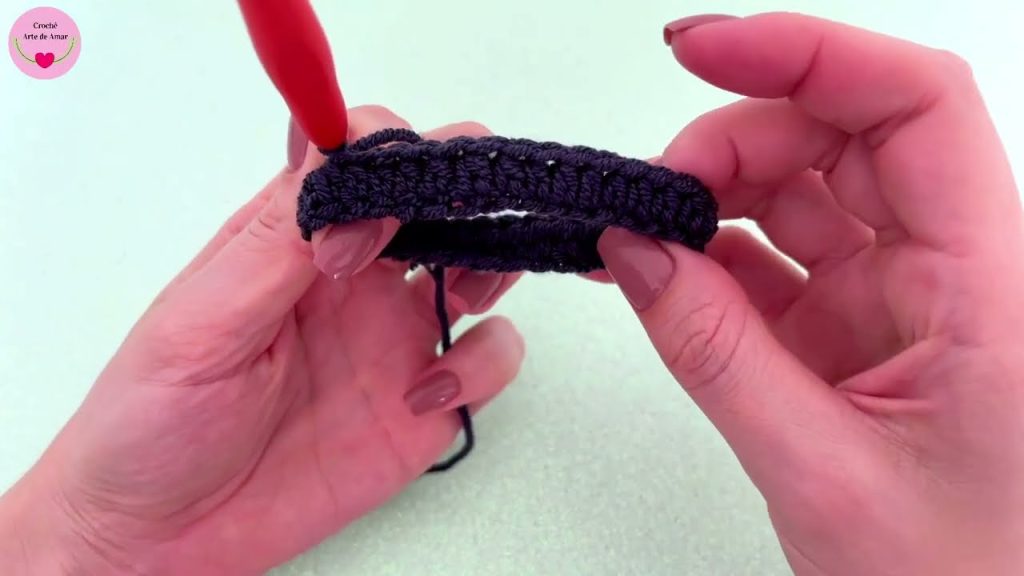
Part 3: Heel and Sides
- Join yarn at the heel.
- Work sc around the sides and back, joining to the front upper part.
- Crochet in rounds or rows depending on the design.
- Continue until the shoe reaches the desired height at the heel.
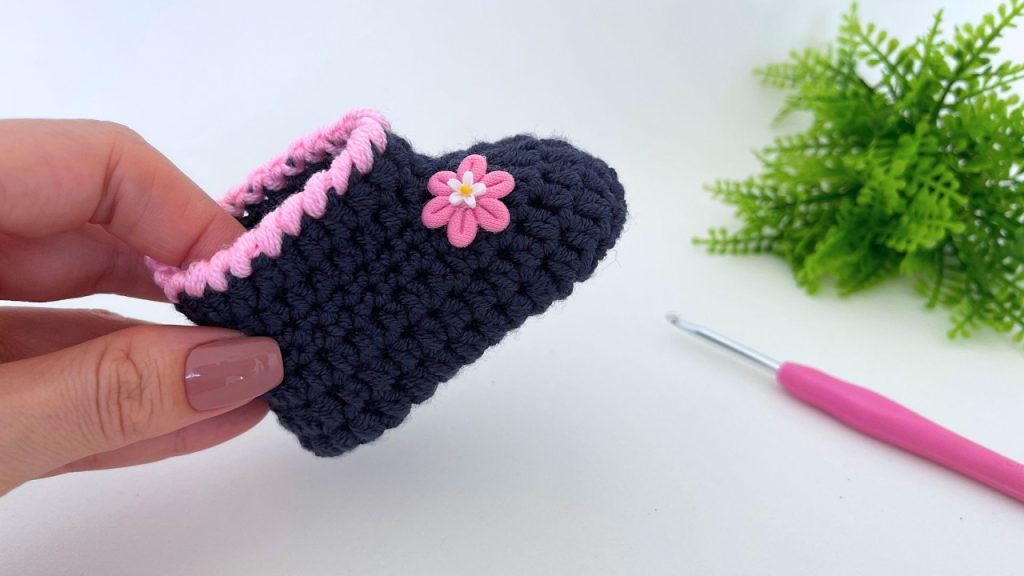
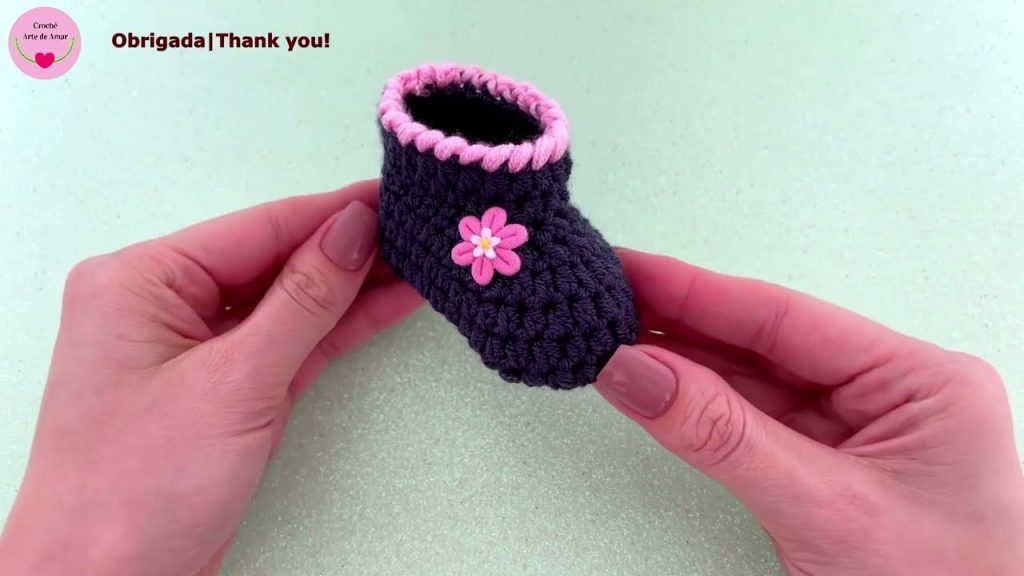
Finishing:
- Try on the shoe. Adjust fit if necessary by adding or removing rows.
- Add decorative edging like crab stitch (reverse sc) or a picot border.
- Weave in all ends securely.
- (Optional) Sew on rubber sole for extra durability.
👟 Variations and Styling Ideas
Once you’ve mastered the basic crochet shoe pattern, try these fun variations:
1. Ballet Flats
- Lower top and rounded edges.
- Add a ribbon or bow for flair.
2. Bootie Style
- Extend the sides up for ankle support.
- Add buttons or toggles.
3. Open-Toe Sandals
- Leave space for toes.
- Add straps around the ankle.
4. Slippers with Faux Fur Lining
- Crochet the outer shell.
- Add soft faux fur yarn for the inside.
5. Espadrille Style
- Use jute twine for the sole.
- Attach canvas or crochet tops.
🎨 Tips for Personalizing Your Crochet Shoes
- Color Blocking: Use two or more contrasting yarn colors.
- Embroidery: Stitch small flowers, initials, or patterns on top.
- Appliqués: Sew on crocheted shapes (hearts, stars, etc.).
- Beads or Buttons: Add sparkle or texture to your creation.
💡 Troubleshooting Common Crochet Shoe Issues
| Problem | Solution |
|---|---|
| Shoe too tight | Use a larger hook or add more increase rounds in the sole. |
| Shoe too loose | Decrease stitches at the heel or toe area. |
| Twisting or uneven | Use stitch markers to track rounds and center stitches. |
| Yarn stretching | Use cotton blend yarn or line the shoe for structure. |
🧼 Care Instructions
Handmade crochet shoes need a bit of love to last:
- Hand wash with mild detergent in cold water.
- Air dry flat — do not tumble dry.
- Store in a cool, dry place.
🛍️ Gifting or Selling Crochet Shoes
These shoes make excellent handmade gifts for birthdays, holidays, or baby showers. If you plan to sell them:
- Offer custom sizes and colors.
- Take quality photos for your shop or craft fair.
- Include a care card with every pair.

🧶 Final Thoughts
The perfect easy and quick crochet shoe is a project that blends practicality with creativity. With minimal materials and just a bit of patience, you can create a cozy, stylish, and customizable pair of shoes tailored just for you or your loved ones. Whether you’re curled up on the couch with your yarn or crafting gifts for others, crochet shoes are a rewarding way to put your skills to use.
So grab your hook, pick your favorite yarn, and step into comfort — one stitch at a time.
Video tutorial:


