
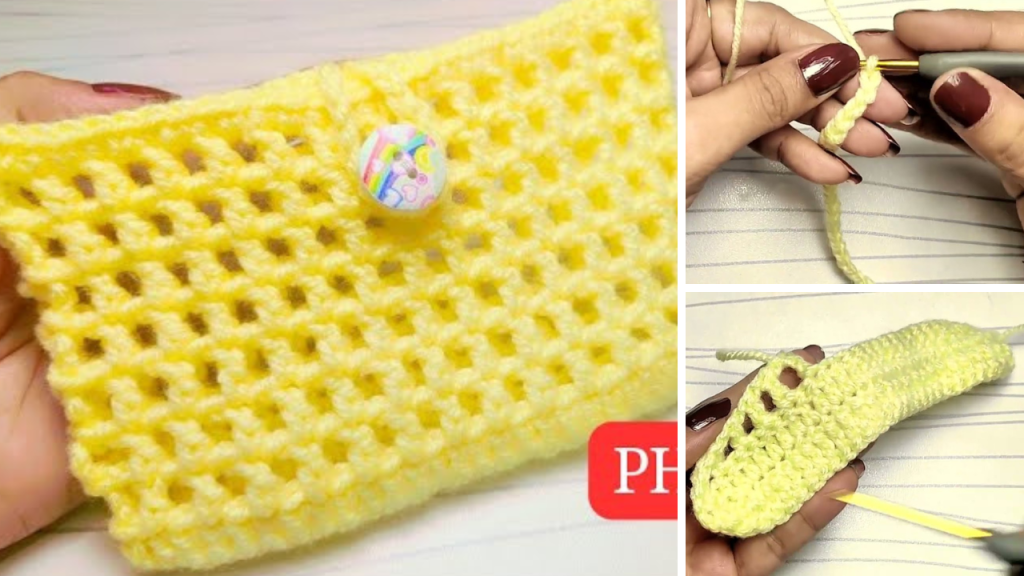
In today’s digital age, we carry our phones everywhere — so why not do it in style? A crochet phone bag is a fashionable, functional, and fun accessory that you can make yourself! Whether you’re going for a quick walk, running errands, or traveling light, a handmade phone pouch is the perfect solution for hands-free convenience.
This tutorial walks you through a step-by-step guide to creating your own crochet phone bag, complete with materials list, sizing tips, customization ideas, and stitch-by-stitch instructions. Perfect for beginners and intermediate crocheters alike, this project is practical and quick — and also makes a wonderful gift!
🧶 Why Make a Crochet Phone Bag?
Crocheting your own phone bag is more than just a fun craft. It’s:
- Convenient – Carry your phone, cash, or keys hands-free.
- Stylish – Match your outfit, mood, or season.
- Customizable – Change the size, color, strap, and details.
- Eco-friendly – Use leftover yarn and reduce textile waste.
- Gift-worthy – Great for birthdays, holidays, or just because.
📏 Choose the Right Size
Before you begin, measure your phone or device. You’ll want to create a pouch that’s slightly larger than your phone to account for the thickness and seam allowance.
Example Measurements for Standard Phones:
- Height: 6.5 inches
- Width: 3.5 inches
To be safe, make your pouch approximately:
- 7 inches tall
- 4.25 inches wide
You can easily adjust this pattern for larger or smaller phones.
🧵 Materials You’ll Need
Yarn
- Worsted weight (Medium #4) cotton or acrylic yarn
- Cotton is preferred for durability and structure
Hook
- 4.0 mm (G/6) or 4.5 mm (7) crochet hook
Notions
- Tapestry needle (for weaving ends)
- Scissors
- Stitch markers (optional)
- Button or magnetic snap (optional)
- Beads, tassels, or appliqués (optional)

📘 Stitches & Abbreviations
| Abbreviation | Stitch Name |
|---|---|
| ch | chain |
| sl st | slip stitch |
| sc | single crochet |
| hdc | half double crochet |
| dc | double crochet |
| sc2tog | single crochet decrease |
This tutorial primarily uses single crochet (sc) for structure and simplicity.
👜 Crochet Phone Bag Pattern – Step by Step
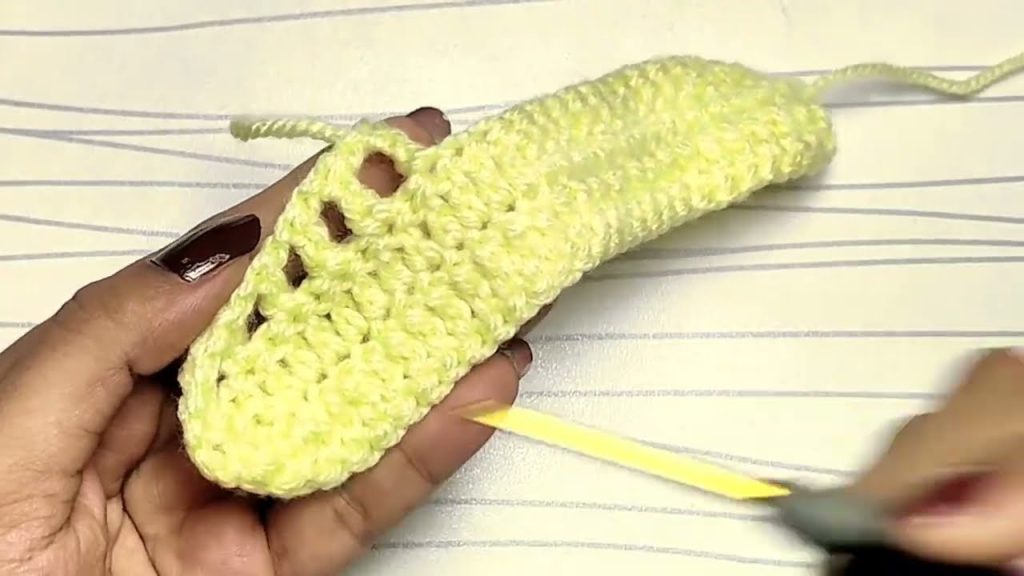
🧱 Part 1: Create the Phone Pouch
We’ll work this pouch in the round, from the bottom up, so there’s no seaming needed for the sides!
Step 1: Foundation Chain
- Ch 16 (or enough chains to match your phone’s width + 1/2 inch)
Step 2: First Round (Creating the Base)
- Sc in 2nd ch from hook and in each ch across (15 sc)
- In last ch: work 3 sc (for rounded corner)
- Continue working on the other side of the chain: sc in next 13 ch, 2 sc in last ch
- You now have a closed oval shape (around 32 sc total)
- Place a stitch marker to mark the beginning of your round
Step 3: Body of the Bag
- Continue working in continuous rounds (no joining)
- Sc in each stitch around
- Work until your bag measures 7 inches tall or desired height
This creates a snug, durable phone pouch.
🪡 Optional: Add a Closure
To keep your phone secure, add a flap and closure.
Create a Flap:
- At the back center of the pouch, attach yarn and ch 1
- Row 1: Sc across 12 stitches
- Rows 2–6: Sc in each stitch across, ch 1 and turn
- Optional: Taper the flap by decreasing 1 stitch at each end for a triangular look
- Fasten off
Closure Options:
- Sew on a button and create a chain loop
- Use a snap button or Velcro for easy open/close
🧵 Part 2: Crochet the Strap
You can make the strap as short or long as you like — a crossbody strap, a wristlet, or even two loops for a belt.
Option 1: Long Crossbody Strap
- Ch 100–130 (depending on desired length)
- Sc in 2nd ch from hook and in each ch across
- Fasten off and sew each end to the inside corners of the pouch
Option 2: Wristlet Strap
- Ch 35
- Sc back along chain
- Attach both ends to one side of the pouch
Option 3: Chain Strap (Advanced Look)
- Use slip stitch i-cord or braided yarn strands for a more decorative look
🌟 Optional: Add Embellishments
Make your phone bag extra special:
- 🌸 Crochet Flower – Attach to the front flap
- ✨ Appliqués or Patches – Hearts, stars, or initials
- 🎀 Beads or Buttons – For texture and sparkle
- 🧵 Embroidery – Add a name or small design
- 🧶 Color Changes – Use stripes or ombré yarn
🧼 Care Instructions
If you’re using cotton or durable acrylic yarn, your phone bag is machine washable — but handwashing is best for longevity.
- Wash in cold water with mild detergent
- Gently press out water (don’t wring)
- Lay flat to dry
- Avoid hot dryers or harsh chemicals
🎁 Great Gift Idea
Crochet phone bags make lovely gifts for:
- Teenagers and college students
- Moms and grandmas
- Travelers and walkers
- Craft fair shoppers
- Bridesmaids and party favors
You can even make matching sets with:
- Earbud holders
- Mini coin pouches
- Crochet keychains
✅ Pattern Recap (Quick View)
Crochet Phone Bag (Single Crochet, Oval Base)
Ch 16
Rnd 1: Sc in 2nd ch from hook and across, 3 sc in last ch.
Continue on other side: sc across, 2 sc in last ch. (Work in the round)
Rnds 2–30: Sc in each st around (until bag measures ~7 inches)
Optional flap:
  - Row 1: Sc across 12 sts, ch 1, turn
  - Rows 2–6: Sc across, ch 1, turn
Add button/snap.
Strap: Ch 120, sc across, sew on both ends.
Fasten off and weave in all ends.

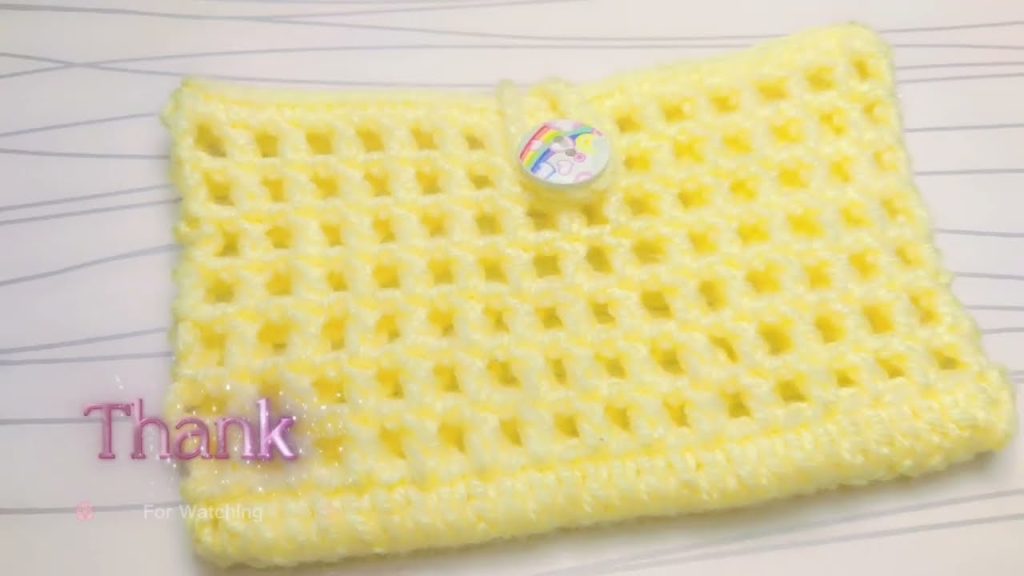
💬 Final Thoughts
Creating a crochet phone bag is the perfect blend of form and function. Not only is it a practical project you’ll use every day, but it’s also a stylish way to express your personality. Whether you prefer a sleek minimalist design or a cute floral pouch with embellishments, this project is endlessly adaptable.
It’s also a fantastic way to use up scrap yarn and hone your crochet skills while making something truly useful. Once you’ve made one, you’ll want to create them in every color — or start gifting them to your friends and family!
Video tutorial:


