
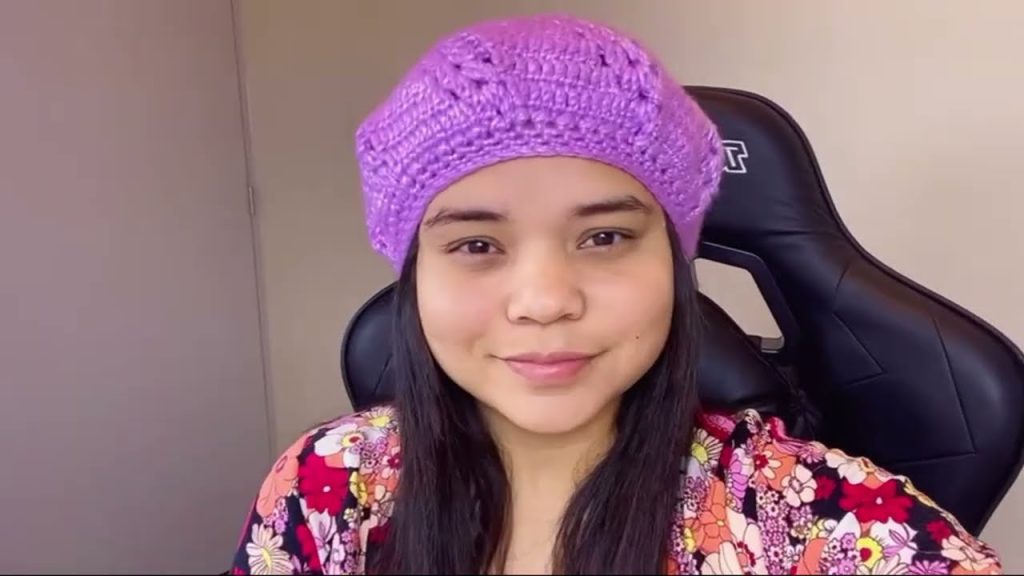
Crocheting is a timeless craft that combines creativity, relaxation, and functionality into one satisfying hobby. Among the many beautiful and practical projects you can create, a beret hat stands out as a stylish accessory that’s both fashionable and functional. Whether you’re a beginner looking for a simple project or a seasoned crocheter seeking a relaxing make, this super easy, step-by-step crocheted beret hat tutorial is just what you need.
In this article, we’ll walk you through everything—from yarn choices and hook sizes to detailed stitch-by-stitch instructions. By the end, you’ll have created a chic, Parisian-inspired beret that you’ll be proud to wear or gift.
Why Crochet a Beret Hat?
Before we jump into the steps, here’s why crocheting a beret is such a rewarding project:
- Beginner-Friendly: Simple construction and basic stitches make it easy.
- Fashionable: Instantly elevate any outfit with a handmade beret.
- Customizable: Change up the colors, yarn, or add decorative elements.
- Quick Finish: Can be completed in a few hours—perfect for weekend crafting.
Materials You’ll Need
To crochet your beret, you’ll need just a few basic supplies:
🧶 Yarn
Choose a worsted weight (medium #4) yarn. Acrylic yarn is budget-friendly and easy to work with, while wool or alpaca blends offer warmth and softness. Here are some good options:
- Red Heart Soft
- Lion Brand Wool-Ease
- Caron Simply Soft
🪝 Crochet Hook
Use a 5.0 mm (H-8) hook. You may adjust based on your tension or yarn type.
🧵 Additional Supplies
- Tapestry needle (for weaving in ends)
- Scissors
- Stitch marker (optional)

Basic Stitches Used
Here are the stitches you’ll use in this pattern:
- Chain (ch)
- Slip Stitch (sl st)
- Single Crochet (sc)
- Half Double Crochet (hdc)
- Double Crochet (dc)
Don’t worry if you’re not familiar with all these stitches—we’ll explain them step by step!
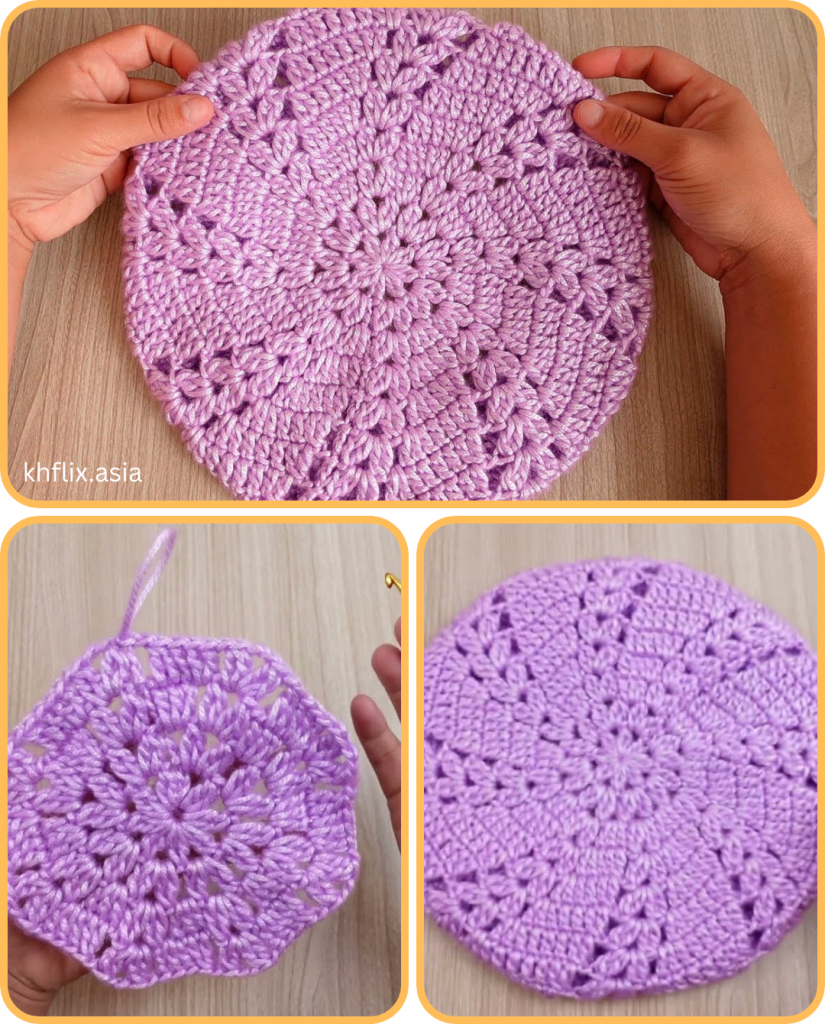
Super Easy Beret Hat Pattern – Step by Step
🔘 STEP 1: Create the Magic Ring
Start your beret by making a magic ring. This creates a snug, adjustable center.
- Wrap the yarn around your fingers to create a loop.
- Insert your hook into the loop, yarn over, and pull through.
- Chain 2 (this counts as your first dc).
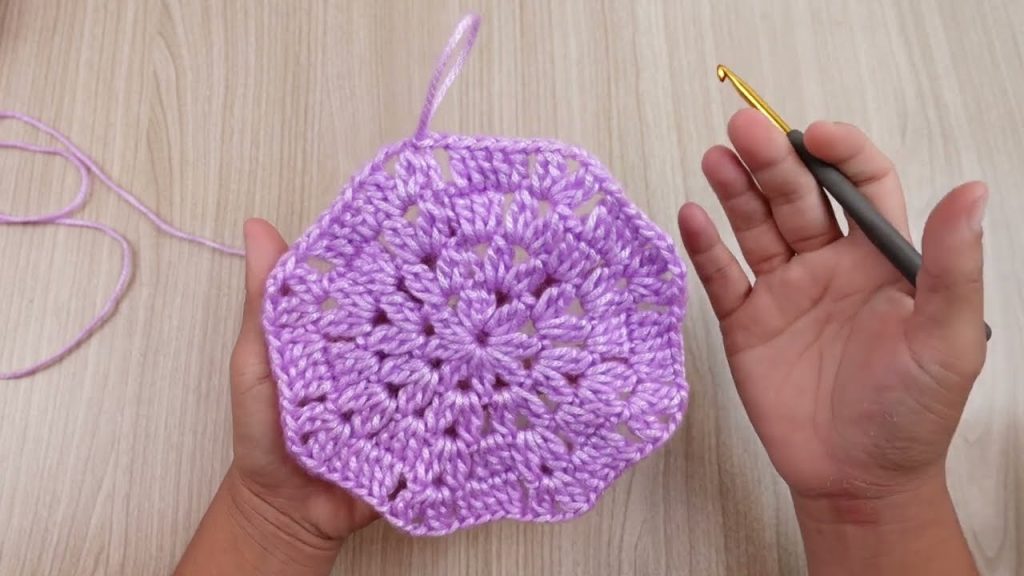
🔘 STEP 2: Make the Top Circle
Now you’ll work double crochets in the round to create a flat circle for the top of the beret.
Round 1:
- 11 dc into the magic ring (12 dc total, including the ch-2).
- Pull the ring tight and sl st into the top of the ch-2 to close.
Round 2:
- Ch 2 (counts as first dc), 1 dc in the same st.
- 2 dc in each stitch around. (24 dc)
- Sl st to join.
Round 3:
- Ch 2, 2 dc in next st, 1 dc in next st, repeat around. (36 dc)
- Sl st to join.
Round 4:
- Ch 2, 2 dc in next st, 1 dc in next 2 sts, repeat around. (48 dc)
- Sl st to join.
Round 5:
- Ch 2, 2 dc in next st, 1 dc in next 3 sts, repeat around. (60 dc)
- Sl st to join.
Round 6:
- Ch 2, 2 dc in next st, 1 dc in next 4 sts, repeat around. (72 dc)
- Sl st to join.
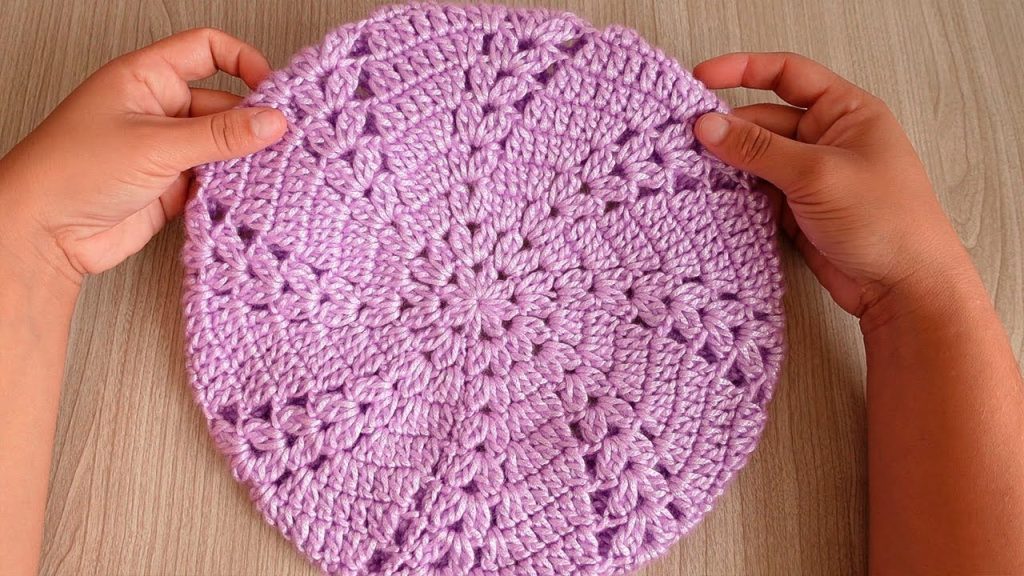
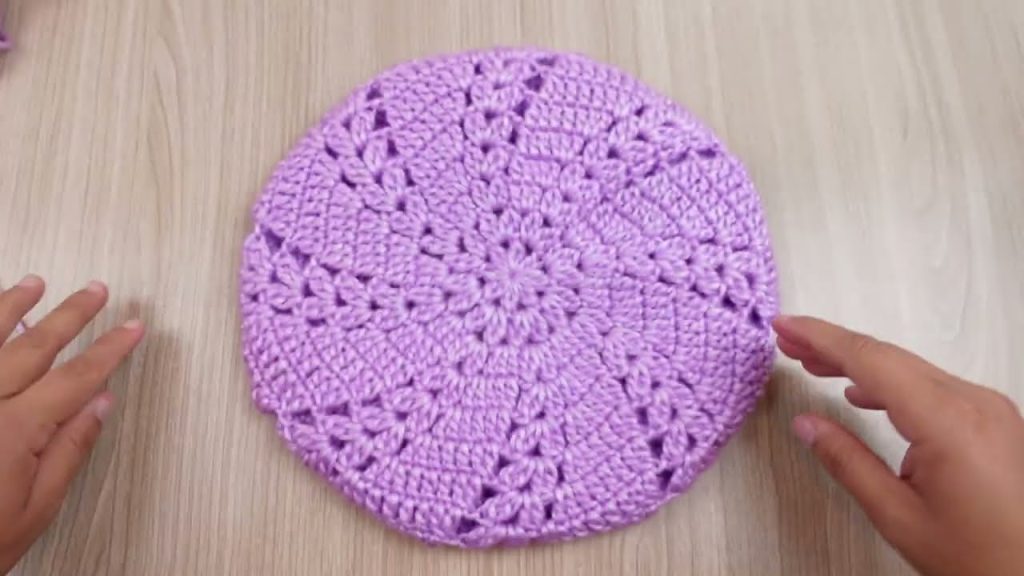
At this point, your beret’s top should measure around 9-10 inches in diameter. If you want a slouchier look, continue increasing until you reach about 11 inches.
🔘 STEP 3: Add Height to the Beret
You’ll now stop increasing and simply work even (no increases) to build height.
Round 7–9:
- Ch 2, dc in each st around. (72 dc)
- Sl st to join after each round.
This creates the “slouch” of the beret. You can add or subtract rows based on your preferred fit.
🔘 STEP 4: Shape the Brim
Now it’s time to decrease and form the brim that gives the beret its classic shape.
Round 10:
- Ch 1, sc2tog (single crochet two together), sc in next 4 sts, repeat around.
- Sl st to join.
Round 11:
- Ch 1, sc in each st around.
- Sl st to join.
You can continue decreasing one more round if you want a tighter fit, or you can stop here.
🔘 STEP 5: Finish the Edging
To make the brim look neat and fitted:
Final Round:
- Switch to half double crochet (hdc).
- Work one hdc in each stitch around for a snug brim.
- Sl st to join, fasten off.
🔘 STEP 6: Weave in the Ends
Use your tapestry needle to weave in all loose yarn tails. This step ensures a clean, finished look.
Optional: Add a Little “Stem” on Top
To make it look more traditionally French:
- Join yarn to the center of the beret top.
- Ch 6, sl st in 2nd ch from hook and across.
- Sl st into the base to anchor it and fasten off.
Now you’ve got that cute little “nub” on top!
Customize Your Beret!
Once you’ve mastered the basic pattern, feel free to get creative:
- 🎨 Use variegated or speckled yarn for a unique look.
- 🌟 Add beads, buttons, or embroidery.
- 🎀 Attach a bow, brooch, or crochet flower.
- 🧵 Try alternating rows of sc and dc for texture.
Care Instructions
Hand wash your crocheted beret in cold water with mild detergent. Lay flat to dry to maintain shape.
Final Thoughts
Crocheting your own beret is a fun, easy, and rewarding project that anyone can do with a bit of yarn and patience. This super easy step-by-step pattern is designed for beginners but results in a stylish hat you’ll love wearing year-round. Whether you make it for yourself or as a gift, your handmade beret will always carry that special handmade touch.
So grab your hook and yarn, settle into your favorite chair, and start stitching your way to a beautiful beret today!
Video tutorial:


