Crochet fingerless gloves are a timeless accessory that seamlessly blends fashion with functionality. Ideal for chilly days when full mobility of your fingers is a must—such as when typing, texting, or crafting—these gloves make an excellent DIY project for crocheters of all skill levels. Whether you’re crafting them for personal use, gifting, or selling at a market, crochet fingerless gloves are versatile, customizable, and satisfying to make.

Why Choose Fingerless Gloves?
Fingerless gloves offer several practical advantages:
- Warmth with Dexterity: They keep your hands warm while leaving your fingers free for detailed tasks.
- Style Statement: With countless design options, yarn types, and color palettes, they can be as fashionable as they are functional.
- Quick to Make: Most patterns are small, portable projects that can be completed in a few hours.
- Beginner-Friendly Options: Many patterns use basic stitches, making them perfect for new crocheters.
Materials Needed
To create crochet fingerless gloves, you’ll need:
- Yarn: Worsted weight (#4) yarn is common, but lightweight or chunky yarn can also be used depending on the desired warmth and style.
- Crochet Hook: The size will depend on your yarn—typically H/8 (5.0 mm) for worsted weight yarn.
- Scissors
- Tapestry Needle: For weaving in ends.
- Stitch Markers (optional): Useful for marking rounds or pattern repeats.
Basic Pattern Structure
Most crochet fingerless gloves follow a similar construction:
- Wrist Cuff: Often made with ribbing (using single or half double crochet in back loops only).
- Palm Section: Worked in rounds or rows, building up the glove to cover the hand.
- Thumb Hole: Created either by chaining and skipping stitches or leaving a gap and returning to complete it later.
- Finishing Edges: Optional decorative borders or edgings can be added.
Popular Stitch Options
- Single Crochet (sc) and Half Double Crochet (hdc): Good for a dense and warm fabric.
- Double Crochet (dc): Allows for more drape and flexibility.
- Shells, Bobbles, and Puff Stitches: Add texture and flair.
- Post Stitches: Great for ribbed cuffs or decorative accents.

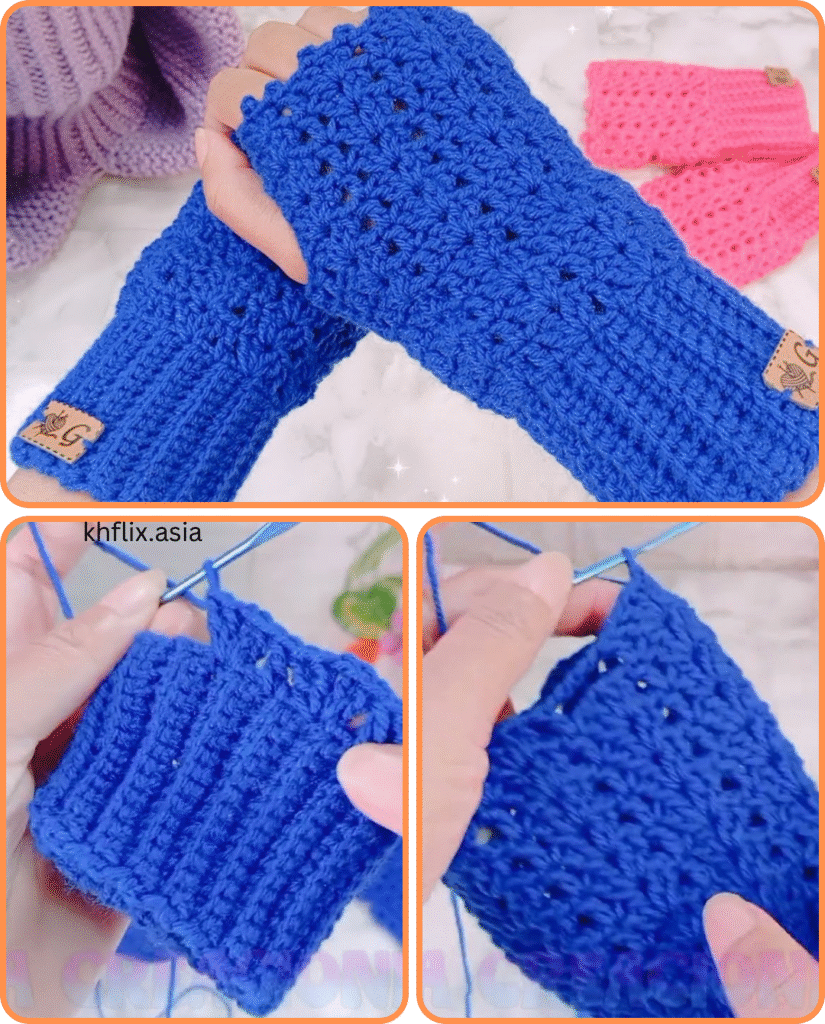
✨ Step-by-Step Instructions: Simple Ribbed Fingerless Gloves
🔹 Step 1: Make the Wrist Cuff (Ribbing)
This will be the stretchy part around your wrist, crocheted sideways.
- Ch 11 (or however wide you want the cuff).
- Row 1: Sc in 2nd ch from hook and in each ch across. (10 sc)
- Row 2: Ch 1, turn. Sc in back loops only (BLO) across all 10 stitches.
- Repeat Row 2 until your piece wraps comfortably around your wrist (about 25–30 rows, depending on your wrist size).
- Fold the piece in half and slip stitch the short ends together to form a tube. This is your cuff!
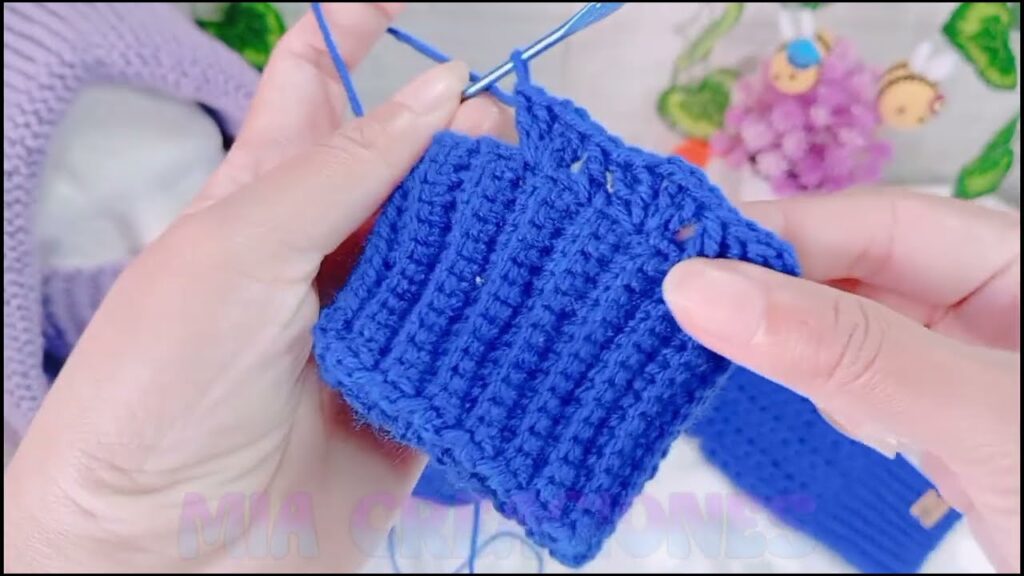
🔹 Step 2: Build the Hand Part
Now we crochet around the long edge of the cuff to build up the glove.
- Round 1: Ch 1. Work 1 sc into the side of each row around the cuff (you should get about 25–30 stitches). Join with a slip stitch to the first sc.
- Round 2–8 (or more): Ch 1. Sc in each stitch around. Join with a slip stitch.
- You can adjust the number of rounds to make the glove longer or shorter.
🔹 Step 3: Create the Thumb Hole
- Next Round (Thumb Hole):
- Sc in the first 20 stitches (or until your thumb naturally starts),
- Ch 5,
- Skip 5 stitches (or however wide your thumb is),
- Continue sc to end of round. Join with slip stitch.
- This creates a space for the thumb.
- Next 2–3 Rounds:
- Sc in each stitch and chain space around. Join after each round.

🔹 Step 4: Finish and Repeat
- Fasten off, weave in your ends with the tapestry needle.
- Repeat all steps to make the second glove!
👌 Customization Tips
- Add edging: A round of crab stitch (reverse single crochet) at the top adds polish.
- Color blocking: Use a second color for the hand portion for style.
- Adjust for size: Try on as you go! Add or subtract rows in the cuff or rounds in the body to fit.

Tips for Success
- Fit Matters: Measure your hand circumference and adjust stitch counts as needed for a snug but comfortable fit.
- Try On As You Go: Especially if working without a specific pattern, regularly trying on the glove ensures proper sizing.
- Match the Pair: Keep detailed notes or count rows to ensure both gloves are symmetrical.
- Wash and Block: Lightly block finished gloves to set the shape and even out stitches.
Video tutorial:
Conclusion
Crochet fingerless gloves are a rewarding project that showcases your creativity and keeps your hands warm in style. With endless customization options, they’re a perfect handmade accessory for any season. Whether you’re making a simple pair for beginners or experimenting with advanced textures and shapes, these gloves are sure to be a hit.