So, you’ve decided to crochet your very first handbag clutch – fantastic! Learning from a video tutorial is often the most effective way for beginners, as you can see the stitches in action, pause, rewind, and follow along at your own pace. But with countless options out there, how do you find the best video for you?
This detailed guide will help you understand what makes a great beginner-friendly clutch video tutorial, what key steps to look for, and how to maximize your learning experience.
What Makes a Great Beginner Crochet Clutch Video Tutorial?
When searching for a video, keep an eye out for these crucial elements:
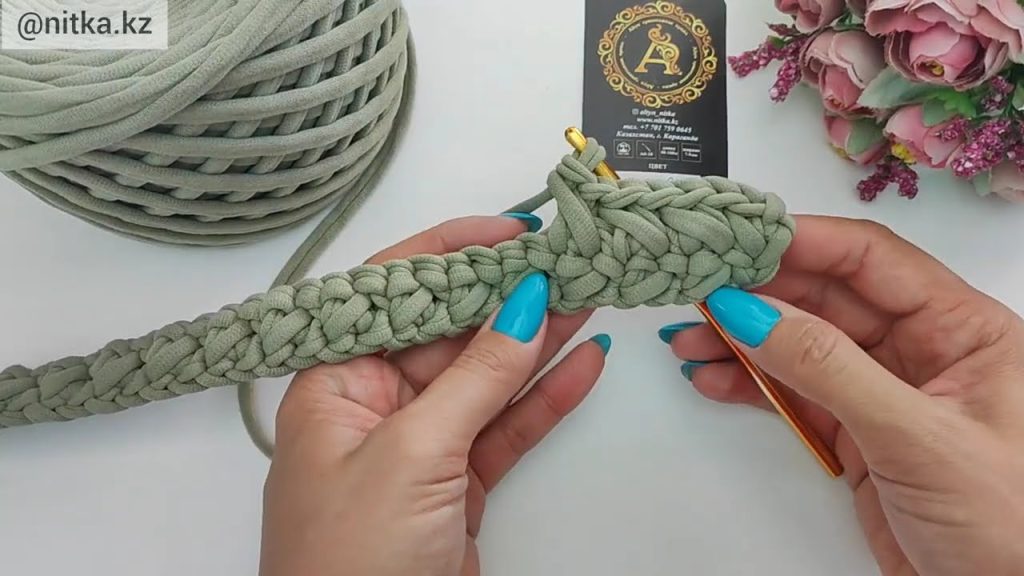
- Clear, Well-Lit Visuals: This is paramount. The video should have excellent lighting, and the camera should be focused directly on the hands and stitches. You should be able to clearly see how the hook enters the yarn, how the yarn is wrapped, and how each stitch is formed.
- Slow and Deliberate Pacing: A good beginner tutorial doesn’t rush. The instructor should demonstrate each new stitch and technique slowly, perhaps even repeating it a few times from different angles.
- Verbal Cues and Explanations: Beyond just showing, the instructor should clearly explain what they are doing and why. They should name the stitches as they make them and offer tips for common beginner challenges.
- On-Screen Text/Annotations (Optional but Helpful): Some videos include text overlays for stitch counts, abbreviations, or important notes, which can be very useful.
- Focus on Basic Stitches: For a “beginner” clutch, the video should primarily use foundational stitches like the chain (ch), slip stitch (sl st), and single crochet (sc) or half double crochet (hdc). Avoid videos that jump straight into complex stitch patterns.
- Full Project Tutorial: The video should cover the entire process, from creating the base to finishing off and, ideally, adding a closure.
- Yarn and Hook Recommendations: The instructor should clearly state the type and weight of yarn they are using, along with the recommended hook size. This helps you gather the right materials.
- Positive and Encouraging Tone: A friendly and patient instructor makes the learning process much more enjoyable!
- Comments Section: A vibrant comments section can be a good sign, as viewers often ask questions and the creator (or other viewers) provide helpful answers.
Key Steps You’ll Learn in a Typical Beginner Clutch Video
Most beginner crochet clutch tutorials will follow a similar progression. Here’s what you can expect to see:
Phase 1: Gathering Materials & Understanding Basics
- Introduction to Tools: The video will likely start by showing you the yarn, hook, scissors, and yarn needle you’ll need.
- Yarn Type & Hook Size: The instructor will explain why certain yarn types (like cotton or sturdy acrylic) are good for bags and how to choose the right hook size based on the yarn label.
- Holding Yarn & Hook: Crucial for beginners! They’ll demonstrate comfortable ways to hold both the yarn and the crochet hook.
- The Slip Knot: The very first step to getting yarn onto your hook.
- The Chain Stitch (ch): The foundation of almost every crochet project. You’ll learn how to make a consistent chain.
Phase 2: Building the Clutch Body
- Creating the Foundation Chain: You’ll chain a specific number of stitches to determine the width of your clutch.
- Working an Oval Base (Common Method):
- The video will demonstrate how to crochet around both sides of your initial chain to create a flat, oval base. This usually involves placing extra stitches at each end of the chain to create the curve.
- Look for: Clear demonstration of increasing stitches at the turns to maintain the oval shape.
- Building the Sides of the Bag (Working in Rounds):
- Once the base is formed, you’ll learn to crochet upwards in continuous rounds.
- Single Crochet (sc) or Half Double Crochet (hdc) Emphasis: These stitches create a dense, sturdy fabric perfect for a bag. The video will show you how to execute these stitches clearly.
- Working in BLO (Back Loop Only) for a Crisp Edge (Optional but common): Many tutorials will show you how to crochet in the back loop only for the first round after the base, which creates a neat, defined edge where the sides meet the bottom.
- Consistent Stitch Count: The instructor will likely remind you to count your stitches at the end of each round to ensure your bag stays rectangular (or oval) and doesn’t get wider or narrower unintentionally.
- Achieving Desired Height: You’ll continue crocheting rounds until your clutch reaches the desired height.
Phase 3: Finishing & Adding Details
- Fastening Off (FO): How to securely end your project and cut the yarn.
- Weaving in Ends: A critical step for a professional finish. The video will show you how to use a yarn needle to hide all loose yarn tails seamlessly.
- Adding a Closure (Optional but Recommended): Many good videos will include options for closing your clutch:
- Magnetic Snaps: How to hand-sew magnetic snap closures.
- Buttons & Loops: Crocheting a small chain loop and sewing on a decorative button.
- Zippers: (Less common for beginner videos, but some might offer a quick overview of how to sew one in).
- Lining (Less common for true beginner videos, but a bonus): Some advanced beginner videos might briefly discuss adding a fabric lining for extra durability and a polished look.
How to Search for the Best Videos
Use specific search terms on platforms like YouTube, Vimeo, or even dedicated crochet websites:
- “Crochet clutch for beginners”
- “Easy crochet handbag tutorial”
- “Beginner friendly crochet pouch”
- “How to crochet a simple clutch”
- “First crochet bag video”
- “Single crochet clutch tutorial” (if you want to focus on this stitch)
Pro Tip: Read the comments section before you start. Other beginners often leave feedback on the clarity of the instructions, which can save you time.
Maximizing Your Learning Experience
- Watch Once First: Before picking up your hook, watch the entire video through at least once to get a general understanding of the process.
- Gather All Materials: Make sure you have everything you need before you begin.
- Pause and Rewind Freely: This is the biggest advantage of video tutorials! Don’t hesitate to hit pause, rewind a few seconds, and re-watch a tricky part until you grasp it.
- Practice Stitches Separately: If you’re completely new, practice the slip knot, chain, and single crochet (or hdc) a few times on their own before starting the actual clutch project.
- Don’t Aim for Perfection on Your First Try: Your first clutch might have a few wobbly stitches, and that’s perfectly normal! Focus on understanding the technique. Every project is a learning opportunity.
- Be Patient with Yourself: Crocheting takes practice. If you get frustrated, take a break and come back to it with fresh eyes.
By following this guide, you’ll be well-equipped to find and follow an excellent “Crochet Handbag Clutch Video for Beginners,” transforming yarn into your very own stylish accessory. Happy hooking!
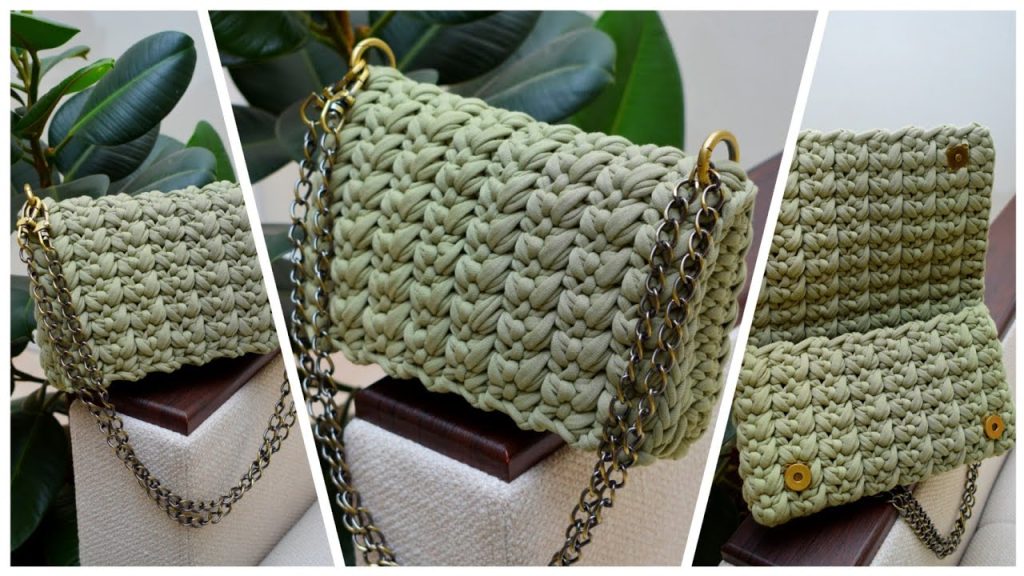
How to Make: The Chic & Simple Crochet Clutch
This clutch is designed for simplicity and style, making it an ideal project for beginners to get comfortable with basic crochet stitches and working in rounds. It creates a seamless and sturdy pouch perfect for holding your essentials.
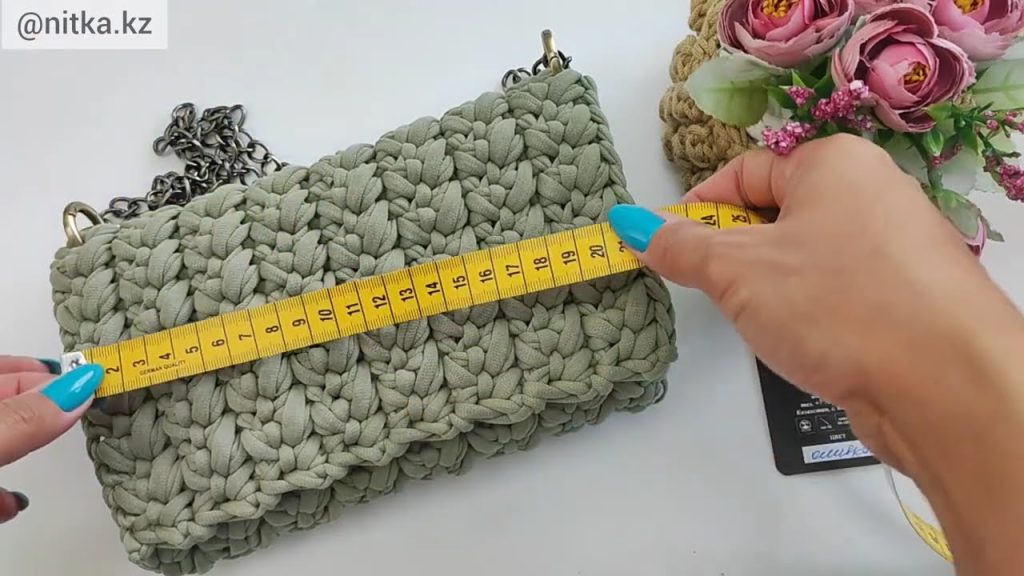
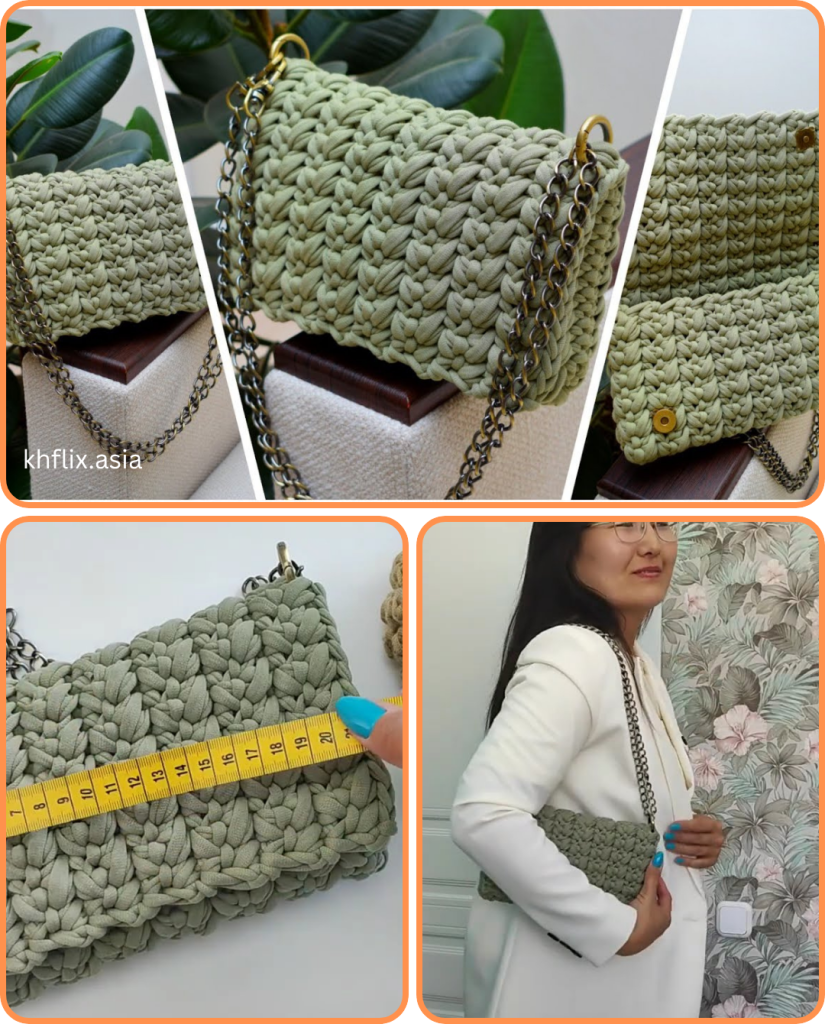
Finished Size (Approximate): 8 inches wide x 5 inches tall. You can easily adjust the starting chain to make it wider or narrower.
Materials You’ll Need:
- Yarn: Approximately 50-100 yards of worsted weight (Aran) yarn. Cotton or a sturdy acrylic blend is recommended for good shape retention.
- Crochet Hook: 5.0mm (H/8) or 5.5mm (I/9) – check your yarn label for the recommended size.
- Yarn Needle (Tapestry Needle): For weaving in ends.
- Scissors: For cutting yarn.
- Stitch Marker (Optional but Recommended): To mark the beginning of your rounds.
Abbreviations Used:
- ch: chain
- sc: single crochet
- sl st: slip stitch
- st(s): stitch(es)
- rep: repeat
- FO: fasten off
- BLO: back loop only (insert hook into the back loop of the stitch only)
Step-by-Step Instructions:
Part 1: Creating the Base (Oval Shape)
The base of your clutch will be an oval, which is created by crocheting around both sides of an initial chain.
- Start with a Slip Knot and Chain:
- Make a slip knot on your hook.
- Ch 21 (this will determine the length/width of your clutch. For a wider clutch, chain more stitches, always an odd number).
- Round 1: First Side of the Chain & Turning the Corner:
- Sc in the 2nd chain from your hook. (The loop on your hook doesn’t count as a stitch. The “2nd chain from hook” is the second chain away from the hook, not counting the loop already on it.)
- Sc in the next 18 chains. (You’ll now be at the very last chain of your starting chain).
- 3 sc in the very last chain. (This creates the curved end of your oval. It’s important to place all three single crochet stitches into that one final chain).
- Tip: Place a stitch marker in the first single crochet you made in this round. This will help you identify the beginning of your round later.
- Round 1 (Continued): Second Side of the Chain & Finishing the Oval:
- Now, you’re going to work along the opposite side of your original starting chain. The stitches you just made in the “3 sc” are pushing your work around.
- Sc in the next 18 chains. (You’ll be crocheting into the unused loop of each chain stitch on the underside of your starting chain, directly opposite the stitches you just made).
- 2 sc in the very first chain you originally started in. (This finishes the curve on the second end of your oval, joining the beginning of your round).
- Join with a sl st to the first sc of the round (the one you marked with your stitch marker).
- (You should have 42 single crochet stitches in total for this round if you started with 21 chains).
- Round 2: Expanding the Base (Increases):
- Ch 1 (this chain does NOT count as a stitch; it just gives height for your first single crochet).
- 2 sc in the first stitch. (This is an increase at one end of your oval).
- Sc in the next 18 stitches.
- 2 sc in each of the next 3 stitches. (These three increases are around the first curved end of your oval).
- Sc in the next 18 stitches.
- 2 sc in each of the last 2 stitches. (These two increases are around the second curved end of your oval).
- Join with a sl st to the first sc of the round.
- (You should have 48 single crochet stitches in total for this round).
- Optional: If you want an even wider base, you could add another increase round here, continuing to place increases at the ends of the oval to maintain its shape. For a simple clutch, two base rounds are usually sufficient.
Part 2: Building the Sides (Single Crochet in Continuous Rounds)
Now you’ll work upwards to create the body of the clutch.
- Round 3: Creating the Defined Edge (Back Loop Only):
- Ch 1 (does not count as a stitch).
- Sc in the back loop only (BLO) of each stitch around. (Instead of inserting your hook under both loops of the ‘V’ on top of the stitch, you’ll only insert it under the loop furthest from you).
- Join with a sl st to the first sc of the round.
- (You should still have 48 single crochet stitches).
- Why BLO? Working in the back loop only for this round creates a subtle, neat ridge that visually separates the base of your clutch from its sides, giving it a more defined look.
- Round 4 onwards: Building Height (Normal Single Crochet):
- Ch 1 (does not count as a stitch).
- Sc in both loops of each stitch around. (Now you’ll go back to inserting your hook under both loops of the ‘V’ on top of the stitch, as is standard).
- Join with a sl st to the first sc of the round.
- (You should maintain 48 single crochet stitches in each of these rounds).
- Repeat Round 4:
- Continue repeating Round 4 until your clutch reaches your desired height. For an 8×5 inch clutch, aim for about 5 inches of height from the base. This will usually be around 10-15 total rounds (including your base rounds and BLO round), depending on your yarn and tension.
- Hold your work up and eyeball it – make it as tall as you like!
Part 3: Finishing the Clutch
- Final Touches & Fasten Off:
- Once you’ve reached your desired height and completed your last single crochet round, sl st in the next stitch or two to create a very smooth, even finish for the top edge.
- Fasten Off (FO): Cut your yarn, leaving a tail of about 6 inches. Pull this tail completely through the loop on your hook to secure it.
- Weave in Ends:
- Thread the remaining yarn tail onto your yarn needle.
- Carefully weave the tail back and forth through the stitches on the inside of your clutch. Try to go through the middle of the stitches, not just under them, to secure the end and make it invisible. Trim any excess yarn.
- Weave in the starting tail from your foundation chain as well, if you haven’t already.
Part 4: Adding a Closure (Optional but Recommended)
A closure will keep your belongings secure. Here are a few easy options:
- Magnetic Snap:
- Purchase “sew-in” magnetic snaps from a craft store.
- Position one half of the snap on the inside of one top edge of the clutch, centered. Use your yarn needle and a length of matching yarn to securely sew it through the small holes on the snap’s backing and into the crochet fabric.
- Close the clutch to determine the exact placement for the other half of the snap on the opposite side. Sew it in place.
- Button and Loop:
- Choose a decorative button.
- For the Loop: On one side of the clutch’s top edge (e.g., the back), decide where you want your loop. Insert your hook, attach new yarn, chain a small number of stitches (e.g., ch 5-8, depending on your button size), sl st back into the same stitch or a nearby stitch to form a loop. Fasten off and weave in ends. Test the loop to make sure your button fits through snugly.
- For the Button: On the opposite side of the clutch (the front), sew your button securely in place, aligning it with the loop.
- No Closure (Open Top): For a very casual clutch, you can simply leave the top open!
Congratulations! Your Chic & Simple Crochet Clutch is now complete!
You’ve successfully created a functional and stylish accessory with just a few basic crochet stitches. Enjoy using your new handmade item!
Video tutorial: