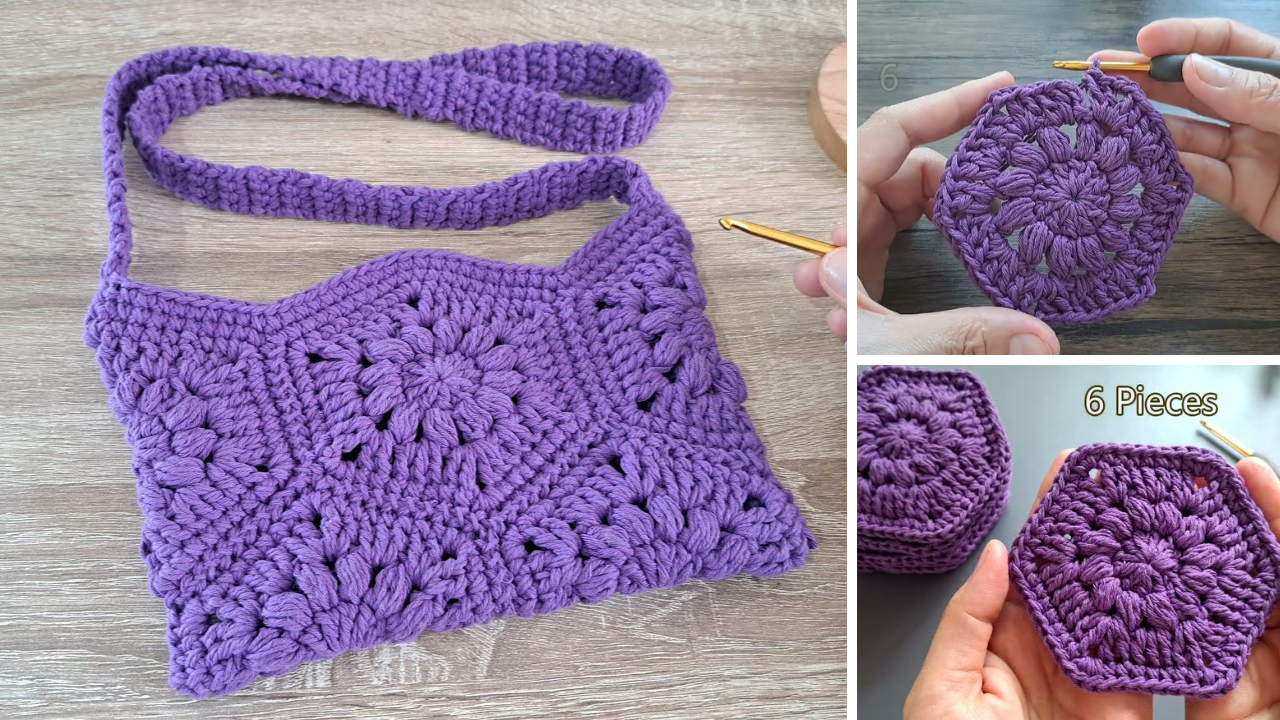
Unleash Your Inner Granny: A Step-by-Step Tutorial for Crocheting a Granny Hexagon Bag
The classic granny square is a beloved crochet staple, but its hexagonal cousin offers a fresh, modern twist that’s perfect for creating unique and stylish bags. Granny hexagons, with their six-sided charm and inherent sturdiness, come together beautifully to form a surprisingly spacious and incredibly chic accessory. This detailed tutorial will guide you through every step, from crocheting your first hexagon to assembling your very own granny hexagon bag.
Why a Granny Hexagon Bag?
- Modern Twist on a Classic: It offers a contemporary update to the beloved granny stitch, creating a more dynamic shape than traditional squares.
- Versatile Design: Granny hexagons can be joined in countless ways, allowing for various bag shapes and sizes – from small pouches to large market totes.
- Color Play Paradise: Like granny squares, hexagons are perfect for using up yarn scraps and experimenting with vibrant color combinations. Each hexagon can be a mini canvas!
- Sturdy Fabric: The granny stitch creates a relatively dense fabric that holds its shape well, making it ideal for a functional bag.
- Beginner-Friendly: While slightly more complex than a basic square, the granny hexagon still relies on fundamental crochet stitches (chains, slip stitches, double crochets), making it accessible for ambitious beginners.
What You’ll Need
Gather your supplies before you begin. Having everything at hand will make your crocheting process smooth and enjoyable.
- Yarn:
- Weight: Worsted weight (Aran) yarn is highly recommended for bags due to its durability and stitch definition. Cotton, cotton blends, or acrylic are good choices.
- Colors: This is where the fun begins! Choose 2-4 colors per hexagon, or use a single color for a more minimalist look. This is an excellent project for using up leftover skeins.
- Quantity: The amount of yarn will depend on the size of your hexagons and the desired size of your bag. For a medium-sized tote, you might need 300-500 yards total.
- Crochet Hook: A hook size appropriate for your chosen yarn (typically H/5.0mm or I/5.5mm for worsted weight). Always check your yarn label for the recommended hook size.
- Stitch Markers: Very helpful for marking the beginning of rounds or specific corners, especially when you’re starting.
- Yarn Needle (Tapestry Needle): Essential for weaving in ends and seaming your hexagons together.
- Scissors: For cutting yarn.
- Optional:
- Fabric lining: To add structure and prevent small items from slipping through stitches.
- Magnetic snap, button, or zipper: For a bag closure.
- Bag handles: D-rings, wooden handles, or ready-made straps for a polished finish.

Mastering the Granny Hexagon: Step-by-Step
The granny hexagon is worked in rounds, growing outwards from a central ring. Each round typically uses a new color for that classic granny look.
Abbreviations:
- ch: chain
- sl st: slip stitch
- dc: double crochet
- sp: space
- Rnd: Round
Pattern (Example based on a 3-round hexagon):
Starting your Hexagon:
- Rnd 1 (Color A): Ch 4, sl st into the first ch to form a ring. (Alternatively, use a magic ring for a tighter center.)
- Ch 3 (counts as 1 dc). 2 dc into the ring. (Ch 2, 3 dc into the ring) 5 times. Ch 2, sl st to the top of the initial Ch 3 to join. Fasten off Color A. (You should have 6 clusters of 3 dc, separated by Ch 2 spaces).
- Rnd 2 (Color B): Join Color B into any Ch 2 corner space.
- Ch 3 (counts as 1 dc). 2 dc into the same Ch 2 sp. Ch 2, 3 dc into the same Ch 2 sp. (This creates your first corner).
- (3 dc, ch 2, 3 dc) into the next Ch 2 corner sp. Repeat from * to * 4 more times. Sl st to the top of the initial Ch 3 to join. Fasten off Color B. (You should now have 6 larger corner clusters).
- Rnd 3 (Color C): Join Color C into any Ch 2 corner space.
- Ch 3 (counts as 1 dc). 2 dc into the same Ch 2 sp. Ch 2, 3 dc into the same Ch 2 sp. (First corner).
- Inside Edge: 3 dc into the next space between the 3 dc clusters (not a corner space).
- Corner: (3 dc, ch 2, 3 dc) into the next Ch 2 corner sp.
- Repeat from * to * around, ensuring you work 3 dc into each side space and (3 dc, ch 2, 3 dc) into each corner space. Sl st to the top of the initial Ch 3 to join. Fasten off Color C.

Continuing to Grow (for larger hexagons):
Each subsequent round will follow a similar pattern: you’ll work (3 dc, ch 2, 3 dc) into each Ch 2 corner space, and 3 dc into every space along the sides between the previous round’s 3 dc clusters. As your hexagon grows, the number of “3 dc” clusters on each side will increase by one with each round.
Pro-Tip for Color Changes: For clean color changes, always join your new color with a slip stitch into the designated space and chain up for your first stitch. Fasten off the old color by pulling the yarn through the loop on your hook after completing the slip stitch join.
Designing Your Granny Hexagon Bag: Layout Ideas
The beauty of the granny hexagon bag lies in its modularity. You can create different bag shapes by arranging your hexagons. Here are some popular layouts:
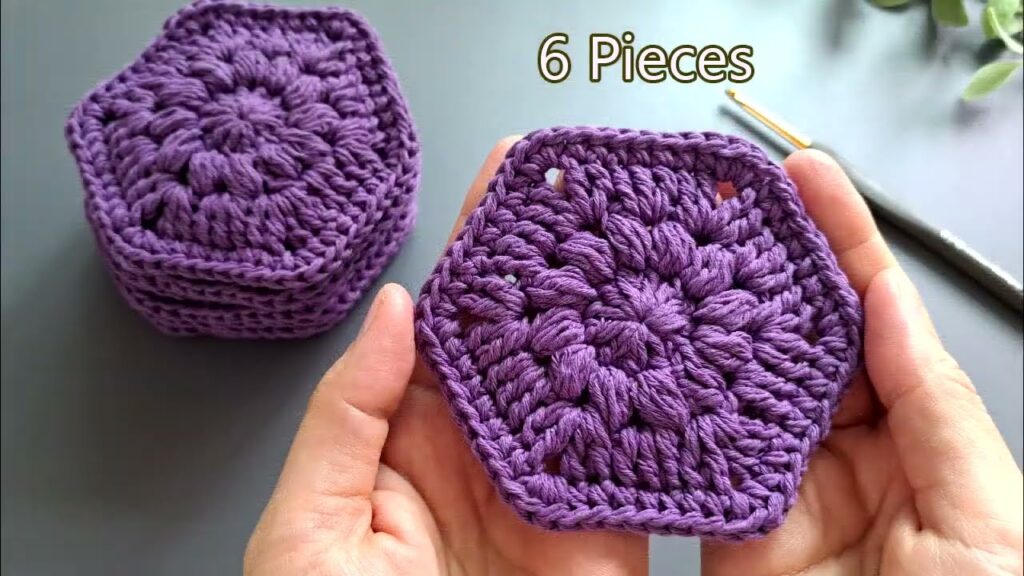
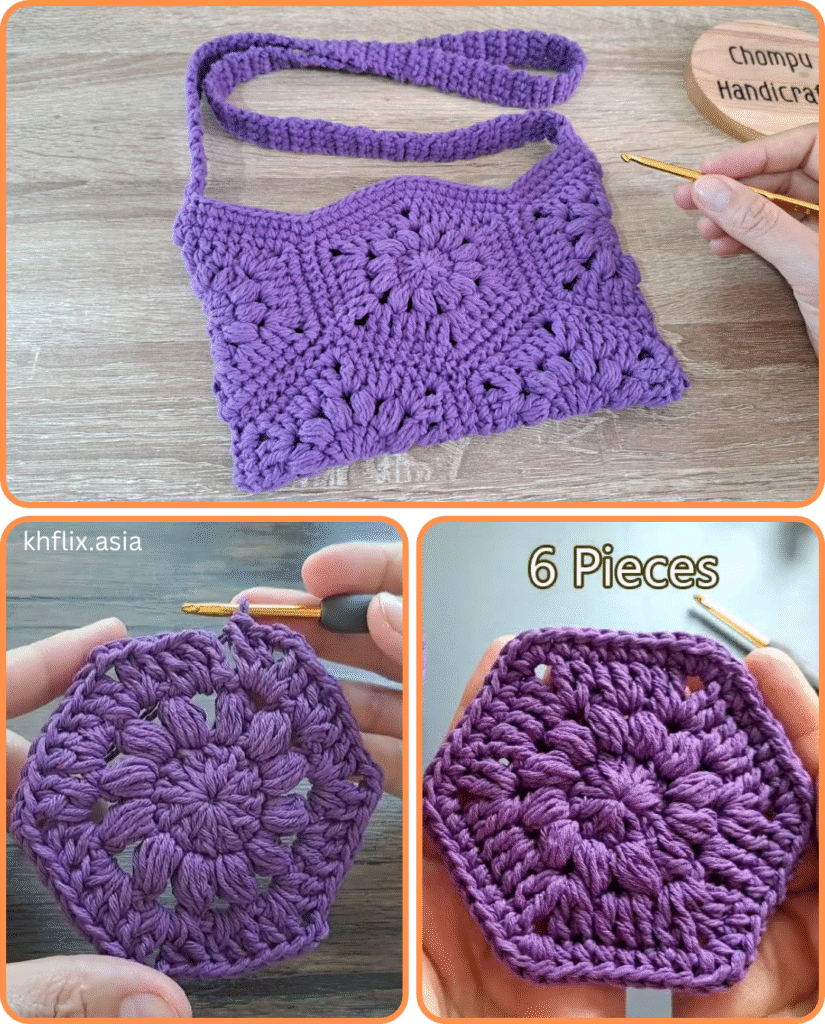
- The “Flower” Bag (6 Hexagons + 1 Base Hexagon):
- Crochet 7 identical hexagons.
- Arrange 6 hexagons around a central 7th hexagon.
- This creates a closed base and sides that naturally fold upwards.
- The “Continuous Strip” Bag:
- Crochet a series of hexagons and join them edge-to-edge in a long strip.
- Fold the strip in half and seam the sides to form a bag.
- This is great for creating tall, rectangular bags.
- The “Half Hexagon” Bag:
- Use two hexagons for the front and back panels.
- A common method is to flatten two hexagons, seam them together, and then add gussets (strips of crochet fabric) for the sides and bottom.
For this tutorial, let’s focus on the popular “Flower” Bag (6 + 1 arrangement).
Assembling Your Bag (6+1 Hexagons)
Step 1: Crochet Your Hexagons
- Decide on the size of your hexagons. For a small to medium bag, 3-4 rounds per hexagon is a good start.
- Crochet 7 identical granny hexagons, following the pattern above. Choose your colors and enjoy the process! Weave in all ends on each hexagon before joining – it’s much easier now than later.
Step 2: Arranging for Joining
- Lay out your 7 hexagons on a flat surface.
- Place one hexagon in the center – this will be your base.
- Arrange the other 6 hexagons around the central one, with one side of each outer hexagon touching a side of the central hexagon. This forms a “flower” shape.
Step 3: Joining Your Hexagons There are several ways to join crochet motifs. For granny hexagons, the slip stitch join or single crochet join offers a sturdy and neat finish.
- Slip Stitch Join (Invisible, flatter seam):
- Place two hexagons right sides together, aligning the edges you want to join.
- Insert your hook through the back loops only of the stitches on both hexagons.
- Yarn over and pull through both loops (making a slip stitch). Continue slip stitching along the entire edge. Fasten off.
- Single Crochet Join (More visible, creates a ridge):
- Place two hexagons right sides together.
- Insert your hook through both loops of the stitches on both hexagons.
- Work a single crochet stitch. Continue single crocheting along the entire edge. Fasten off.
Joining Sequence for the “Flower” Bag:
- Attach outer hexagons to the central base hexagon:
- Join one side of each of the 6 outer hexagons to a corresponding side of the central hexagon. You’ll make 6 seams here.
- Once done, your project will start to naturally curve upwards, forming the bottom and lower sides of your bag.
- Join the side seams:
- Now, you’ll join the adjacent edges of the 6 outer hexagons to each other.
- For example, if you have Hexagon A, B, C, D, E, F around the central Hexagon G:
- Join Hexagon A to Hexagon B along their touching side.
- Join Hexagon B to Hexagon C, and so on, until all 6 outer hexagons are joined to each other along their vertical seams.
- This will fully form the body of your bag.
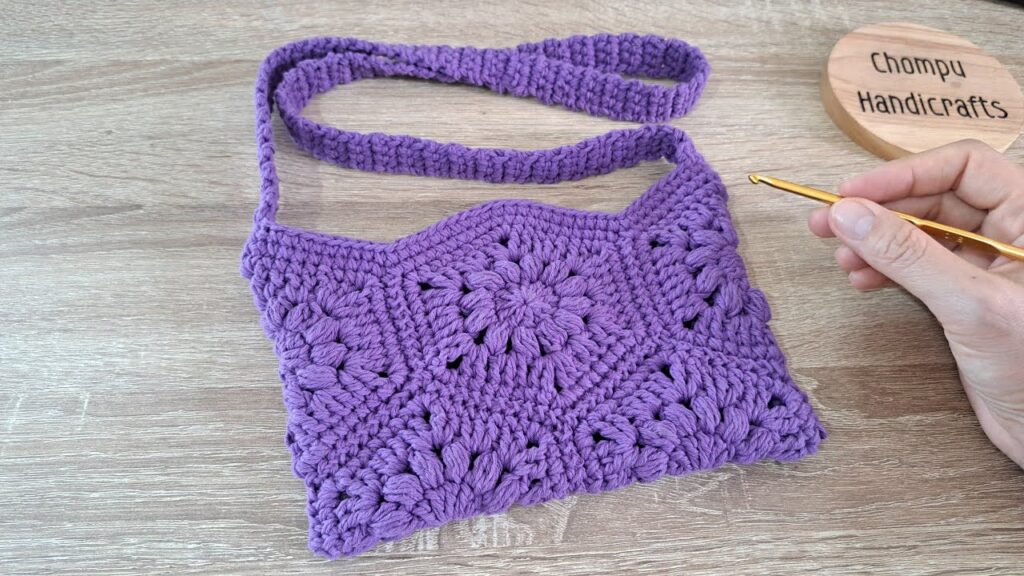
Step 4: Top Edging
- Once the hexagons are joined, you’ll have an opening at the top of your bag.
- Join your yarn to any corner of the top opening.
- Work a few rounds of single crochet (sc) or half double crochet (hdc) evenly around the entire top edge. This creates a sturdy and clean finish for the opening. You might work 2 sc into each corner space of the hexagons to keep the shape.
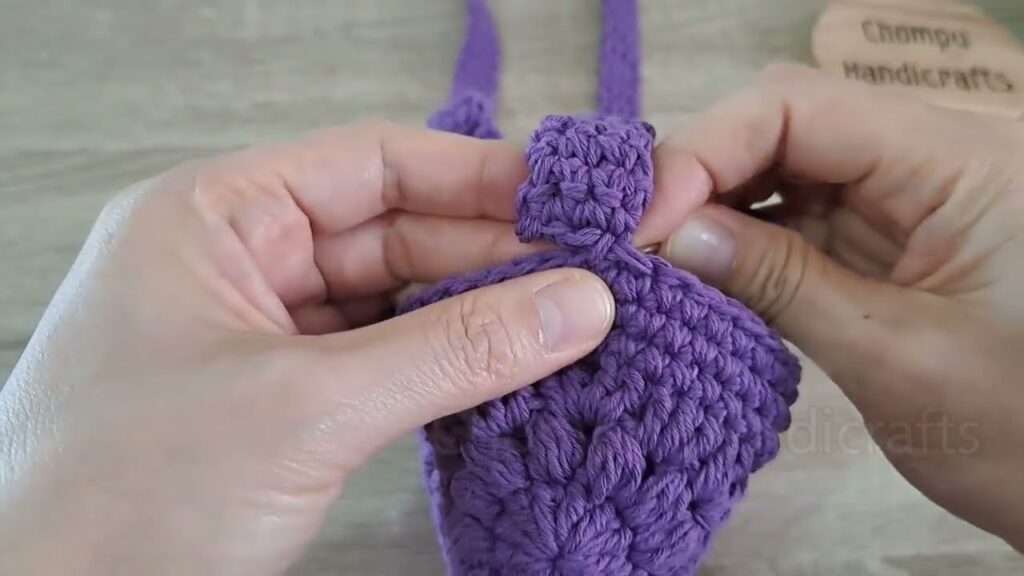
Adding Handles
- Crocheted Handles:
- Simple Straps: Chain a long length (e.g., 50-70 chains for a shoulder strap). Work several rows of single crochet or half double crochet along the chain. Fasten off and sew securely to the inside top corners of your bag. Make two identical straps.
- Granny Square Straps: You can even make a long strip of joined mini granny squares or single granny hexagons joined in a row for a unique handle.
- Store-Bought Handles:
- Attach D-rings or other hardware to the top corners of your bag (sew them securely). Then, attach store-bought leather, wooden, or bamboo handles to the hardware.
- Alternatively, sew the handles directly to the bag if they have attachment points.
Finishing Touches (Optional but Recommended)
- Lining: A fabric lining will transform your crocheted bag into a more durable and functional item.
- Measure the dimensions of your finished bag. Cut and sew a simple fabric bag (with a flat bottom, similar to your crochet bag’s shape) that fits snugly inside.
- Fold down the top edge of the fabric lining, press, and hand-stitch it securely to the inside of the crocheted bag’s top edging.
- Closure:
- Sew a magnetic snap onto the inside of the top edging.
- Crochet a simple loop and sew a button onto the opposite side for a button closure.
- Install a zipper for a secure closure (this requires some basic sewing skills).

Tips for Success
- Weave in Ends as You Go: Seriously, don’t save them all for the end! Weave in the tails from each color change as you finish each hexagon. It will save you hours of work later.
- Consistency is Key: Try to maintain consistent tension throughout your crocheting, especially when making the hexagons, to ensure they are all roughly the same size.
- Blocking (Optional): If your hexagons are curling or not perfectly flat, you can gently block them before joining. Lightly mist them with water, pin them to shape on a foam board, and let them dry completely.
- Practice Hexagons: If you’re new to granny hexagons, make a few practice ones before you start your main bag project. This will help you get comfortable with the pattern.
- Don’t Be Afraid of Color: This is a project where bold color combinations truly shine! Experiment and have fun.
Crocheting a granny hexagon bag is a journey of creativity and skill. With patience and these detailed steps, you’ll soon have a unique, handmade accessory that’s sure to turn heads and become a cherished part of your wardrobe. Happy hooking!
Video tutorial:


