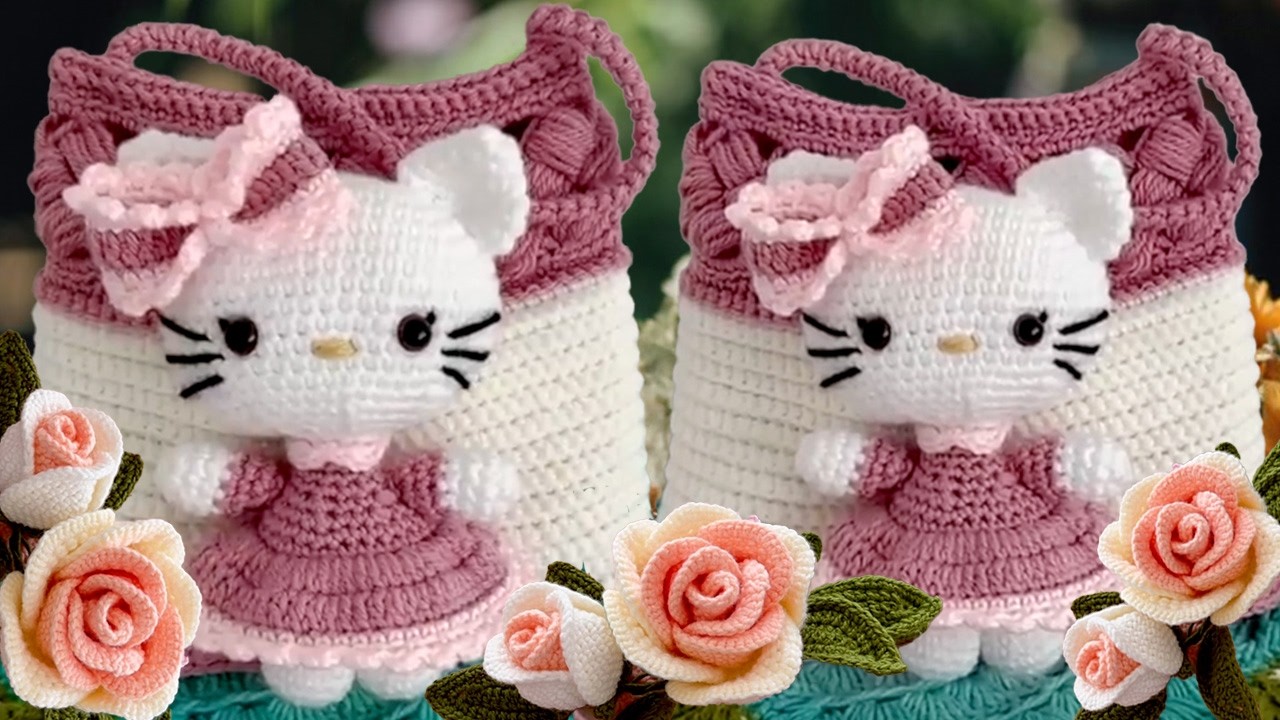
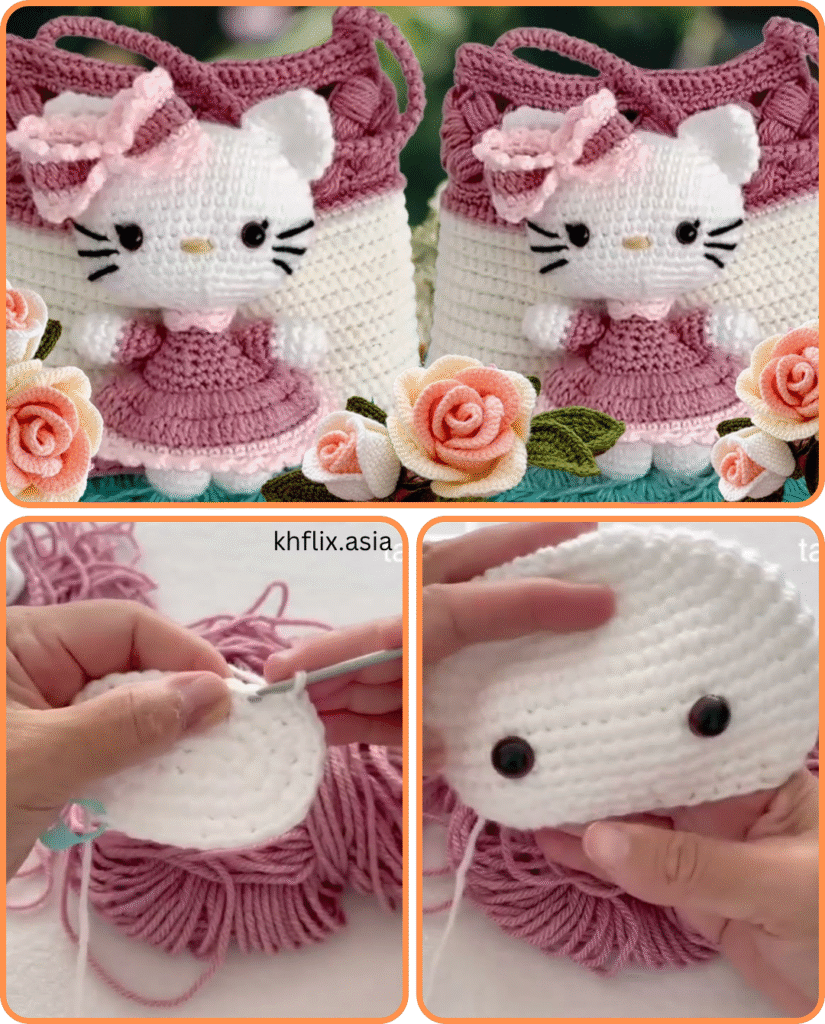
If you’re a fan of Hello Kitty and love cute, handmade accessories, then this project is perfect for you! A crochet Hello Kitty bag is an adorable and easy project for beginners. It combines simple shapes, basic stitches, and a little creativity — no advanced skills required.
In this step-by-step tutorial, you’ll learn how to crochet your own Hello Kitty bag, perfect for kids, gifts, or your own kawaii collection.

🧶 What You’ll Need
✨ Materials:
- Yarn:
- White (main body)
- Pink or red (bow)
- Black (eyes and whiskers)
- Yellow (nose)
- Crochet Hook: 3.5 mm–4.5 mm (based on your yarn)
- Tapestry Needle
- Scissors
- Stitch Markers (optional)
- Zipper, button, or drawstring (for closure)
- Optional: Fabric for lining
📏 Finished Size (Approx.)
- Width: 6–8 inches (15–20 cm)
- Height: 6–8 inches (excluding strap)
- Perfect for holding small toys, makeup, keys, or cards
🧵 Basic Stitches Used
All stitches are in US terms:
- Ch – Chain
- Sc – Single Crochet
- Sl st – Slip Stitch
- Inc – Increase (2 sc in one stitch)
- Dec – Decrease (sc two together)
- MR – Magic Ring (or chain 2 and crochet into 2nd chain)

🐱 Step-by-Step Crochet Hello Kitty Bag Tutorial
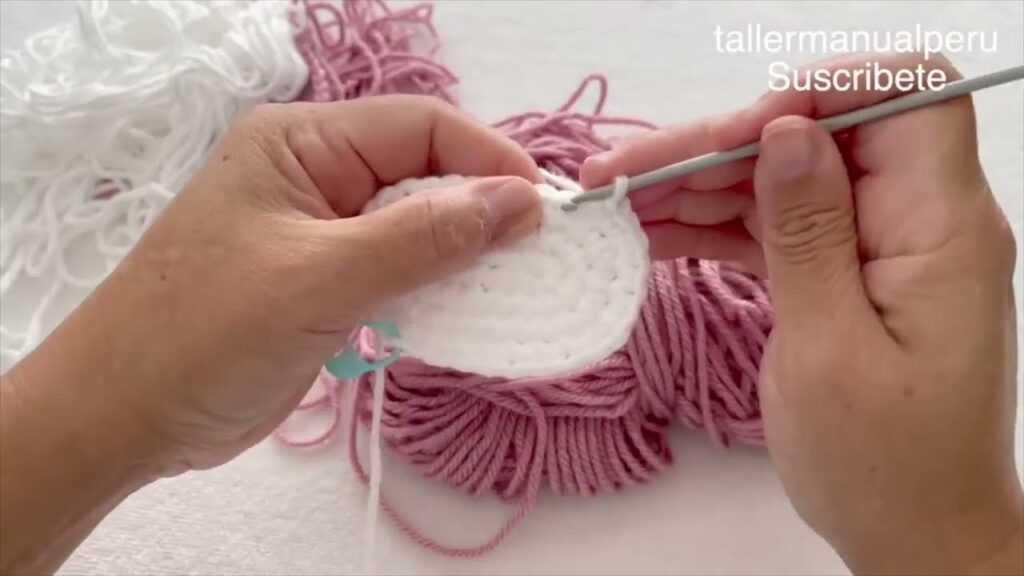
🧤 Step 1: Crochet the Bag Base (Hello Kitty’s Face)
We’ll make two identical round/oval panels for the front and back of the bag.
🧶 Pattern for Oval Face (Make 2):
- Start with a magic ring.
- Round 1: 6 sc in MR (6)
- Round 2: inc in each st around (12)
- Round 3: (sc, inc) around (18)
- Round 4: (2 sc, inc) around (24)
- Round 5–10: Continue increasing in a round OR shape into an oval by alternating sides with more increases:
- Example: Ch 12, work around chain with scs on both sides, increasing at the ends.
👉 Keep your stitch count even and shape symmetrical. Adjust size by working more rounds.
Fasten off and make two pieces.
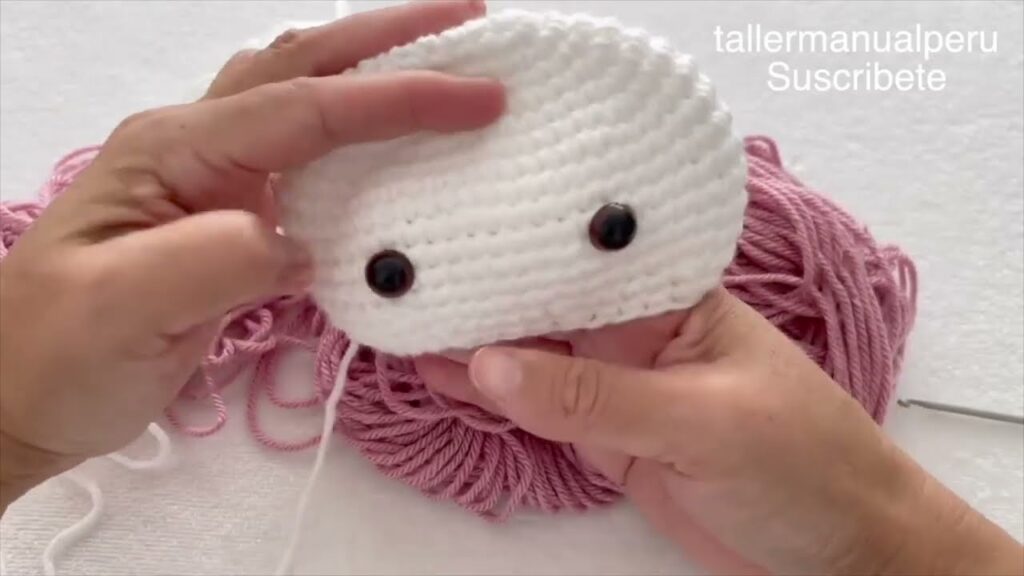
👁️ Step 2: Facial Features (Sew or Crochet)
Make and attach the eyes, nose, and whiskers to one panel only (the front).
🧶 Eyes (Make 2):
- With black yarn:
- MR, 6 sc in ring, sl st to join, fasten off.
- Or: Ch 3, 2 sc in 2nd ch from hook, fasten off.
🧶 Nose:
- With yellow yarn:
- MR, 5–6 sc in ring, sl st to join, fasten off.
🧵 Whiskers:
- With black yarn:
- Use a tapestry needle to embroider three whisker lines on each side.
📍 Assembly:
- Sew eyes evenly spaced horizontally.
- Place the nose between and slightly below eyes.
- Use photo references for spacing.
🎀 Step 3: Crochet the Bow (Hello Kitty’s Signature)
🧶 Bow Pattern:
- Ch 8
- Row 1–4: sc in each st across (7), ch 1, turn
- Fasten off. Leave a long tail.
Wrap yarn tightly around the center of the rectangle to form the bow shape. Sew it to the top left of Hello Kitty’s head.
🧳 Step 4: Assemble the Bag
- Place the two face panels together, wrong sides facing.
- Use single crochet or slip stitch to join around the edge.
- Leave the top open to form the bag opening.
- If you want to add a zipper or button, attach now.

🧵 Step 5: Add the Strap
Option 1: Crochet Strap
- Ch 80–120 (depending on length desired).
- Row 1: sc in each ch.
- Sew both ends to the top inside corners of the bag.
Option 2: Use Fabric or Ready-Made Strap
- Sew or glue on securely.
🪡 Optional: Add a Lining
For a cleaner finish and better structure:
- Cut fabric slightly smaller than the bag shape.
- Hand-stitch or machine-sew the lining inside before attaching the strap.
💡 Customization Ideas
- Add a zipper pouch inside
- Change the bow to a flower or star
- Use sparkle yarn or pastel shades for a magical touch
- Turn into a mini backpack by attaching two straps
✅ Summary: Pattern Recap
| Part | Method | Notes |
|---|---|---|
| Face Panels | Oval shape in sc | 2 identical pieces |
| Eyes & Nose | Small circles | Sew onto front panel |
| Whiskers | Embroidery | 3 lines each side |
| Bow | Rectangle | Wrap center tightly |
| Strap | Chain and sc row | Adjust length as needed |
🎉 Final Thoughts
Creating a crochet Hello Kitty bag is a fun, rewarding, and totally adorable project. It’s small enough for beginners, yet packed with creative opportunities. Whether you’re making one for a child, a friend, or yourself, this cute bag is sure to make hearts melt.
So grab your hook, pick your yarn, and let Hello Kitty come to life in your hands — stitch by stitch! 💕
Video tutorial:


