
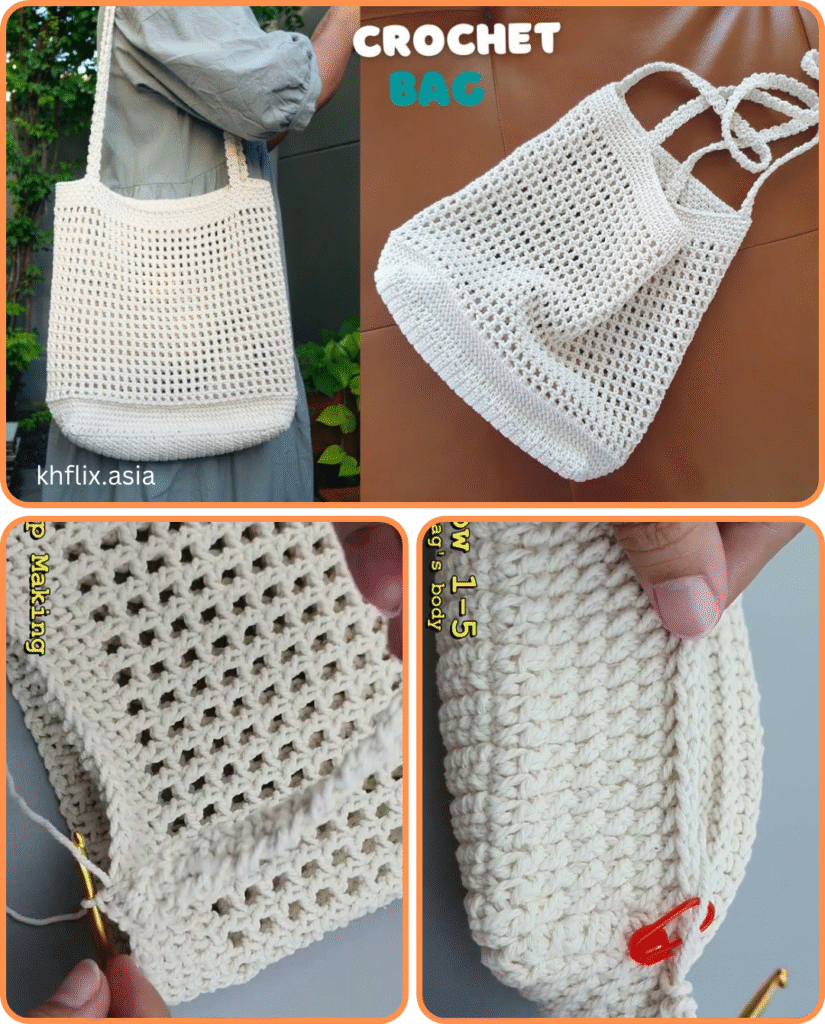
Simplicity in Stitches: Your Guide to a Super Easy & Minimal Crochet Bag
In a world overflowing with intricate designs, there’s a unique elegance in minimalism. A super easy and minimal crochet bag embodies this philosophy perfectly: clean lines, simple stitches, and effortless style. This kind of bag isn’t just a quick project; it’s a testament to the beauty found in simplicity, making it an ideal choice for beginners seeking a confidence-boosting make, or experienced crocheters craving a quick, stylish accessory for everyday essentials.
This detailed article will show you how to create a versatile, understated crochet bag that proves less truly is more. We’ll focus on straightforward techniques and basic stitches to achieve a chic, modern aesthetic with minimal fuss.

Why Choose a Super Easy & Minimal Crochet Bag?
- Effortless Style: The clean lines and uncluttered design make it a timeless accessory that complements any outfit.
- Beginner-Friendly: Uses only the most basic crochet stitches and simple construction, making it highly accessible for new crocheters.
- Lightning Fast: Minimal shaping and repetitive stitches mean you can often complete this bag in just a few hours.
- Highly Versatile: Perfect for carrying essentials like your phone, wallet, and keys, or even as a simple market bag for small purchases.
- Stash Busting Potential: Ideal for using up those single skeins or leftover bits of yarn you’ve been saving.
- Focus on Yarn & Texture: The simplicity of the design allows the beauty of your chosen yarn and stitch texture to truly shine.
Key Considerations for Your Minimal Bag
Achieving that clean, minimal look while ensuring functionality comes down to a few mindful choices.
- Yarn Choice (The Star of the Show!):
- Fiber: For a bag that holds its shape well and has a clean drape, cotton, cotton blends, linen, or sturdy acrylic yarns are excellent. These fibers offer good stitch definition and resist excessive stretching. Avoid overly fuzzy or soft yarns unless you specifically desire a very relaxed, slouchy look.
- Weight: Worsted weight (Category 4) or Aran (Category 4/5) is highly recommended. These weights work up quickly and provide a good balance of structure and drape. Using a chunky (Category 5) or super bulky (Category 6) yarn will make your bag even faster to create, resulting in a robust, modern piece.
- Color: Neutrals (beige, grey, black, white, cream), earthy tones, or a single bold solid color will enhance the minimal aesthetic. Avoid highly variegated or multi-colored yarns if you’re aiming for extreme simplicity.
- Hook Size: To ensure a dense fabric with minimal gaps and good structure, use a hook size one or two sizes smaller than what the yarn label typically recommends for garments. For worsted weight yarn, a 4.0mm (US G/6) or 4.5mm (US 7) hook is usually ideal. If using bulkier yarn, adjust accordingly (e.g., 6.0mm for chunky).
- Stitch Pattern: The beauty of minimalism lies in simplicity.
- Single Crochet (sc): Creates a very dense, sturdy fabric with a clean, unassuming texture. It’s excellent for the main body of the bag.
- Half Double Crochet (hdc): Works up faster than single crochet while still providing good density and a slightly softer drape.
- This pattern will primarily use single crochet for maximum simplicity and structure.
- Bag Shape & Construction:
- For ultimate ease and minimalism, we’ll create a simple rectangular pouch that can be folded or left open. This avoids complex shaping or intricate joins.
- We’ll primarily work in rows, then seam the sides.
- Handles: Integrated crocheted handles or simple loops are best for a minimal look. Avoid ornate or bulky hardware.
Materials You’ll Need
- Yarn: Approx. 150-250 yards of Worsted weight (Category 4) cotton or sturdy acrylic yarn in a solid, neutral, or bold color. (One standard skein is often enough for a small-medium bag).
- Crochet Hook: Size G/6 (4.0mm) or US 7 (4.5mm), chosen to create a dense fabric with your yarn.
- Yarn Needle (Tapestry Needle): For weaving in ends and seaming.
- Scissors:
Essential Crochet Abbreviations
- ch: chain
- sl st: slip stitch
- sc: single crochet
- st(s): stitch(es)
- FO: Fasten off (cut yarn and pull through loop)
- (): indicates stitch count at the end of a row
Super Easy & Minimal Crochet Bag Pattern (Simple Pouch Style)
This bag is made by crocheting a flat rectangle that is then folded and seamed. It’s incredibly straightforward and clean!
Target Dimensions: Approx. 8 inches (20 cm) wide x 9 inches (23 cm) tall (when flat and open).
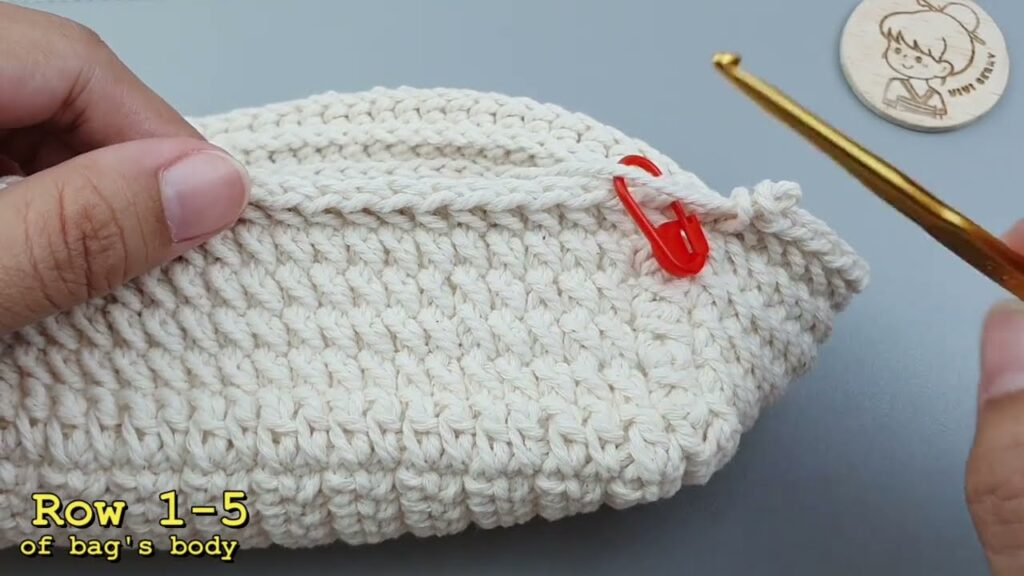
Part 1: The Bag Body (Single Rectangle)
We’ll create one rectangle that will become the front, back, and bottom of your bag.

- Starting Chain: Ch 31.
- To adjust the width of your bag, chain more or fewer stitches. Remember, the finished width will be slightly less than your starting chain length once crocheted.
- Row 1: Sc in 2nd ch from hook and in each ch across. Turn. (30 sc)
- Row 2: Ch 1 (does NOT count as a st). Sc in each sc across. Turn. (30 sc)
- Rows 3 – 48: Repeat Row 2 until your rectangle measures approximately 16 inches (40 cm) in length.
- This length accounts for the front, back, and bottom of the bag. You can adjust the number of rows to make your bag taller or shorter.
- FO, leaving a very long tail (approx. 40 inches / 100 cm) for seaming.
—
Part 2: Assembling the Bag
This is where your rectangle magically transforms into a minimal bag!
- Fold the Rectangle: Lay your crocheted rectangle flat. Fold the bottom edge up towards the top, so that about 8 inches (20 cm) of the rectangle overlaps. This folded section will form the body of your bag. The remaining top section will be the opening.
- Ensure the side you want to be the “outside” of your bag is facing inward for seaming.
- Seaming the Sides:
- Thread the long tail you left onto your yarn needle.
- Using a whip stitch or a mattress stitch, seam one side edge of the folded rectangle, starting from the bottom fold and working up to the opening. Secure your stitches firmly.
- Repeat the seaming on the other side edge using a new strand of yarn or the remaining portion of your long tail if it reached. Secure firmly.
—
Part 3: Integrated Handles
For a truly minimal look, we’ll add simple, strong handles directly to the bag’s top edge.
- Handle 1:
- Attach yarn with a sl st to the top corner of one side of the bag (where your seam ends).
- Ch 30 (or desired handle length – measure against yourself for a comfortable fit).
- Sl st into the corresponding top corner on the other side of the bag.
- Reinforce: Ch 1. Sc evenly across the chain (approx. 30 sc). Sl st back into the base where the chain began to secure it. FO, weave in ends.
- Handle 2: Repeat the process for the second handle on the opposite side of the bag opening, ensuring it’s symmetrical to the first.

—
Part 4: Finishing Touches
- Weave in All Ends: Neatly weave in every remaining loose yarn tail using your yarn needle. This is crucial for a clean, minimal aesthetic and prevents unraveling.
- Turn Right Side Out: Flip your bag right side out. Gently shape it with your hands.
- Optional: Top Border (for extra neatness):
- Attach yarn with a sl st to any stitch on the top edge of the bag.
- Ch 1. Sc evenly around the entire top opening of the bag, including around the base of the handles. Join with a sl st to the first sc.
- FO, and weave in the end. This provides a clean, sturdy rim.
- Optional: Blocking: Gently mist your bag with water (or wet block if using cotton/linen). Stuff the bag lightly with tissue paper or a small towel to help it hold its rectangular shape, and allow it to air dry completely. Blocking helps to even out stitches and set the overall form of the bag, enhancing its minimal lines.

Tips for Success & Making Your Bag Even More Minimal:
- Consistent Tension: This is the most crucial factor for a clean, professional-looking minimal bag.
- Seaming Quality: Take your time with seaming. Invisible or very neat seams are key to the minimal aesthetic. The mattress stitch is excellent for a near-invisible join.
- Yarn is Everything: The yarn you choose will define the character of your minimal bag. A smooth, solid-colored yarn will enhance its simplicity.
- No Embellishments: To maintain the minimal look, avoid tassels, charms, or elaborate closures. The beauty is in the form and texture.
- Consider a Lining: While not strictly part of the crochet, adding a simple fabric lining can significantly enhance durability and structure, especially for lighter yarns. It can also hide any slight imperfections in your stitching.
- Experiment with Size: Easily scale this pattern up or down by adjusting your starting chain length and the number of rows.
You’ve now created a stylish, practical, and utterly chic super easy and minimal crochet bag. Enjoy the beauty of simplicity and the satisfaction of your handmade creation!
Video tutorial:


