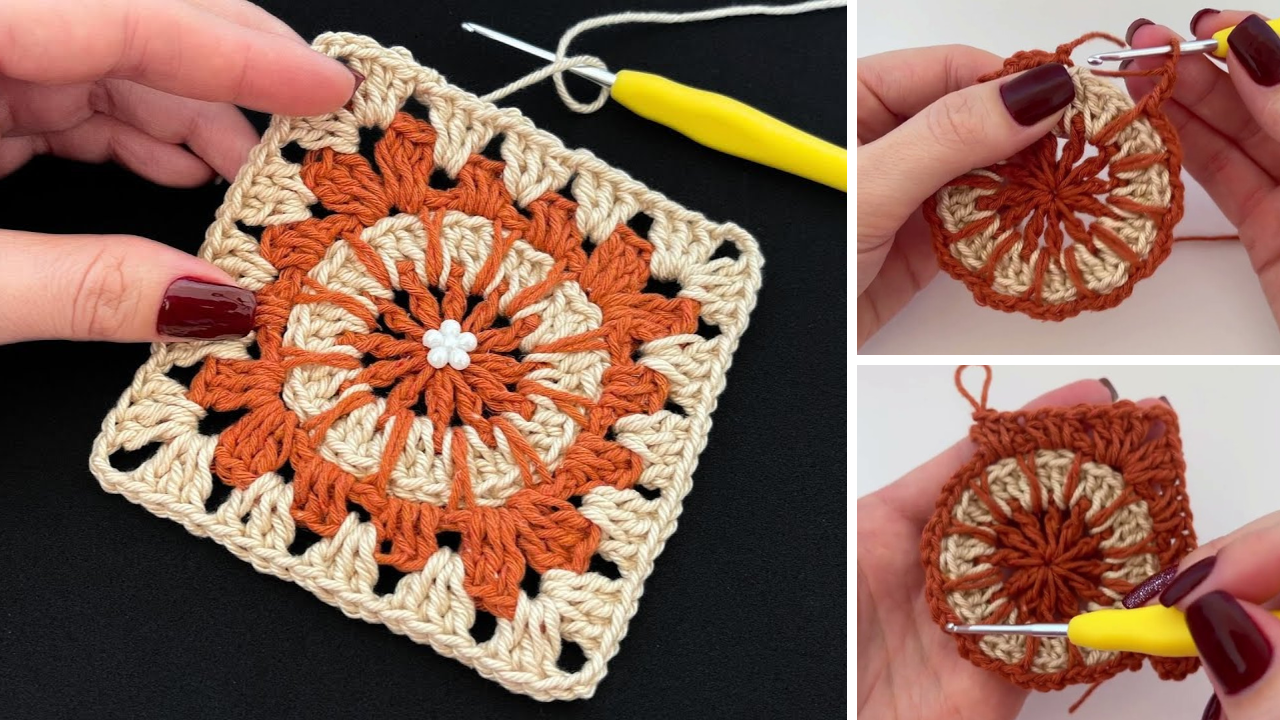
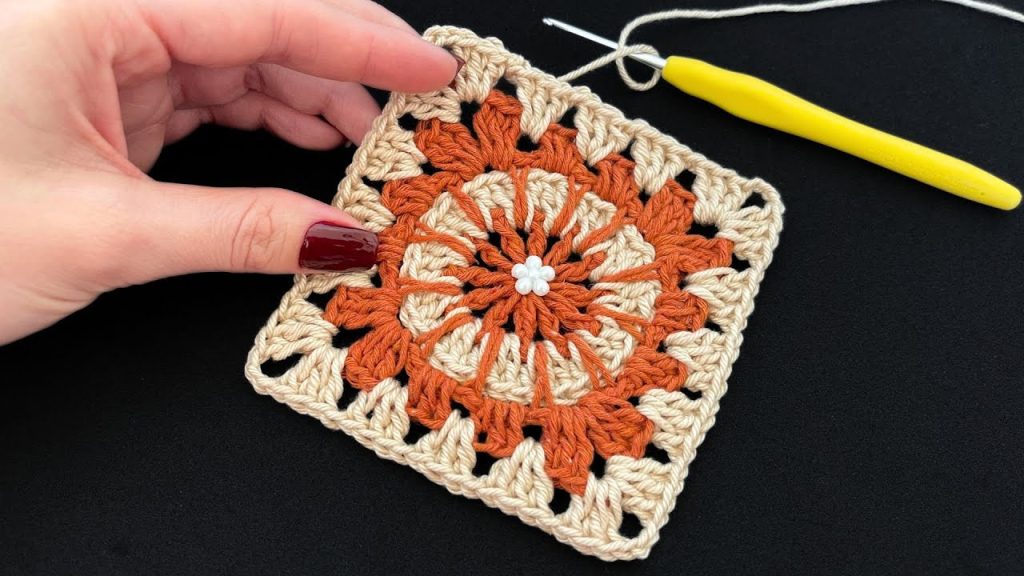
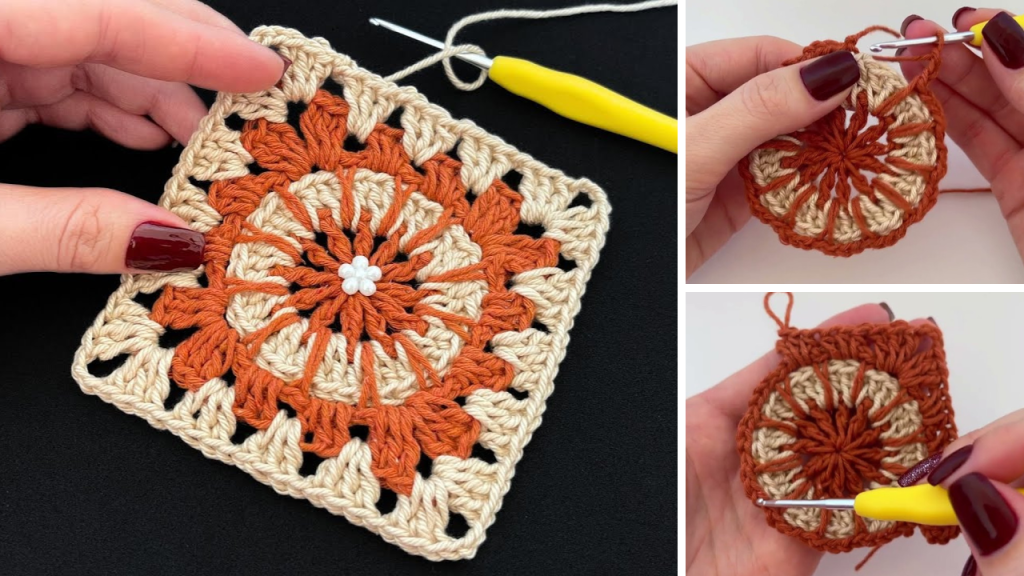
Hello, fellow makers! Are you ready to fall in love with a granny square pattern that’s a little different from the rest? I’m excited to share this unique and detailed pattern for the Vintage Granny Square. This design is a modern take on a classic motif, featuring a lovely raised floral texture at its center and crisp, clean corners that make it perfect for joining into blankets, cushions, bags, and more.
What makes this square so special is its clever construction. We’ll start with a circular, textured center and then build the square shape around it, finishing with bold color blocks. This pattern is great for using up small amounts of yarn and is a fantastic way to practice a variety of stitches, from half-double crochets to double crochets and a clever elongated single crochet. Let’s get started on this delightful project!
Why You’ll Love This Square:
- Visually Stunning: The unique floral-like center and crisp corners create a beautiful, eye-catching design.
- Skill-Building: You’ll practice a variety of stitches and color-changing techniques.
- Perfect for Scraps: This is an excellent pattern for using up smaller amounts of yarn in different colors.
- Versatile: The finished squares are ideal for joining into larger projects like blankets, pillows, or shawls.
- Beginner-Friendly: While it looks complex, the steps are broken down into easy-to-follow rounds.
What You’ll Need:
- Yarn: Light worsted / DK (Category 3) yarn is recommended for a nice drape and stitch definition. You can use as many colors as you like. This pattern is designed for two or more colors.
- Crochet Hook: A 3.5mm (US E/4) or 4.0mm (US G/6) hook, or the size recommended for your yarn.
- Yarn Needle (Tapestry Needle): For weaving in all those ends.
- Scissors:
- Stitch Markers (optional): To mark corners or the beginning of a round.
Essential Crochet Abbreviations:
- ch: chain
- sl st: slip stitch
- sc: single crochet
- hdc: half-double crochet
- dc: double crochet
- elongated sc: elongated single crochet (insert hook into a stitch from a previous round, pulling up a long loop to the current round before completing the single crochet)
- st(s): stitch(es)
- sp: space
- magic ring: a method for beginning a project in the round
- FO: fasten off
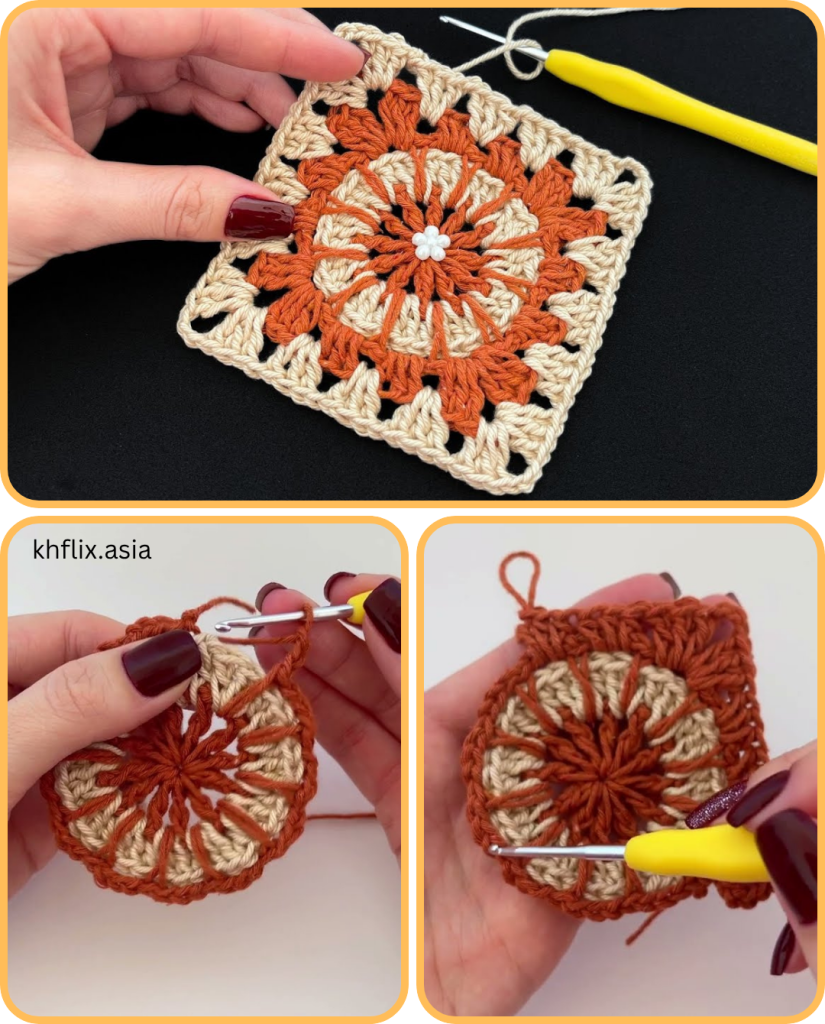
The Pattern: The Vintage Granny Square
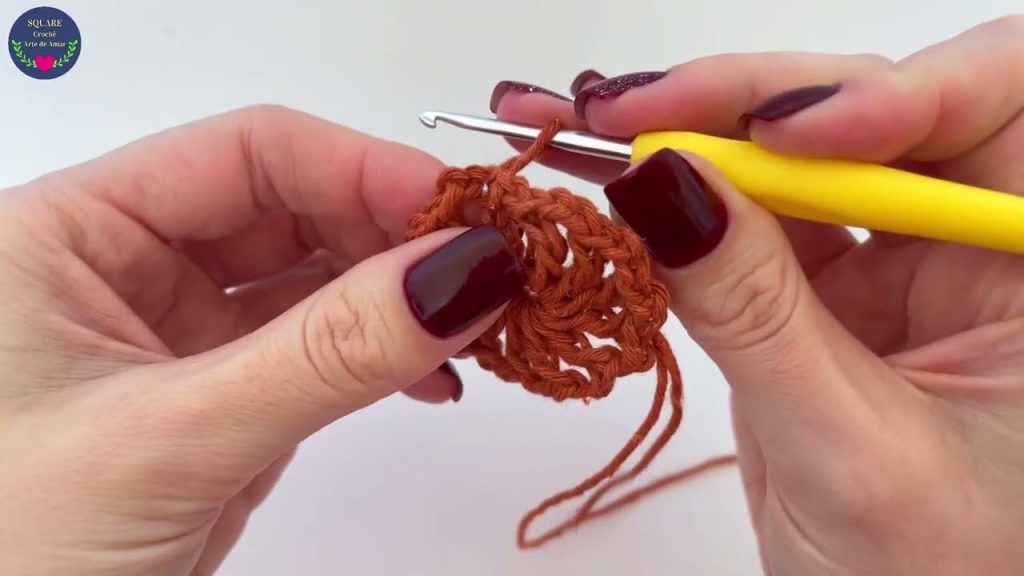
This pattern is worked in the round, from the center outwards.
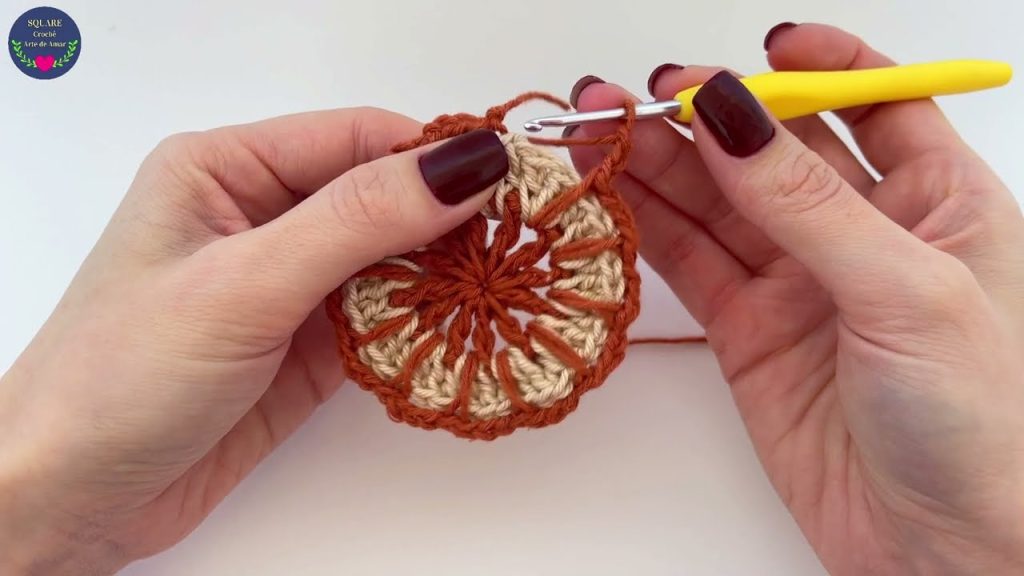
Color 1: The First Round
- Round 1: Create a magic ring. Make 12
dcstitches separated by2 chinside the ring. Pull the yarn tail to close the magic ring tightly and finish with asl stto the top of the firstdc. - FO Color 1, leaving a tail to weave in later.
Color 2: The Petal Frame
- Round 2: Attach Color 2 yarn in any of the two-chain spaces from the previous round.
- Work a group of
3 dcin each of the twelve two-chain spaces around the square. - Finish with a
sl stto the top of the firstdc. - FO Color 2, leaving a tail to weave in later.
Color 1: The Long Stitch Detail
- Round 3: Attach Color 1 yarn to the middle of any three-double-crochet group from the previous round.
- Make an
elongated scstitch (by inserting your hook into the middledcof the 3-dc group), followed by3 ch. - Repeat this pattern (1
elongated scfollowed by3 ch) in the middle of each three-double-crochet group around the square. - Finish with a
sl stto the firstelongated scstitch.
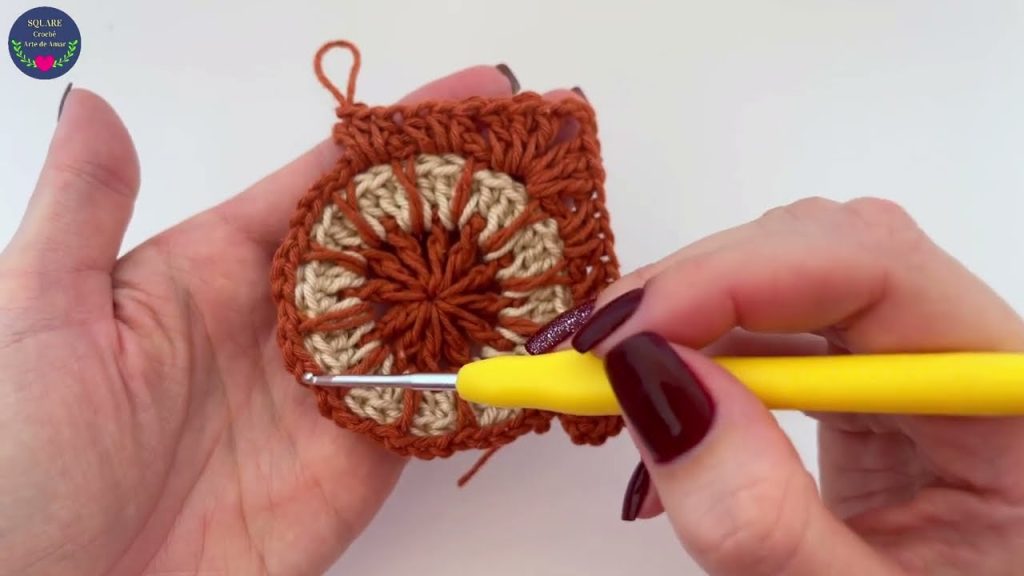
Color 2: The Square’s First Edge
- Round 4: This round creates the foundation for the square’s corners. Attach Color 2 yarn in any of the three-chain spaces.
- In the current
3-chspace, create a fan stitch:3 dc,3 ch, and3 dc. (This forms your first corner!) - In the next
3-chspace, make3 hdc. (This forms your first side!) - Repeat these two steps around the entire square. You will have four corners and four sides.
- Finish with a
sl stto the top of the firstdc.
Color 1: The Final Frame
- Round 5: Attach Color 1 yarn in any of the three-chain corner spaces from the previous round.
- In the corner
3-chspace, create a fan stitch:3 dc,3 ch, and3 dc. - Work
3 dcin each of the spaces along the sides of the square, separated by1 ch, until you reach the next corner. - Repeat this pattern all the way around the square.
- Finish with a
sl stto the top of the firstdc. - FO Color 1, leaving a tail to weave in.
Finishing Your Square:
- Weave in All Ends: This is the most important step for a neat and professional finish! Use your yarn needle to weave in every single yarn tail securely.
- Blocking (Optional): To ensure your square is perfectly flat and the corners are crisp, you can gently mist it with water, pin it to a flat surface, and let it air dry completely.
Congratulations, you’ve created a beautiful and unique crochet square! You can stop here, or continue adding more rounds of double crochet for a larger square, or join multiple squares together to create a stunning larger project. Happy hooking!
Video tutorial:


