Introduction: Classic Crochet with a Modern Twist
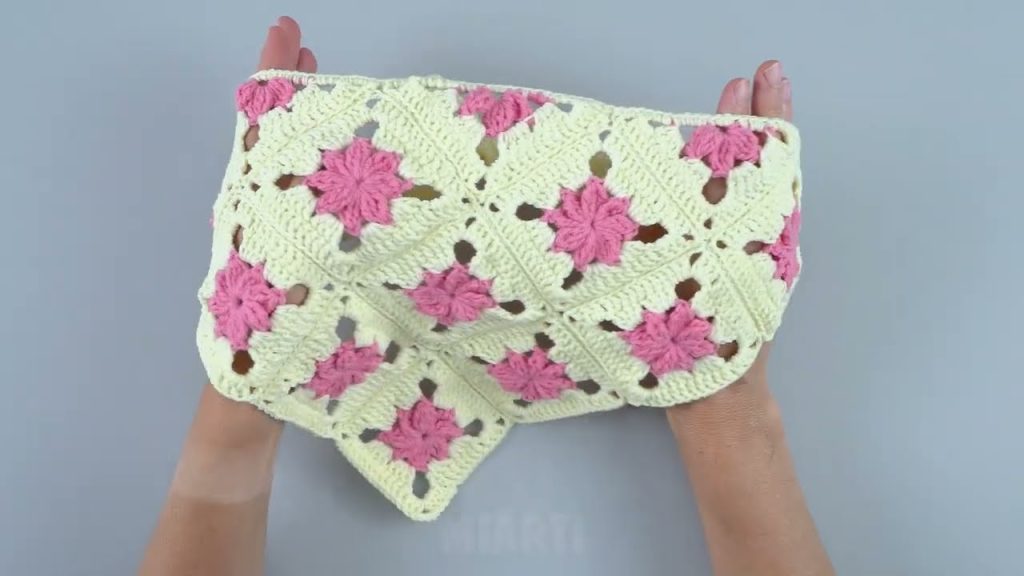
The granny square has long been a staple in the world of crochet, beloved for its simplicity, versatility, and vintage flair. While traditionally seen in blankets, scarves, and bags, this humble motif has taken on fresh and fashionable new forms in recent years. One especially charming and trendy adaptation is the granny square triangle bandana.
Crocheted bandanas have surged in popularity thanks to their boho style, practicality, and customizability. Whether you’re looking to protect your hair on a breezy day, add flair to your outfit, or craft a unique gift, a triangle bandana made from granny squares is a perfect, beginner-friendly project with a stylish payoff.

Why Make a Granny Square Triangle Bandana?
Crocheting your own accessories isn’t just satisfying—it also opens up endless possibilities for creativity. Here’s why a granny square triangle bandana is a standout project:
- Quick to make – One of the fastest wearable projects
- Scrap-busting – Ideal for using up leftover yarn
- Beginner-friendly – Great for learning basic shaping and joining techniques
- Highly customizable – Change colors, yarn weights, edging, and more
- On-trend – Perfect for festivals, beachwear, or casual everyday outfits
Materials You’ll Need
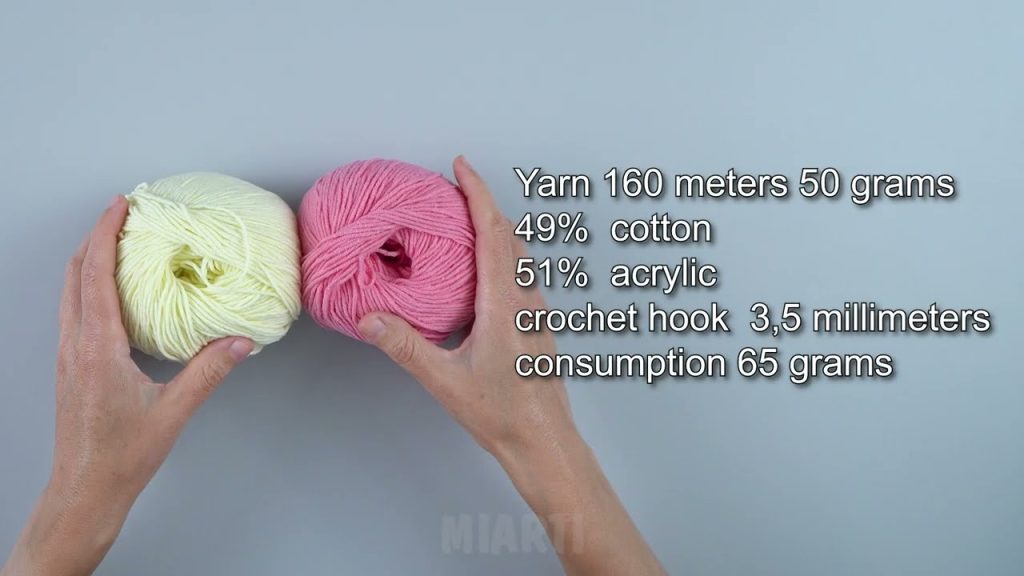
Yarn
You’ll want something lightweight and breathable, especially for warm-weather wear.
- Recommended:
- Cotton (DK or Sport weight)
- Bamboo or linen blends
- Avoid: Bulky or scratchy yarns
Hook
- Use a hook that matches your yarn weight
- Typically, a 3.5mm to 4.5mm hook works well for DK weight cotton
Notions
- Yarn needle (for sewing in ends)
- Scissors
- Stitch markers (optional)
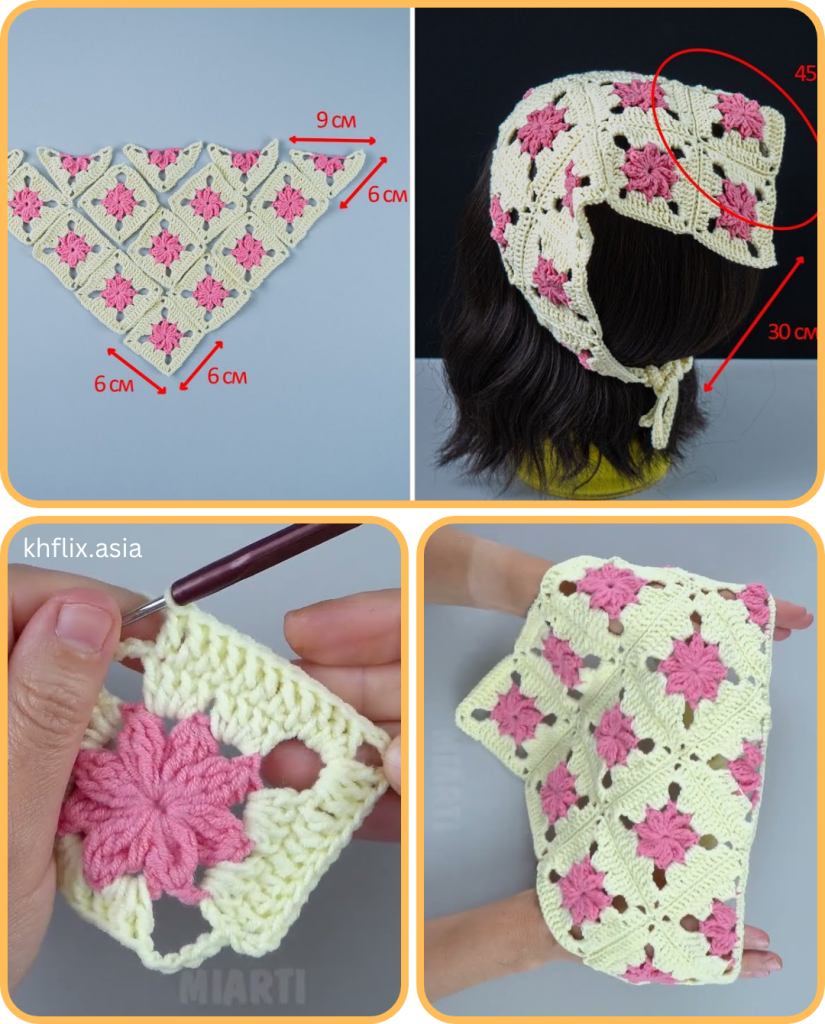
Bandana Structure: How It’s Built
There are two common approaches to creating a granny square triangle bandana:
- One Large Triangle Granny: A single triangle that grows outward, row by row.
- Multiple Squares Joined into a Triangle Shape: Typically 3, 6, or more squares arranged and joined into a triangle.
This tutorial will focus on the first method, creating a single triangle granny motif, as it’s simpler, more adjustable, and perfect for beginners.
Crochet Pattern: Triangle Granny Square Bandana
Step 1: Start with a Magic Ring (or Chain 4, slip stitch to join)
Round 1:
- Ch 3 (counts as first dc), 2 dc into ring, ch 2,
- 3 dc into ring, ch 2,
- 3 dc into ring, ch 2
- Join with a slip stitch to the top of beginning ch-3.
You now have a small triangle with 3 clusters of 3 dc, and 3 ch-2 corner spaces.
Step 2: Increase Triangle (Granny Style)
Round 2:
- Sl st into next 2 dc and into first ch-2 corner space.
- (3 dc, ch 2, 3 dc) in corner, ch 1, 3 dc in space between clusters (side space), ch 1
- Repeat (3 dc, ch 2, 3 dc) in each remaining corner.
- Join with slip stitch to top of starting ch-3.
Round 3:
- Repeat same logic: In each ch-2 corner space, work (3 dc, ch 2, 3 dc)
- In each ch-1 space on the side, work 3 dc
- Separate each with ch 1 as you go along the sides.
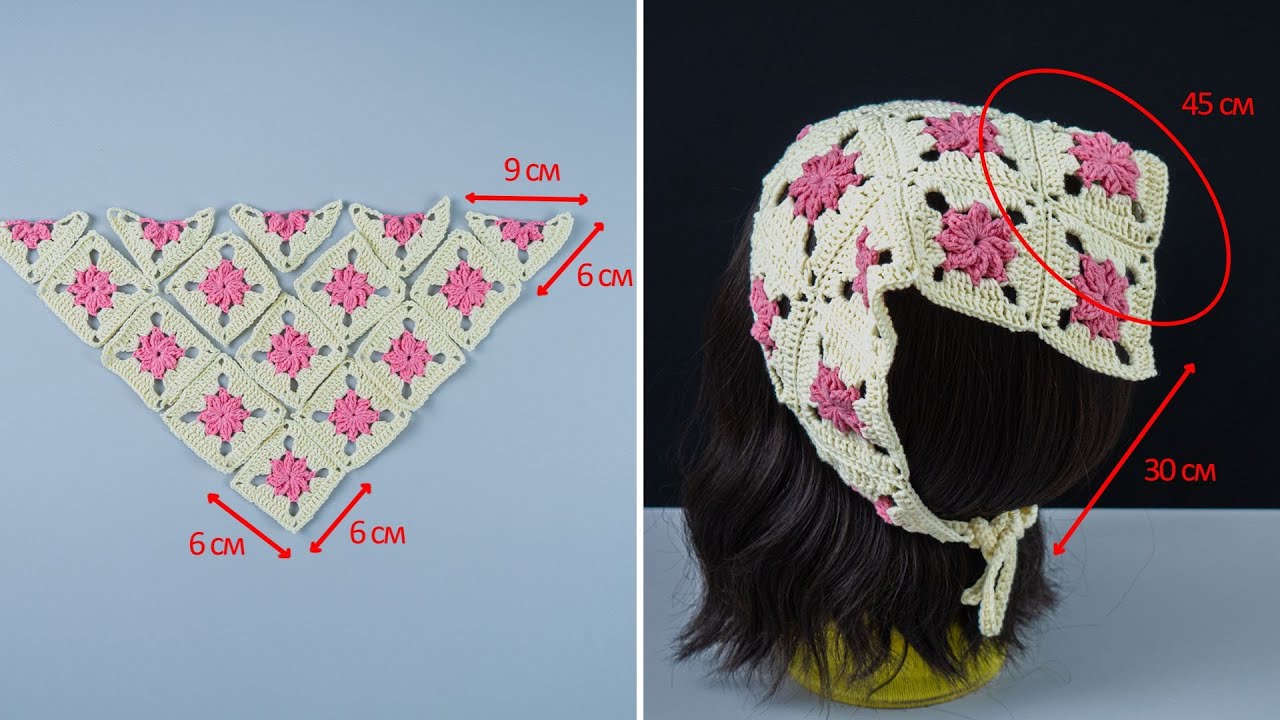
Continue adding rounds until the triangle reaches your desired size. For a typical adult bandana, you’ll want the longest side (the base of the triangle) to be 18–22 inches.
Sizing Guide
| Head Size | Triangle Width (Base) | Number of Rounds |
|---|---|---|
| Toddler (2–4 yrs) | 14–16 inches | 6–7 rounds |
| Child (5–12 yrs) | 17–19 inches | 7–9 rounds |
| Adult | 20–22 inches | 9–11 rounds |
Tip: Measure your work flat across the base (longest edge of the triangle).
Optional: Add Edging or Ties
1. Edging Ideas:
- Picot edge: Adds a decorative touch
- Shell edge: (5 dc in one stitch) in each space
- Reverse single crochet (crab stitch): For a sturdy, textured border
2. Crochet Ties:
Attach ties to both ends of the base of the triangle.
Method A: Chain Ties
- Attach yarn at the corner
- Chain 40–60 (depending on how long you want it)
- Slip stitch back into each chain, fasten off
Method B: Braided Ties
- Cut three strands of yarn, each about 24″
- Fold in half, attach to corner with a lark’s head knot
- Braid, tie a knot at the end
Variations to Try
1. Multi-Color Rows
Change colors each round to create a rainbow or ombré effect.
2. Use a Traditional Granny Square Pattern
Instead of starting with a triangle, you can:
- Make 6–9 mini granny squares
- Arrange them in a triangle layout
- Seam together using slip stitch or whip stitch
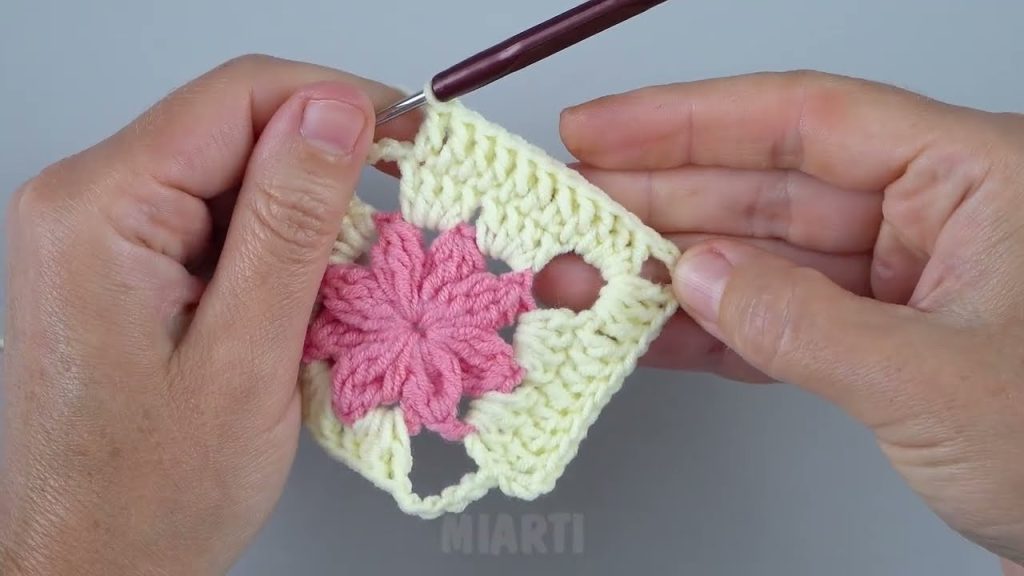
3. Add a Motif
- Insert a flower or star motif at the center
- Surround it with granny-style triangle increases
Wearing & Styling
The granny triangle bandana is incredibly versatile:
- Classic Hair Bandana: Tied at the back of the neck
- Head Wrap: Pull hair through the back for a boho look
- Neck Kerchief: Worn around the neck cowboy-style
- Dog Bandana: Adjust size and gift one to your pup!

Care Instructions
- Hand wash in cold water, lay flat to dry
- If using cotton, a light steam block keeps it crisp
- Avoid tumble drying to preserve shape and texture
Final Thoughts: Handmade Beauty, Stitch by Stitch
A granny square triangle bandana is a satisfying blend of vintage charm and modern fashion. With just a hook and some yarn, you can craft a timeless accessory that’s practical, beautiful, and made with love. It’s a great project for beginners exploring shapes and construction, and it offers plenty of room for more advanced crocheters to innovate with color, texture, and detail.
Whether you wear it to the beach, a music festival, or just to tame your hair on a breezy day, your handmade bandana is sure to stand out and spark admiration.
Video tutorial:


