
Introduction: The Magic of Granny Squares
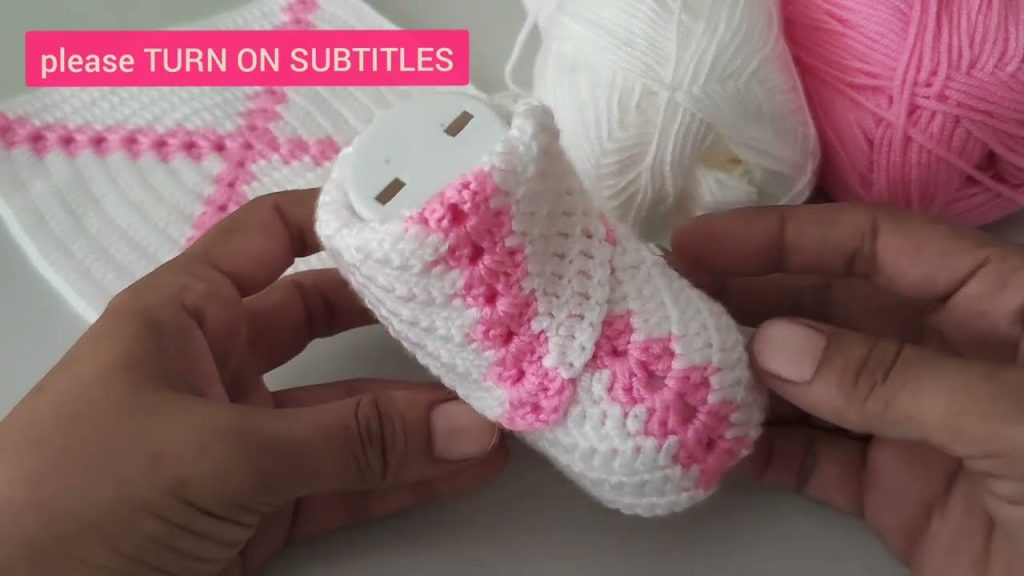
Granny squares are a classic motif in the world of crochet, celebrated for their versatility, charm, and nostalgic appeal. Originating as a thrifty way to use leftover yarn, they’ve become symbolic of home, comfort, and handmade artistry. Traditionally used for blankets, bags, or garments, granny squares are also surprisingly adaptive—and one of the most delightful transformations they can undergo is into baby booties.
Turning a flat, square motif into a three-dimensional, wearable object like a baby bootie may sound complex, but it’s a clever use of shaping, folding, and seaming that brings this project to life. Whether you’re a seasoned crocheter or a curious beginner, crafting baby booties from granny squares is both a rewarding and heartwarming project.
Why Granny Squares for Baby Booties?
Using granny squares for baby booties combines beauty, simplicity, and sustainability. Here are a few reasons why this project is so appealing:
- Quick and Economical: Most booties require only a few granny squares and a small amount of yarn.
- Beginner-Friendly: If you can crochet a basic square, you can tackle this project with confidence.
- Customizable: Colors, yarn types, and embellishments can be tailored to your personal style or the baby’s nursery theme.
- Sentimental Gift: Handmade baby booties made from granny squares carry an extra touch of love and vintage charm—perfect for baby showers or keepsakes.
Materials You’ll Need
Before diving into the process, gather your supplies:
Yarn
Choose a soft, baby-friendly yarn such as:
- DK (Double Knit) or Sport weight
- Cotton or acrylic blends
- Hypoallergenic and washable varieties preferred
Hook
- Recommended size: 3.5mm to 4.5mm, depending on your yarn
- Use the hook size that gives a tight, dense fabric so the booties hold shape
Notions
- Yarn needle for sewing
- Scissors
- Stitch markers (optional)
- Ribbon, buttons, or appliqués for embellishment
Step-by-Step: From Granny Square to Baby Bootie
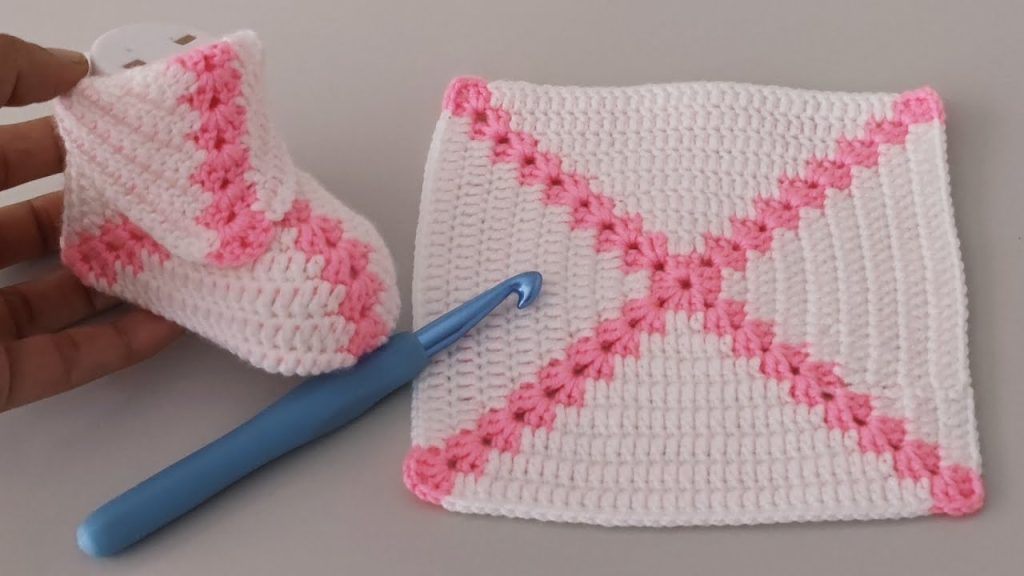
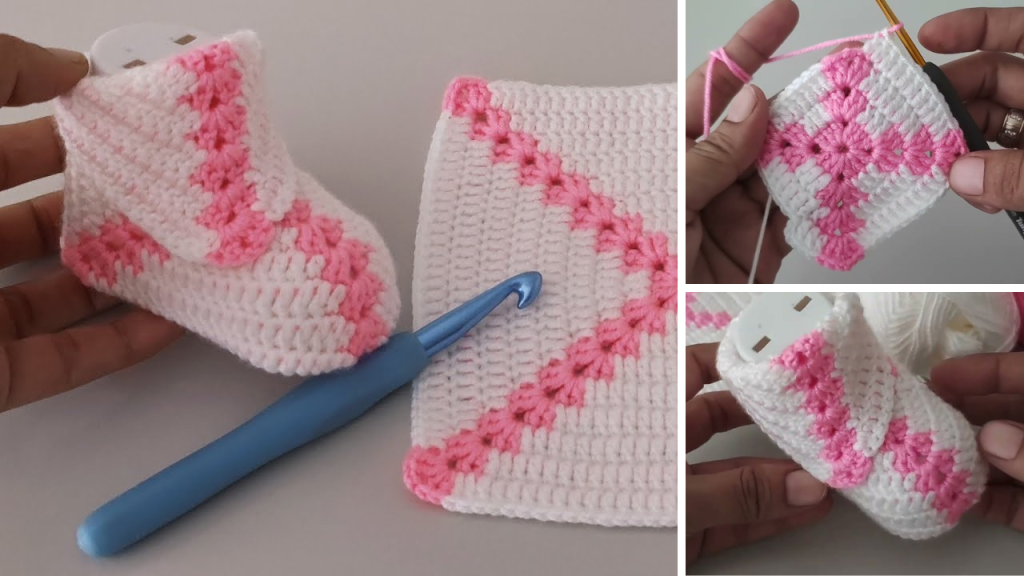
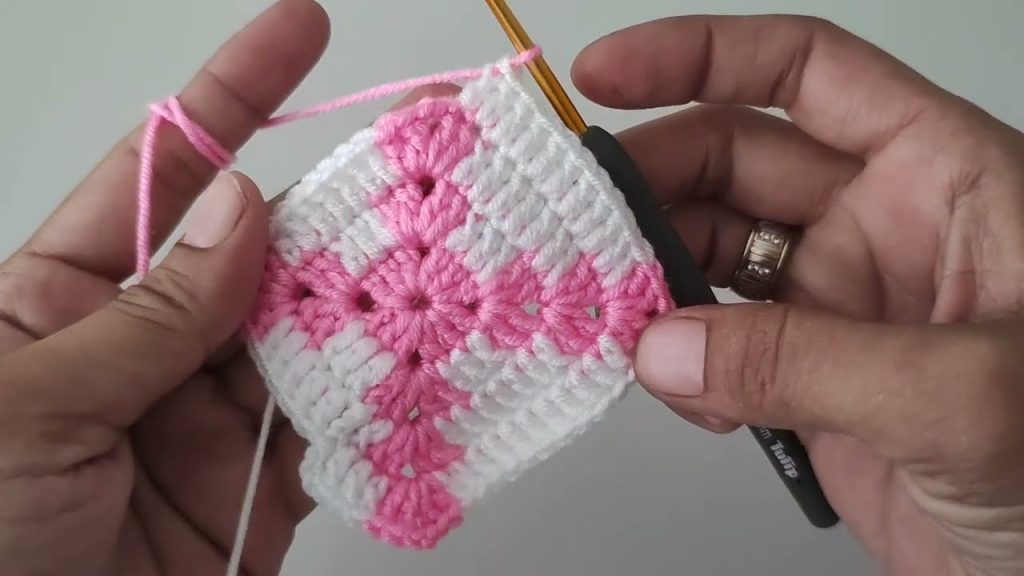
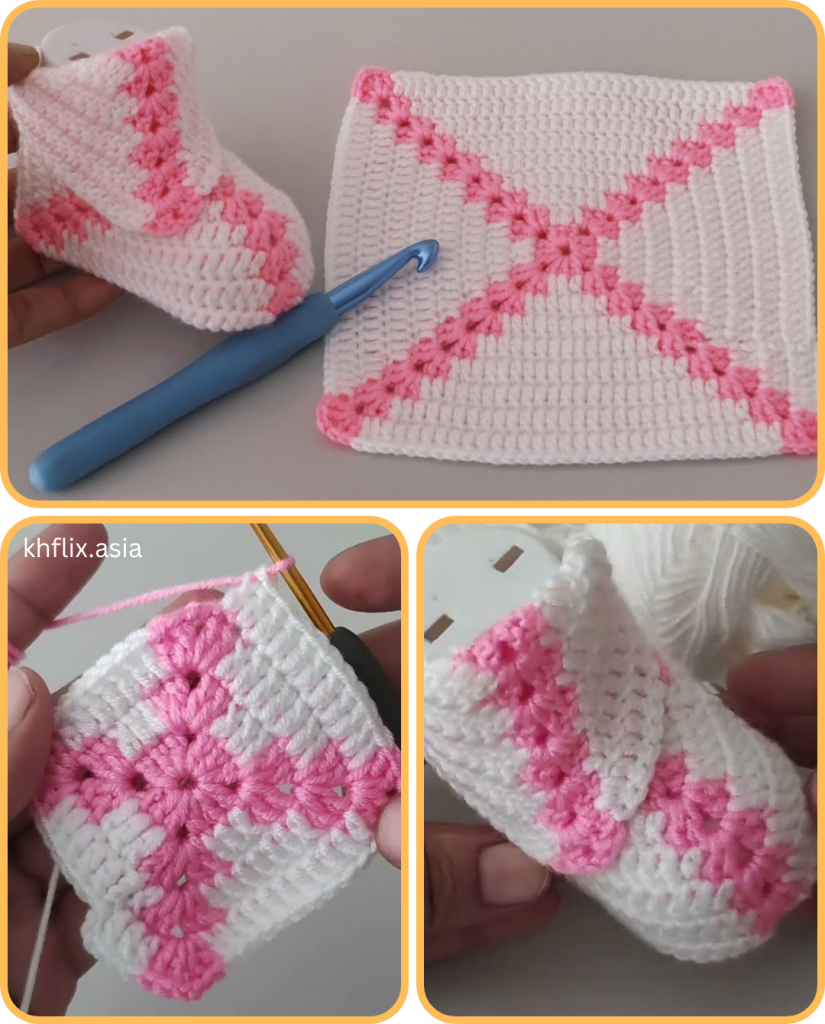
1. Crochet Your Granny Squares
You’ll typically need:
- 2 Granny Squares per bootie, so 4 in total
Basic Granny Square Pattern:
Round 1:
- Ch 4, join with sl st to form a ring.
- Ch 3 (counts as 1 dc), 2 dc into ring, ch 2, 3 dc repeat 3 times. Join to top of beginning ch-3.
Round 2:
- Sl st into next 2 dc and into corner ch-2 space.
- (3 dc, ch 2, 3 dc) into corner, ch 1, 3 dc in side space, ch 1 repeat around.
Continue to desired size, typically 3 to 4 rounds for baby booties.
Tip: Your squares should measure approximately 3” x 3” (7.5 cm x 7.5 cm).
2. Block Your Squares
Blocking ensures all squares are uniform in size and shape, which is critical for seamless assembly. Use a steam block or pin and mist method for best results.
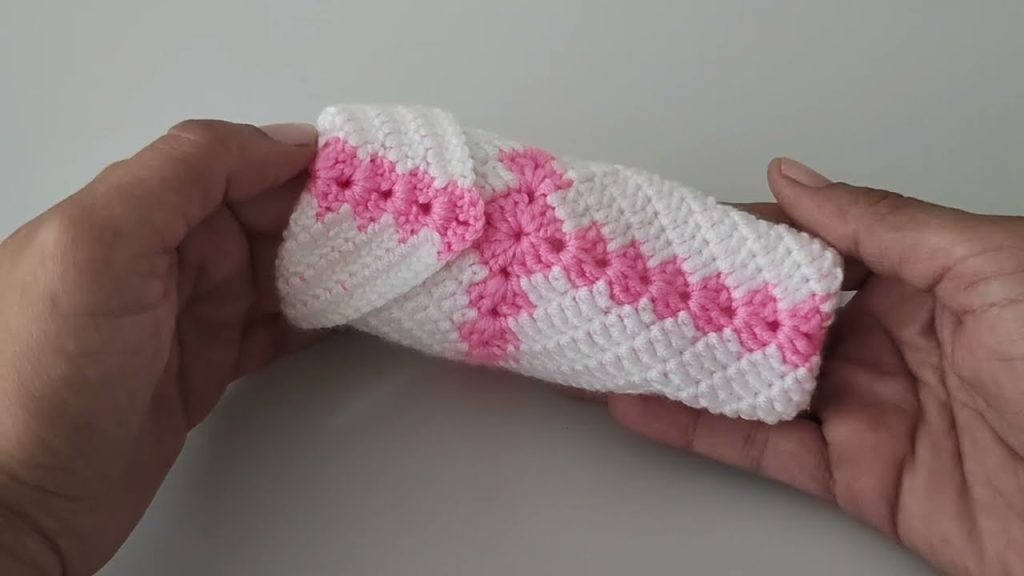
3. Fold and Seam the Squares
This is where the magic happens.
Assembly Method (Basic Origami Fold):
- Fold One Square into a “U” Shape: This creates the toe and sides of the bootie.
- Attach the Second Square:
- Fold and sew the second square to form the heel and ankle cuff.
- Join the edges where they align, leaving the ankle top open.
- Sew the Seams:
- Use a whip stitch or mattress stitch.
- Secure all ends and weave in neatly.
- Create the Sole (Optional):
- For extra structure, crochet a separate oval or rectangle and attach to the bottom.
- Or, line the sole with soft felt or fleece.
4. Customize the Cuff
Once your base bootie is assembled, consider finishing the ankle with:
- Single crochet rounds
- Shell or picot edging
- A ribbed cuff (front/back post stitches)
- Ribbon threaded through eyelets
Tips for Success
- Gauge Matters: Too loose, and the bootie won’t hold shape. Too tight, and it may be uncomfortable.
- Yarn Choices: Avoid yarns that are too slippery or overly fuzzy.
- Practice First: Make a prototype before gifting.
- Color Play: Alternate colors for a patchwork look, or use gradient yarn for a dreamy ombré.
Variations and Inspiration
- Animal Booties: Add ears and eyes to create bunny or bear booties.
- Holiday Themes: Use reds and greens for Christmas, or pastels for Easter.
- Granny Hexagons: Try hexagons or circles instead of squares for a new shape.
- Matching Sets: Crochet a matching hat or blanket using the same granny square motif.
Care and Gifting
- Care Instructions: Always provide washing instructions—baby-safe yarns should be machine washable.
- Presentation: Wrap in tissue paper or place in a handmade crochet pouch.
- Keepsake Label: Consider adding a small tag that says “Handmade with Love.”
Conclusion: A Fusion of Tradition and Tenderness
Creating baby booties from granny squares is a beautiful blend of old-school charm and modern creativity. These tiny treasures encapsulate the warmth of handmade crafts and the joy of welcoming new life. With just a few squares and some thoughtful folding, you can crochet not only a practical item but a lasting memory.
So next time you pick up your hook, don’t just make another square—make something magical. From scrap yarn to snug little soles, granny square baby booties are proof that the simplest beginnings can become the most cherished creations.
Video tutorial:


