
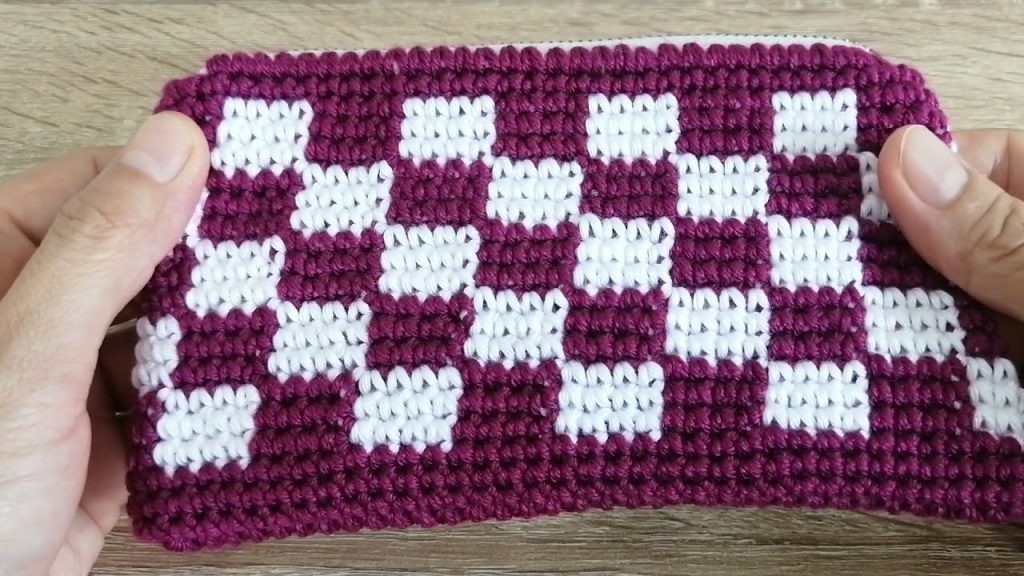
Crocheting your own purse is not only a creative outlet but also a fantastic way to make stylish and personalized accessories. If you’re looking for something both practical and beginner-friendly, then a super easy crochet purse bag with a zipper is the ideal project. It’s small, functional, and a great introduction to incorporating closures into crochet work—especially zippers, which can elevate a simple bag into a polished, professional-looking piece.
In this comprehensive guide, you’ll learn:
- Why this project is great for all skill levels
- The best materials and tools to use
- Step-by-step pattern instructions
- How to sew in a zipper (easily!)
- Styling tips and personalization ideas
🌟 Why Make a Super Easy Crochet Purse With Zipper?
Crocheting a small purse with a zipper closure provides the perfect blend of craft and function. Here’s why it’s worth making:
✅ Perfect for Beginners
You’ll use basic stitches like single crochet (sc) and work mostly in rectangles, making this project ideal for those new to crochet.
✅ Secure Closure
A zipper adds both aesthetic and functional value to the bag. It keeps your items safe and gives the purse a more structured look.
✅ Quick Project
Most small purses can be made in a few hours or a weekend. Instant gratification!
✅ Fully Customizable
You control the color, yarn, size, zipper style, and decorative elements. Make it minimalist, boho, bright, or neutral—it’s up to you.
🧶 Materials You’ll Need
Here’s what you need to complete a simple zipped crochet purse:
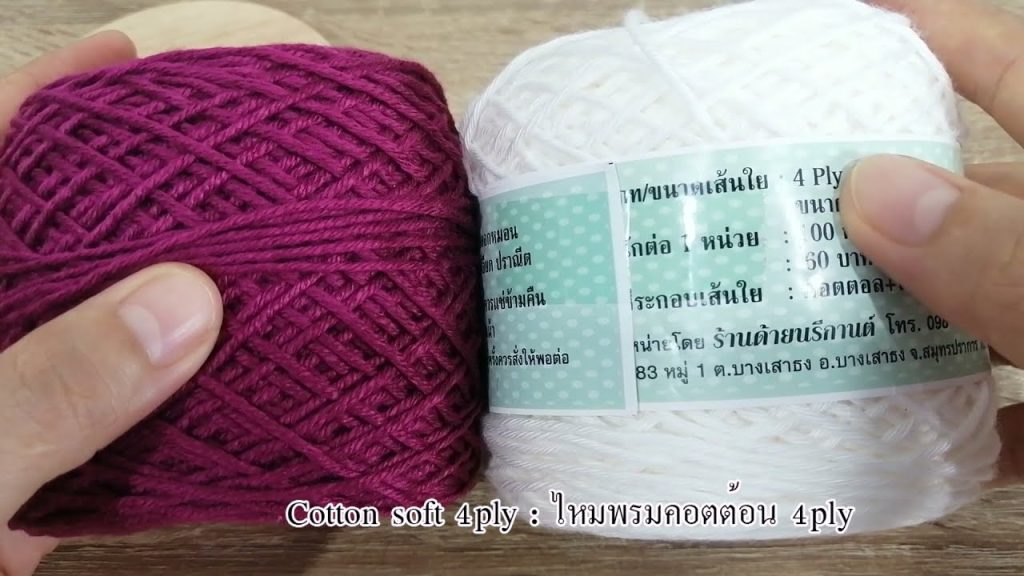
✂️ Yarn
- Weight: Worsted weight yarn (#4)
- Fiber: Cotton is preferred for durability and structure
- Amount: Around 50–100g (depending on size)
🧵 Hook
- Size: 4.0mm–5.0mm (US G–H), depending on your tension and yarn
🧵 Notions
- 1 zipper (6–8 inches, depending on your purse width)
- Yarn needle or tapestry needle
- Scissors
- Stitch markers (optional)
- Sewing needle & thread (to match zipper or yarn)
- Lining fabric (optional but recommended)
📐 Finished Size (Customizable)
For the example pattern in this article:
- Width: 8 inches (20 cm)
- Height: 5 inches (13 cm)
- Depth: Flat (no gusset, but easy to add)
📜 Super Easy Crochet Purse With Zipper – Pattern Instructions
🧵 Basic Stitches Used
- Ch = Chain
- Sc = Single Crochet
- Sl st = Slip Stitch
🪡 Step 1: Make the Body of the Purse
Foundation:
- Ch 33 (or adjust based on desired width + 1 extra for turning)
- Row 1: Sc in 2nd ch from hook and in each across. (32 sts)
- Row 2–36: Ch 1, turn. Sc in each st across.
Note: You can add more rows to make the purse taller. Just ensure your total rows are even.
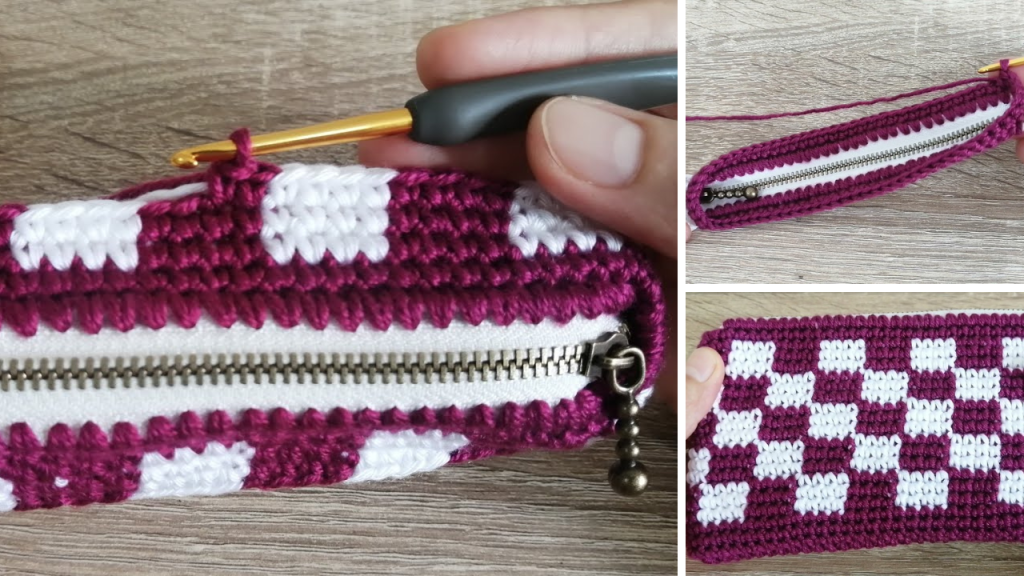
🪡 Step 2: Fold and Seam the Sides
- Fold the rectangle in half widthwise (like a book), creating a front and back.
- Seam the sides using slip stitch or whip stitch with the yarn needle.
- Leave the top edge open for zipper insertion.
🧵 Step 3: Add a Lining (Optional but Recommended)
- Cut a piece of fabric slightly smaller than your crochet piece.
- Hem the edges with an iron or by hand stitching.
- Sew the lining to the inside of the purse body using sewing thread and a needle. This prevents stretching and protects the contents of your bag.
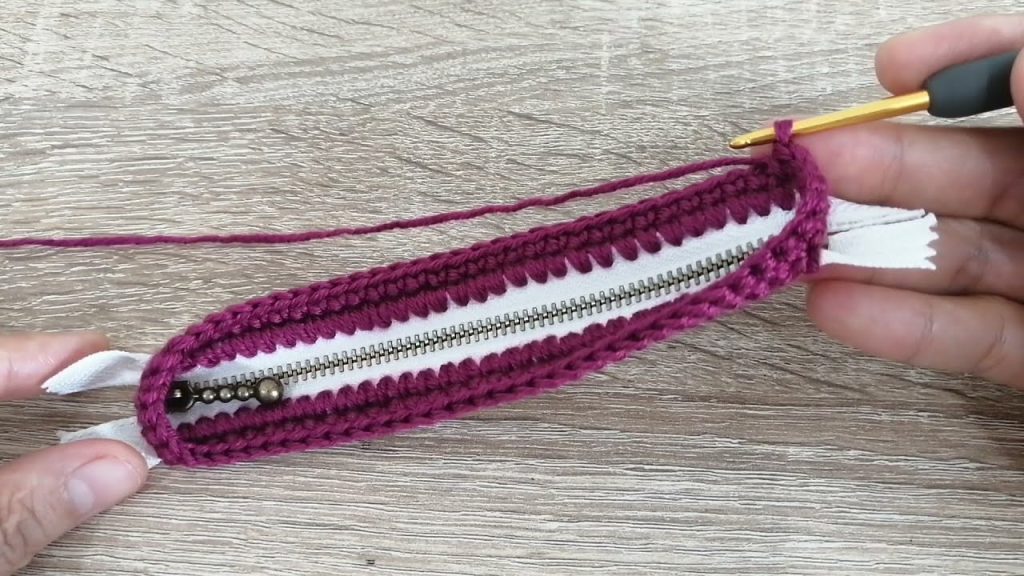
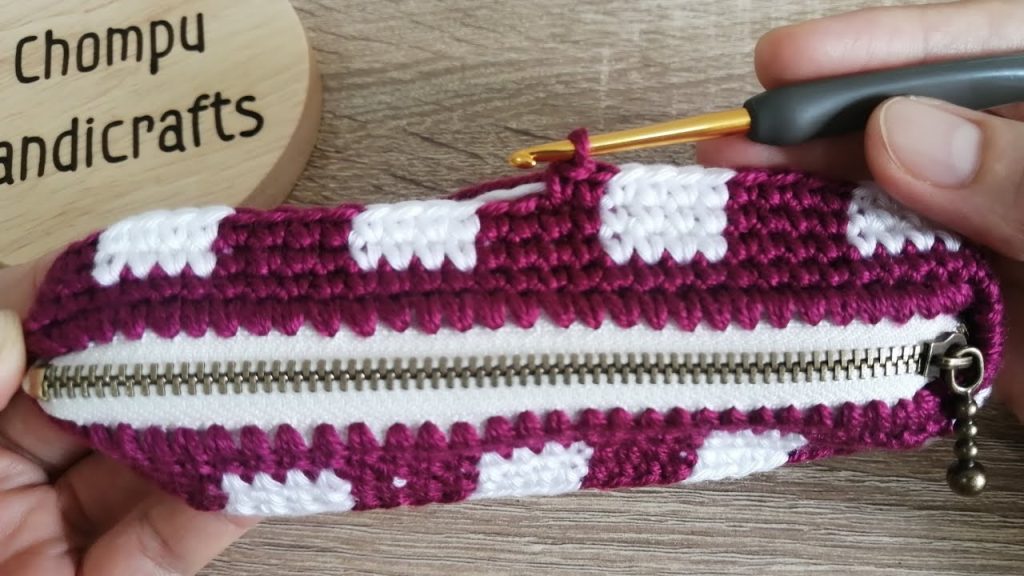
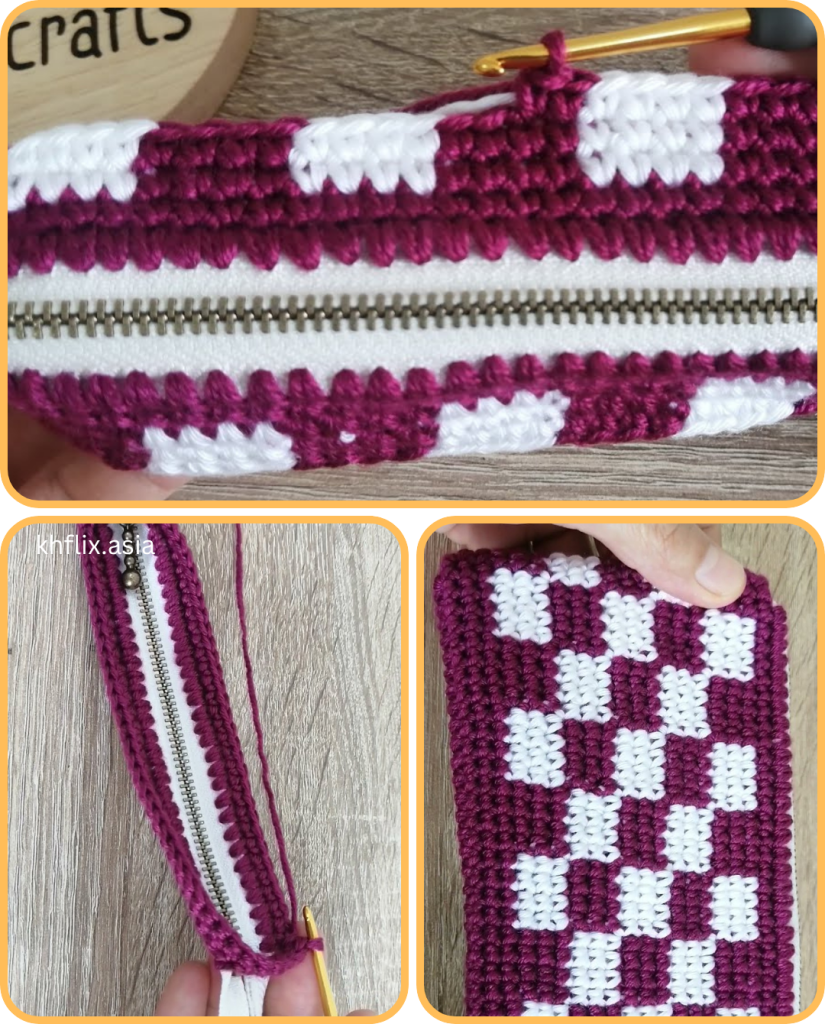
🪡 Step 4: Install the Zipper (The Easy Way)
Option A: Hand-Sewing the Zipper
- Pin or clip the zipper to the top edges of the bag, making sure it aligns evenly.
- Thread a sewing needle with matching thread.
- Use small, neat stitches to sew the zipper onto the bag, catching both the fabric lining and the top edge of the crochet piece.
Option B: Machine Sewing
- If your crochet stitches are tight and even, you can machine-sew the zipper.
- Use a zipper foot and go slowly to avoid breaking your needle on thicker yarns.
🧶 Optional Add-Ons
📎 Strap or Handle
- Ch 80–100 and sc back across to make a wristlet strap or short handle.
- Sew it securely to one corner of the purse.
🎀 Decorations
- Add tassels, pompoms, wooden buttons, or patches.
- Embroider your initials or a flower pattern.
🧵 Gusset (to add depth)
- Instead of a flat seam, crochet a 1″ strip and sew it around the bag’s sides and bottom to create depth.
💬 Troubleshooting and Tips
❓ My stitches are too loose—what do I do?
Try a smaller hook size to tighten up the fabric. A dense fabric gives better structure for bags.
❓ My zipper doesn’t align—help!
Pin or clip both sides before sewing. You can also use fabric glue to lightly tack it in place before stitching.
❓ Can I make a larger purse this way?
Yes! Just increase the starting chain and the number of rows. You can also add a gusset for more space inside.
🖌️ Design Ideas and Inspiration
- Color Block Purse: Work the bottom half in one color and the top half in another.
- Striped Pattern: Change colors every 2 or 3 rows.
- Granny Square Zipper Pouch: Make two identical granny squares and sew them together.
- Boho Style: Use natural yarn colors and add fringe or shells.
- Elegant Look: Use black or navy yarn with gold or silver zippers and a sleek lining.
🎁 Use Cases and Gift Ideas
A crochet purse bag with a zipper is a thoughtful, handmade item that’s perfect for:
- Holding makeup or toiletries
- Storing crochet hooks or craft tools
- Keeping cards, money, or keys in your larger bag
- Gift sets (pair with handmade coasters or dishcloths)
- Craft fair items or Etsy listings
🧶 Conclusion: Handmade, Functional, and Beautiful
Creating a super easy crochet purse with a zipper is the perfect way to blend creativity with utility. With just a bit of yarn, a zipper, and some basic crochet knowledge, you can craft a professional-looking accessory that you’ll actually use. Whether it’s your first bag or your fiftieth, this project offers something valuable: a sense of accomplishment, a useful item, and a stylish statement.
And remember, each time you make one, you can tweak the size, color, stitch, or zipper to create something completely unique.
Video tutorial:


