Among all the motifs in the world of crochet, the rose flower stands as one of the most beloved and timeless. From elegant brooches and hair clips to bouquet embellishments and home décor, crocheted roses offer a romantic, delicate touch. With just a bit of yarn and creativity, you can craft eye-catching rose flowers that look as beautiful as real blooms — and last forever.
In this guide, we’ll walk you through how to crochet a classic rose flower, step by step, and how to make it truly stand out with color, layering, and styling.
🧶 Why Crochet a Rose?
Crochet roses are:
- Versatile – perfect for accessories, decor, and gifts
- Customizable – change yarn type, size, or color for different effects
- Beginner-friendly – easy patterns with high visual impact
- Reusably decorative – they don’t wilt and can be used in many ways
✂️ Materials You’ll Need
| Item | Details |
|---|---|
| Yarn | Cotton or acrylic, light or worsted weight (red, pink, or custom colors) |
| Hook | 3.0 mm – 4.5 mm (match yarn size) |
| Tapestry Needle | To weave in ends |
| Scissors | For trimming yarn |
| Optional | Green yarn (for leaves), hot glue (for attachments), brooch pin or hair clip base |
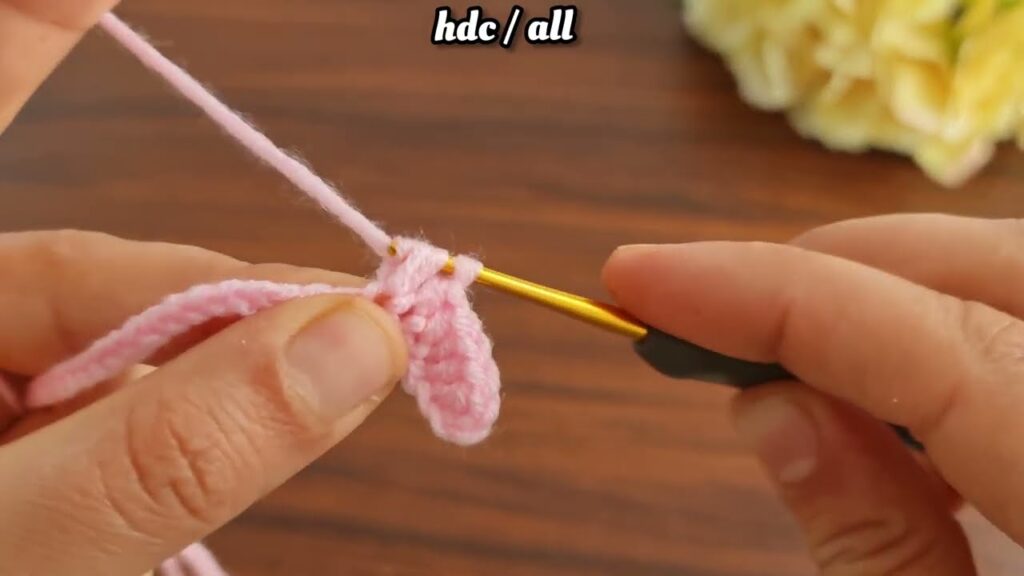
🧵 Basic Crochet Stitches Used (US Terms)
| Stitch | Abbreviation | Description |
|---|---|---|
| Chain | ch | Foundation and petal shaping |
| Single Crochet | sc | Dense, short stitch |
| Half Double Crochet | hdc | Medium height stitch |
| Double Crochet | dc | Tall stitch for soft petals |
| Slip Stitch | sl st | Joining rounds or finishing |
| Turn | — | Flip work to continue rows |
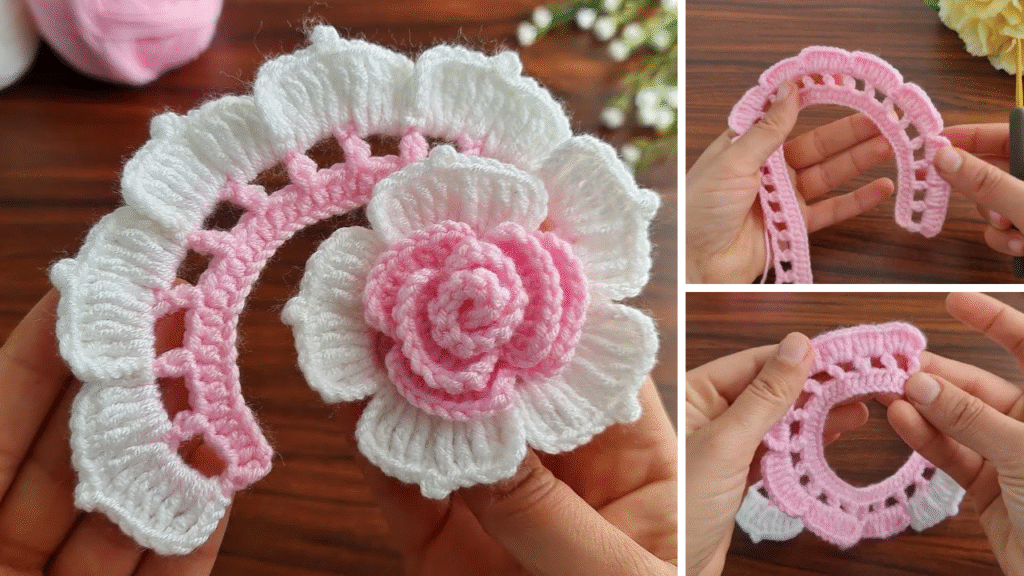
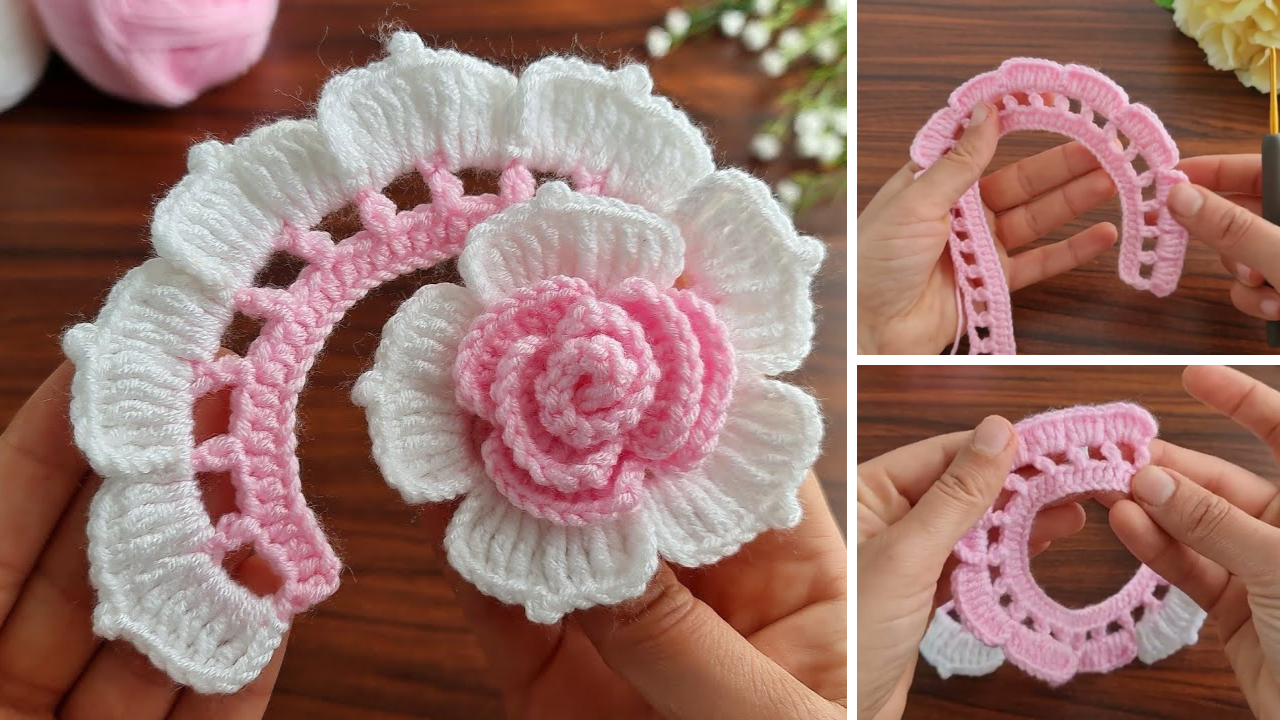
🌹 How to Crochet a Rose Flower – Step-by-Step
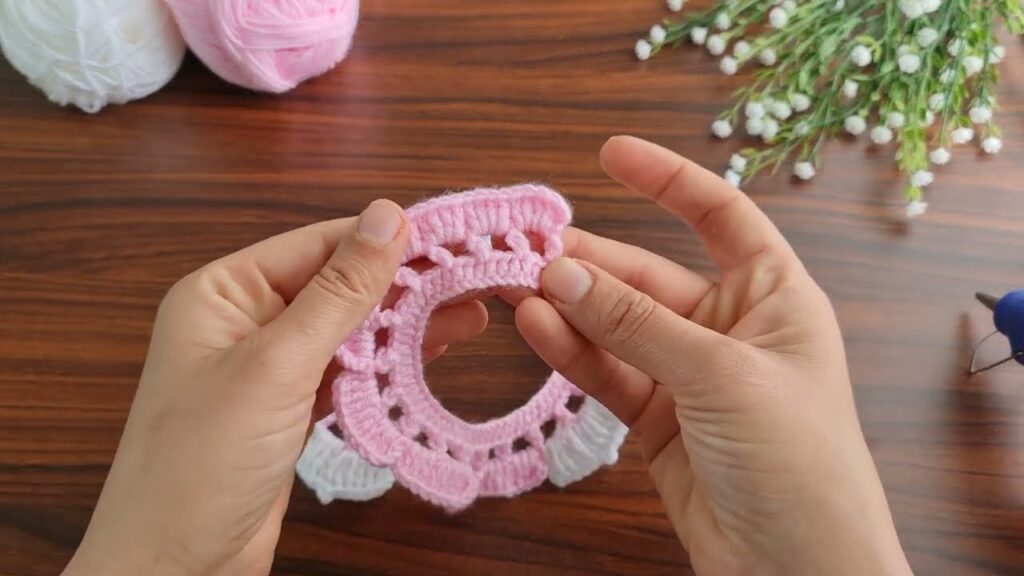
✅ Step 1: Create the Petal Strip
We’ll start by making a long strip with built-in petals, which will be rolled into a rose.
Foundation Chain:
- Chain 52 (for a small rose). Use more (72, 92, etc.) for a fuller rose.
Row 1:
- Starting in the 2nd chain from hook, sc in each ch across. (51 sc)
- Turn.
Row 2 (Petal Shaping):
- In first stitch: ch 1, (sc, hdc, 3 dc, hdc, sc) — one petal made.
- Skip next stitch, repeat the petal pattern in the next stitch.
- Continue: skip 1, make petal in next, until end of row.
- You will have about 25 petals (for 52 ch base).
✅ Step 2: Form the Rose
Now that your strip has scalloped petals:
- Start rolling tightly from one end (this forms the rosebud center).
- As you roll, let the petals spiral naturally.
- Stitch or glue the base together as you go (use tapestry needle and yarn tail).
- Secure the end with a few stitches to hold the shape.

✅ Step 3: Add Leaves (Optional but Eye-Catching!)
Basic Leaf Pattern:
- With green yarn, ch 8.
- In 2nd ch from hook: sc, hdc, dc, dc, hdc, sc, sl st.
- Work into opposite side of chain: sl st, sc, hdc, dc, dc, hdc, sc.
- Fasten off and attach behind rose.
Make 2–3 leaves for balance. Stitch them to the rose or glue for a cleaner look.
🎨 Ways to Make It Eye-Catching
| Technique | Result |
|---|---|
| Ombre yarn | Creates a rose with natural color gradient |
| Layered rose | Crochet 2 rose strips and roll them together for fullness |
| Metallic or glitter yarn | Adds shimmer for festive decor |
| Pearl/bead in center | Makes a classy, eye-catching focal point |
| Scented yarn spray | Add floral scent for realism in gifts |
| Large hook with chunky yarn | Make oversized statement roses |
🎀 How to Use Crochet Rose Flowers
| Use | Ideas |
|---|---|
| Accessories | Hair clips, headbands, brooches, pins |
| Home Décor | Garland, bouquet, curtain tiebacks, cushions |
| Fashion | Sew onto shawls, bags, collars, or hats |
| Gifts | Decorate gift wrap or make a bouquet |
| Special Occasions | Weddings, anniversaries, baby showers |
🧼 Care Tips
- Hand wash gently in cool water
- Air dry flat
- Avoid pulling petals or twisting
🌟 Conclusion
The crochet rose flower is a charming project that blends simplicity with elegance. Whether you’re making a romantic gift, decorating your home, or enhancing an outfit, a crocheted rose never fails to catch the eye and the heart. With just a bit of yarn and time, you can create blossoms that last forever — and make everything they touch more beautiful.
So, grab your favorite yarn, pick a color that inspires you, and let your creativity bloom!
Video tutorial:


