
Crocheted coasters — known as “supla” in Turkish and some South Asian cultures — are beautiful, functional accessories that add charm to any table setting. Whether you’re sipping morning chai, serving guests Turkish coffee, or styling a boho brunch, a handmade supla adds warmth and style to the occasion.
This article walks you through how to crochet a round supla coaster with a lacy border, ideal for mugs, glasses, or small bowls.
✨ Why Crochet a Coaster?
Crocheted coasters are:
- Quick to make – great for gifts or last-minute decor
- Customizable – choose your color, size, and style
- Eco-friendly – reusable and washable
- Beginner-friendly – ideal project to learn circular crochet
🧵 Supplies You’ll Need
| Item | Details |
|---|---|
| Yarn | Cotton yarn (worsted or DK weight works best) |
| Hook | 3.5 mm to 4.5 mm (adjust to yarn size) |
| Scissors | For trimming yarn ends |
| Tapestry Needle | To weave in ends |
| Stitch Markers (optional) | Helps track rounds if you’re new to circular crochet |
☕ Supla Crochet Coaster Pattern
💡 Finished Size: 4 to 6 inches in diameter (adjustable)
🔁 Stitches & Abbreviations (US Terms)
| Abbreviation | Meaning |
|---|---|
| ch | chain |
| sl st | slip stitch |
| sc | single crochet |
| dc | double crochet |
| tr | treble crochet |
| st | stitch |
| sp | space |
🌼 Step-by-Step Instructions
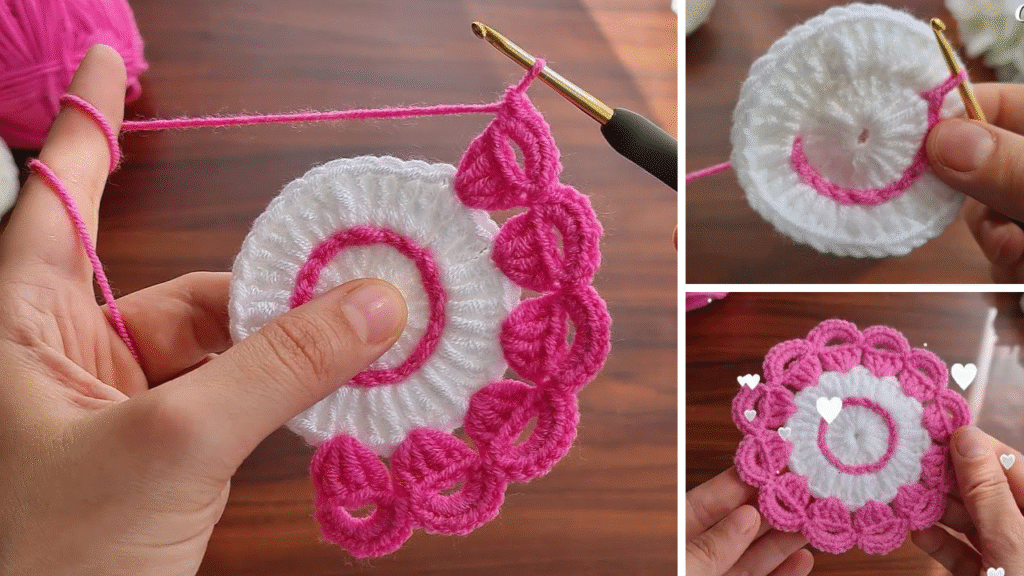
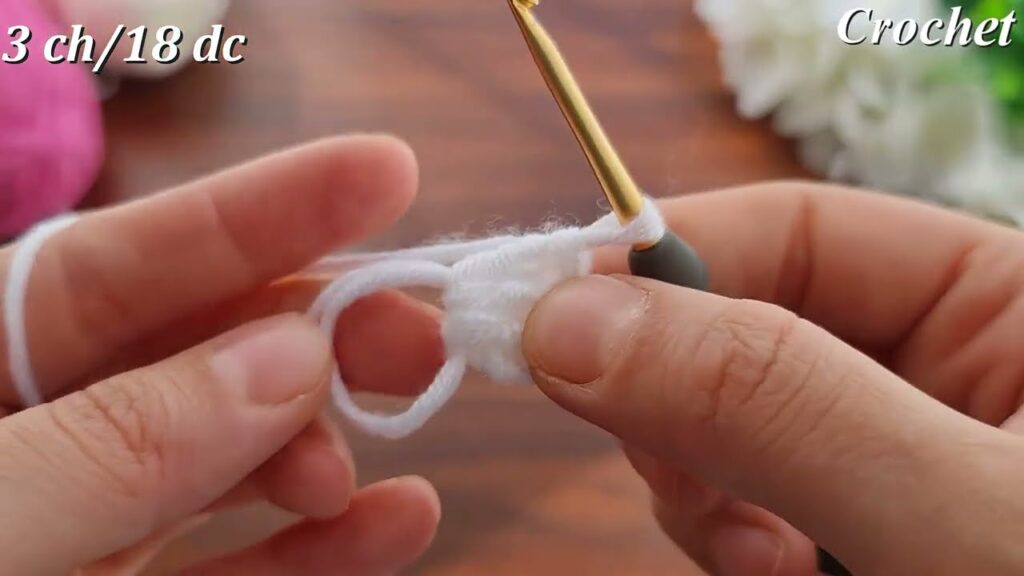
🔸 Round 1 – Magic Ring & Center
- Create a magic ring.
- Ch 3 (counts as first dc), then work 11 dc into the ring.
- Tighten the ring and sl st into the top of ch-3. (12 dc total)
🔹 Alternative: If you’re not familiar with the magic ring, ch 4 and join into a loop.
🔸 Round 2 – Increase Round
- Ch 3, dc in same st (2 dc in each stitch around).
- Repeat (2 dc in each st) around. (24 dc)
- Sl st to join.
🔸 Round 3 – More Increases
- Ch 3, dc in same st, dc in next st.
- Repeat (2 dc, 1 dc) around.
- Sl st to join. (36 dc)
🔸 Round 4 – Create Texture or Pattern
- Ch 3, dc in next 2 st, 2 dc in next st.
- Repeat (1 dc in next 3 st, 2 dc in next) around.
- Sl st to join. (48 dc)
💡 Optional Variation: For added texture, alternate rows using front post double crochet (fpdc) or back post double crochet (bpdc).
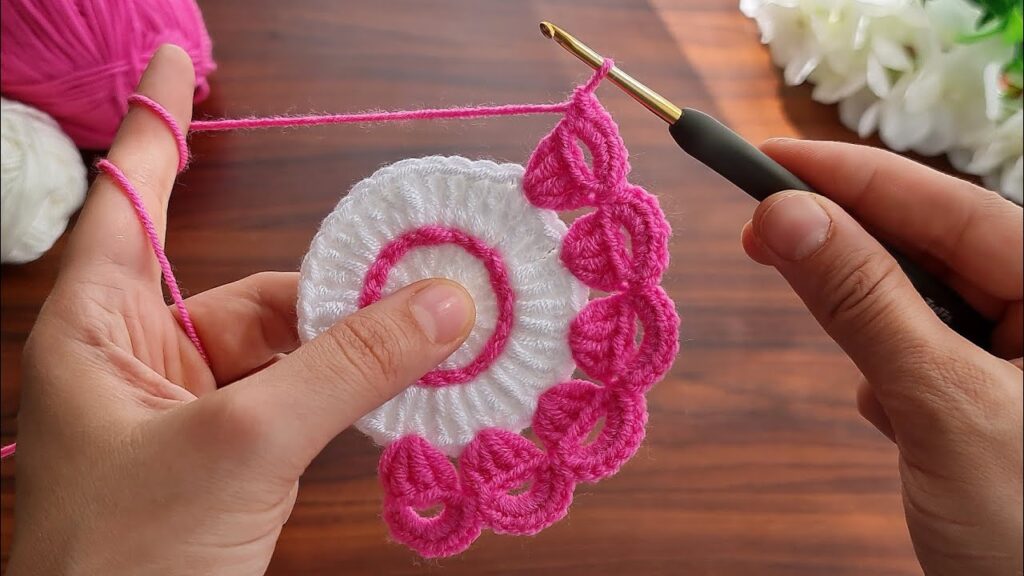
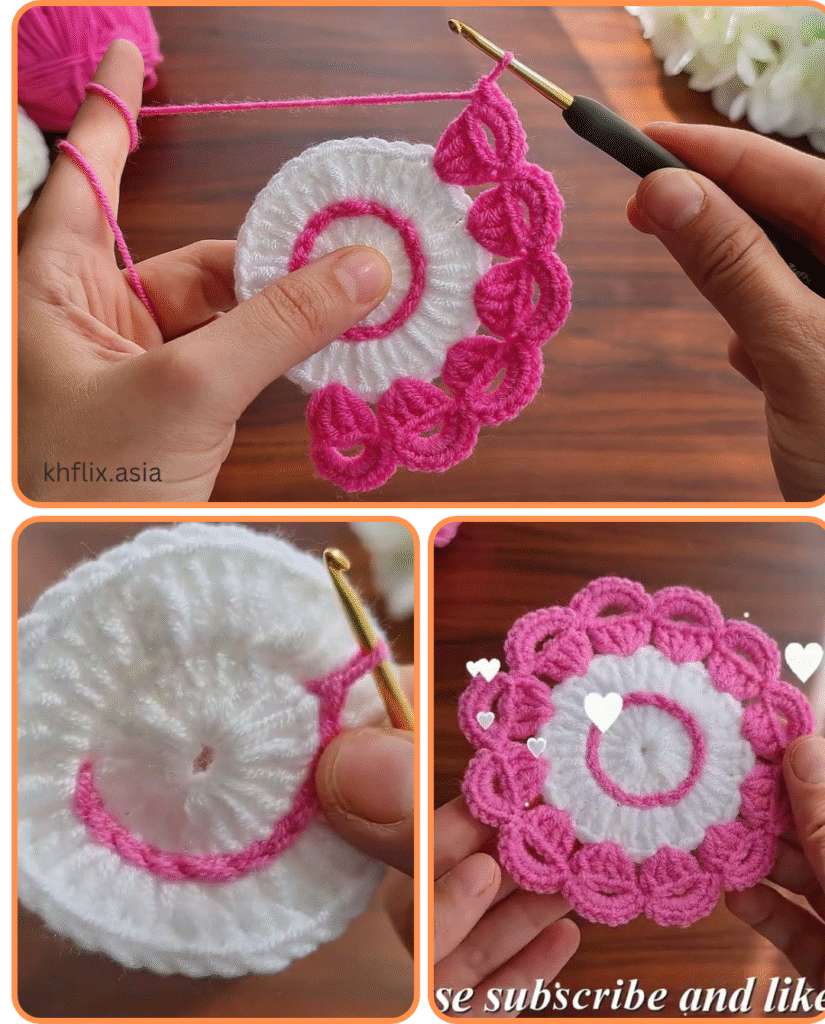
🔸 Round 5 – Lacy Border
- Ch 1, sc in same st.
- Ch 3, skip 2 st, sc in next.
- Repeat around.
- Sl st into first sc.

🔸 Round 6 – Shell or Picot Finish (Optional)
- In each ch-3 loop from the previous round:
- Work (sc, hdc, 3 dc, hdc, sc) for a shell edge.
- Or use (sc, ch 3, sl st in same st) for a picot edge.
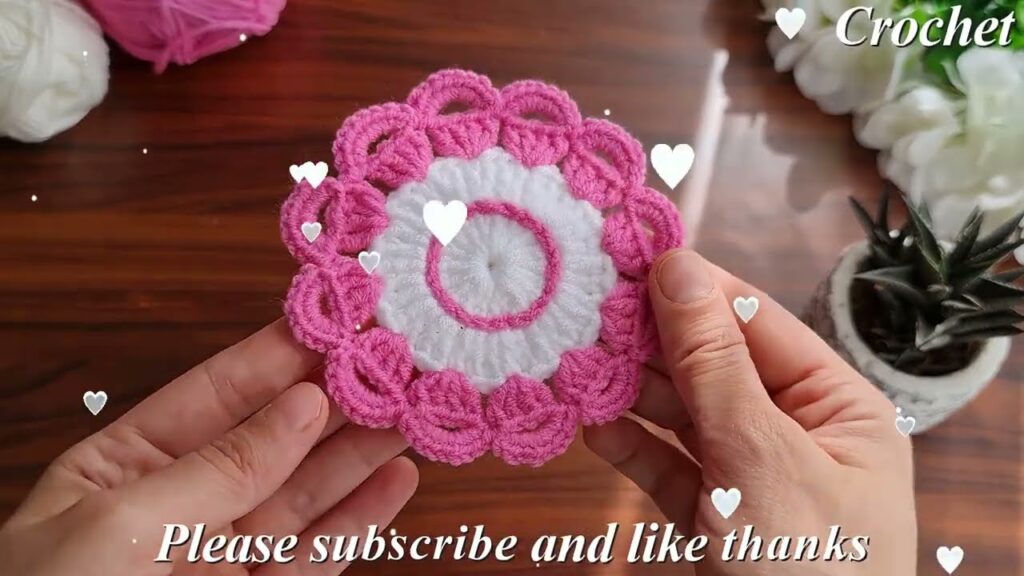
🪄 Final Step – Weaving and Blocking
- Fasten off and weave in loose ends with a tapestry needle.
- Block your coaster if needed (lightly wet it, pin it flat, and let it dry).
🎨 Customization Ideas
| Theme | Ideas |
|---|---|
| Boho | Use jute or hemp yarn and neutral tones |
| Festive | Add metallic yarn or beads to the edge |
| Minimalist | Stick to solid colors with tight stitching |
| Vintage | Use pastel colors with lacy shell borders |
| Kids’ Room | Use bright colors and yarn appliqués like smileys or animals |
🧼 How to Care for Crochet Coasters
- Hand wash or machine wash on gentle cycle with cold water
- Lay flat to dry (do not wring)
- Store flat to maintain shape
🧡 Perfect For:
- Home decor
- Wedding or party favors
- Handmade gift sets
- Ramadan or holiday table settings
- Tea parties or coffee corners
🧵 Conclusion
Crocheting a coaster supla is a simple yet satisfying way to bring beauty and function into your home. Whether you’re making a single piece for your coffee table or creating a coordinated set for a special occasion, this small project allows you to practice your crochet skills while producing something elegant and practical. With endless options for colors, textures, and borders, each coaster becomes a unique expression of your creativity.
Once you master this basic pattern, you can easily scale it up to make placemats, doilies, or even table runners — turning your handmade crafts into cherished parts of your daily life or thoughtful gifts for loved ones.
So pick up your hook, choose your favorite yarn, and start stitching your way to a cozy, handmade touch that will brighten any table!
Video tutorial:


